
Christmas cookie decorating is the absolute best way to bring festive magic into your kitchen without stressing over complicated baking techniques. When I first started baking for the holiday season years ago, I used to think gorgeous festive treats required professional decorating kits, hours of intricate piping, and endless patience.That all changed one December afternoon while baking with my family. I realized that with the right royal icing consistency, simple tools, and a few smart techniques, anyone can create stunning, bakery-worthy holiday treats at home. The secret isn’t fancy equipment—it’s understanding how your ingredients work together to give you smooth fills, crisp lines, and vibrant colors that hold up on your cookie platter.Whether you are preparing for a holiday cookie swap, baking with kids, or hosting a festive party, this complete guide covers everything you need to master Christmas cookie decorating effortlessly.

My Secret Family Tradition Behind Festive Baking
For as long as I can remember, December in my kitchen has meant flour on the countertops, holiday music playing in the background, and trays of freshly baked sugar cookies cooling on every surface. My grandmother taught me that the key to great Christmas cookie decorating isn’t perfection—it’s flavor and fun.Over the years, I’ve tweaked her classic sugar cookie base to ensure it holds its shape perfectly in the oven while staying soft in the middle. Combining that nostalgic butter flavor with modern icing techniques has become my signature holiday move. Every time I mix up a batch of brightly colored royal icing, I am immediately brought back to those warm, cozy afternoons in my family kitchen.
Why You Will Love Decorating Christmas Cookies
- Festive Fun: Create unforgettable memories with family and friends during the holiday season.
- Make-Ahead Friendly: Decorated cookies store exceptionally well and can be made days in advance.
- Endless Creativity: Customize your colors, patterns, and themes for any holiday party.
- Great for Gifting: Packed in tin boxes or clear bags, decorated cookies make thoughtful homemade gifts.
Ingredients List and Exact Measurements
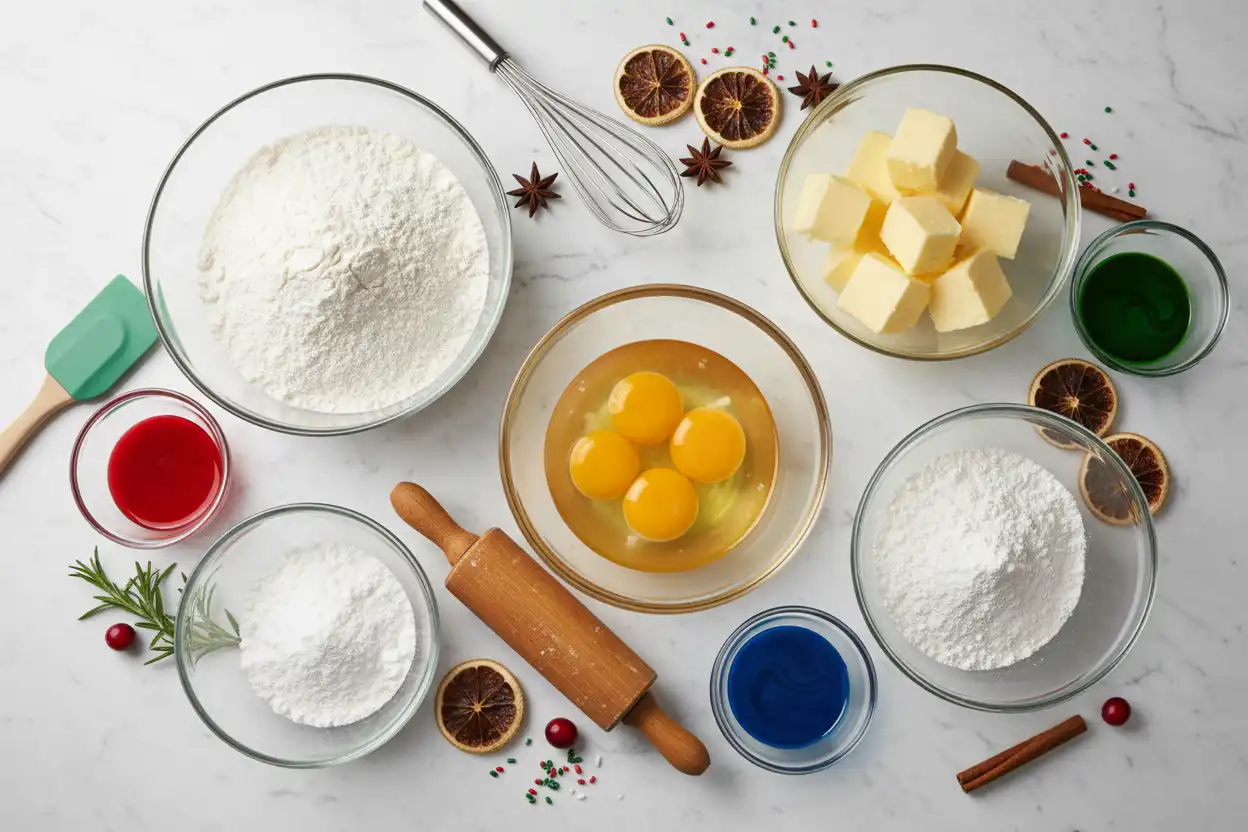
To achieve perfect results every time, measuring your ingredients by weight with a digital scale is essential. Here is the complete breakdown for both the cookie dough and the royal icing:
DOUGH INGREDIENTS:
- 225 grams Unsalted Butter (softened at room temperature)
- 200 grams Granulated White Sugar
- 1 Large Egg (approximately 50 grams, room temperature)
- 5 milliliters Pure Vanilla Extract (or 1 teaspoon)
- 360 grams All-Purpose Flour
- 6 grams Baking Powder (or 1.5 teaspoons)
- 3 grams Salt (or 0.5 teaspoon)
ROYAL ICING INGREDIENTS:
- 500 grams Powdered Sugar (sifted)
- 30 grams Meringue Powder (or 4 tablespoons)
- 75 milliliters Warm Water (plus more for thinning consistency)
- 5 milliliters Vanilla Extract (use clear extract for pure white icing)
Ingredients Breakdown Table
| Ingredient | Exact Weight (Grams) | Standard Volume | Purpose in Recipe |
| Unsalted Butter | 225g | 1 cup (2 sticks) | Provides rich flavor and tender texture |
| Granulated Sugar | 200g | 1 cup | Adds sweet structure and aids in creaming |
| Large Egg | 50g | 1 Whole Egg | Binds dough structure together |
| Vanilla Extract | 5g / 5ml | 1 Teaspoon | Enhances warm holiday flavors |
| All-Purpose Flour | 360g | 3 Cups | Creates core cookie shape and stability |
| Baking Powder | 6g | 1.5 Teaspoons | Offers subtle rise without loss of shape |
| Fine Salt | 3g | 0.5 Teaspoon | Balances sweetness |
| Powdered Sugar | 500g | 4 Cups | Basic forms for smooth royal icing |
| Meringue Powder | 30g | 4 Tablespoons | Sets icing firm and shiny |
Essential Kitchen Tools You Will Need
- Digital Kitchen Scale: Ensures accurate ingredient ratios for perfect dough texture.
- Electric Hand Mixer or Stand Mixer: Essential for beating butter and whipping royal icing.
- Baking Sheets: Heavy-duty aluminum pans yield even browning.
- Parchment Paper: Prevents sticking and makes cleanup fast.
- Piping Bags and Couplers: Gives you control when outlining and flooding cookies.
- Scribe Tool or Toothpick: Used to pop air bubbles and smooth icing edges.
- Gel Food Coloring: Delivers rich holiday colors without thinning your icing consistency.
Step-by-Step Guide to Baking and Decorating Christmas Cookies
Step 1: Cream the Dough Base
In a large mixing bowl, beat 225 grams of softened butter and 200 grams of granulated sugar for 3 minutes on medium speed until light and fluffy.
Step 2: Add Wet Ingredients
Add the egg and 5 milliliters of vanilla extract to the butter mixture. Beat on low speed until combined, scraping down the sides of the bowl with a rubber spatula.
Step 3: Mix Dry Ingredients
Whisk together 360 grams of flour, 6 grams of baking powder, and 3 grams of salt. Gradually mix into the wet ingredients on low speed until a smooth dough forms.
Step 4: Chill and Cut Out Shapes
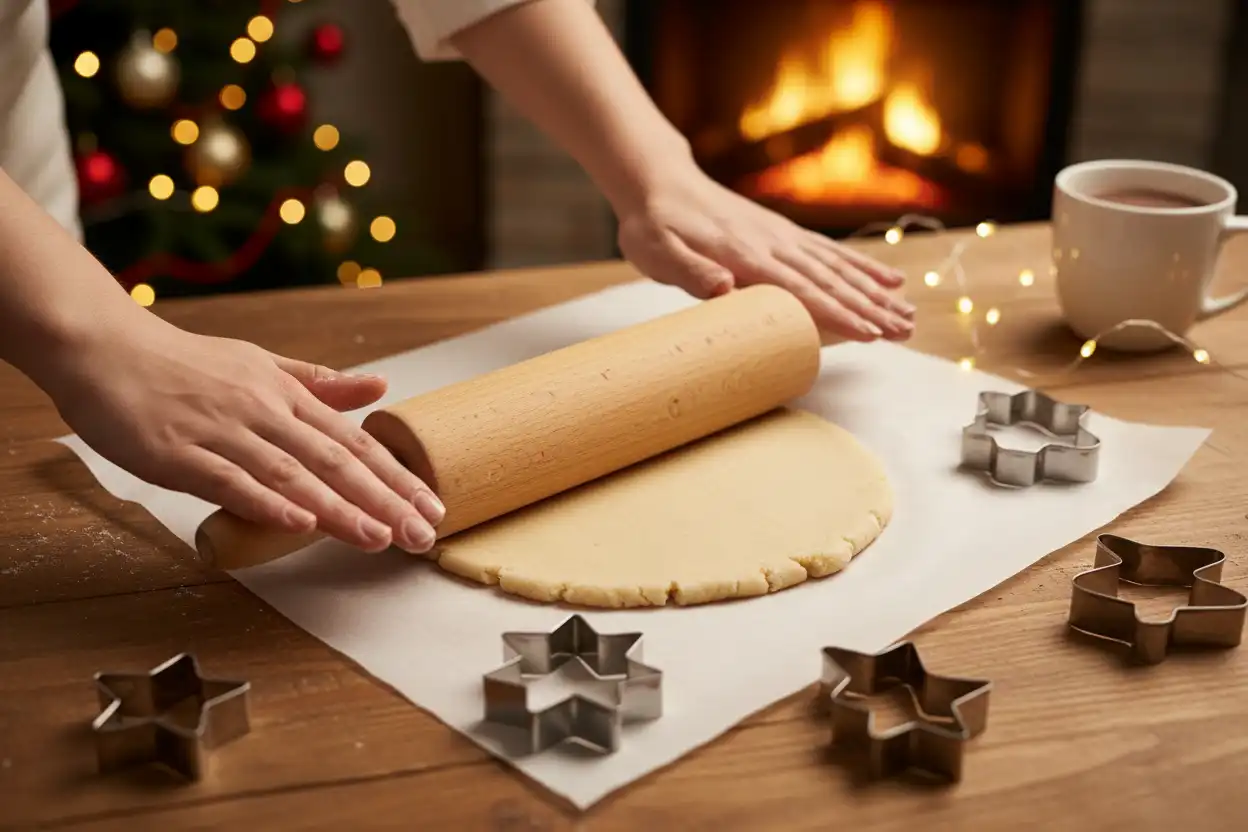
Divide dough into two disks, wrap in plastic, and chill for 45 minutes. Roll dough to 6mm (1/4 inch) thickness on a floured surface. Cut into holiday shapes using cookie cutters.
Step 5: Bake to Perfection
Place cookies on parchment-lined trays. Bake in a preheated oven at 175°C (350°F) for 8 to 10 minutes until edges are set. Cool completely before decorating.
Step 6: Prepare Royal Icing
Whip 500 grams of powdered sugar, 30 grams of meringue powder, vanilla, and 75 milliliters of water for 5 minutes until stiff peaks form. Divide into bowls and add gel food coloring.
Step 7: Outline and Flood
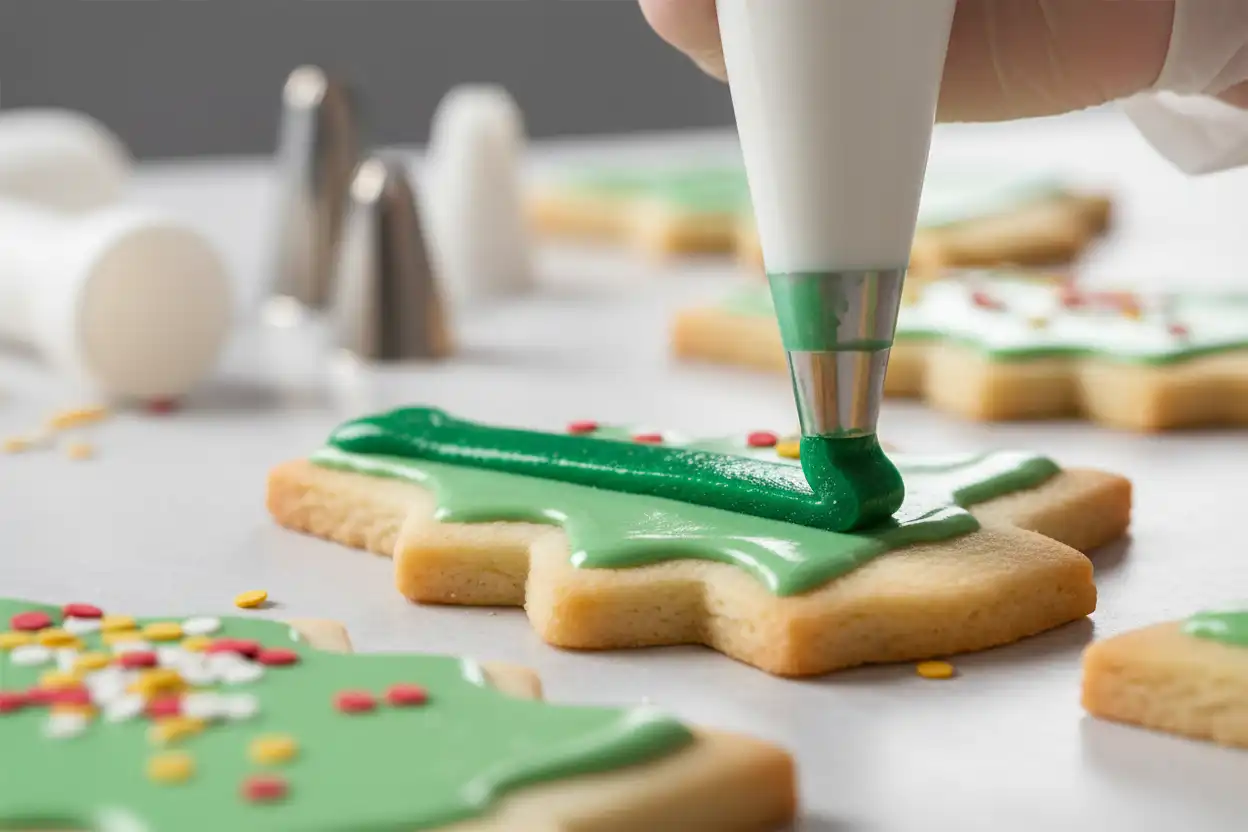
Transfer icing into piping bags. Pipe an outline around the cookie edge with medium-consistency icing, then fill (flood) the center with slightly thinner icing. Use a scribe tool to remove bubbles.
Understanding Royal Icing Consistencies
Mastering Christmas cookie decorating comes down to controlling your icing consistency with small drops of water.
| Consistency | Water Content | Purpose | Visual Test |
| Stiff Consistency | Minimal Water | Piping details, stars, and lettering | Holds sharp peaks like shaving cream |
| Piping Consistency | Medium Water | Outlining edges and fine linework | Soft peaks that drop gently |
| Flood Consistency | Higher Water | Filling large areas smooth | Settles completely flat in 15 seconds |
Stiff Icing
Stiff icing holds its shape completely. It is ideal for adding 3D details like pine needles on Christmas trees, sweater textures, or crisp text onto finished cookies.
Piping Icing
Piping icing is slightly softer. It flows smoothly through a fine piping tip to create clean borders that prevent thinner flood icing from running over the cookie edges.
Flood Icing
Flood icing is runny enough to self-level within seconds, leaving you with a glossy, glass-like finish across your entire cookie surface.
Creative Decorating Techniques for Beginners
You don’t need years of practice to make striking holiday patterns. Try these foolproof methods:
1. The Wet-on-Wet Technique
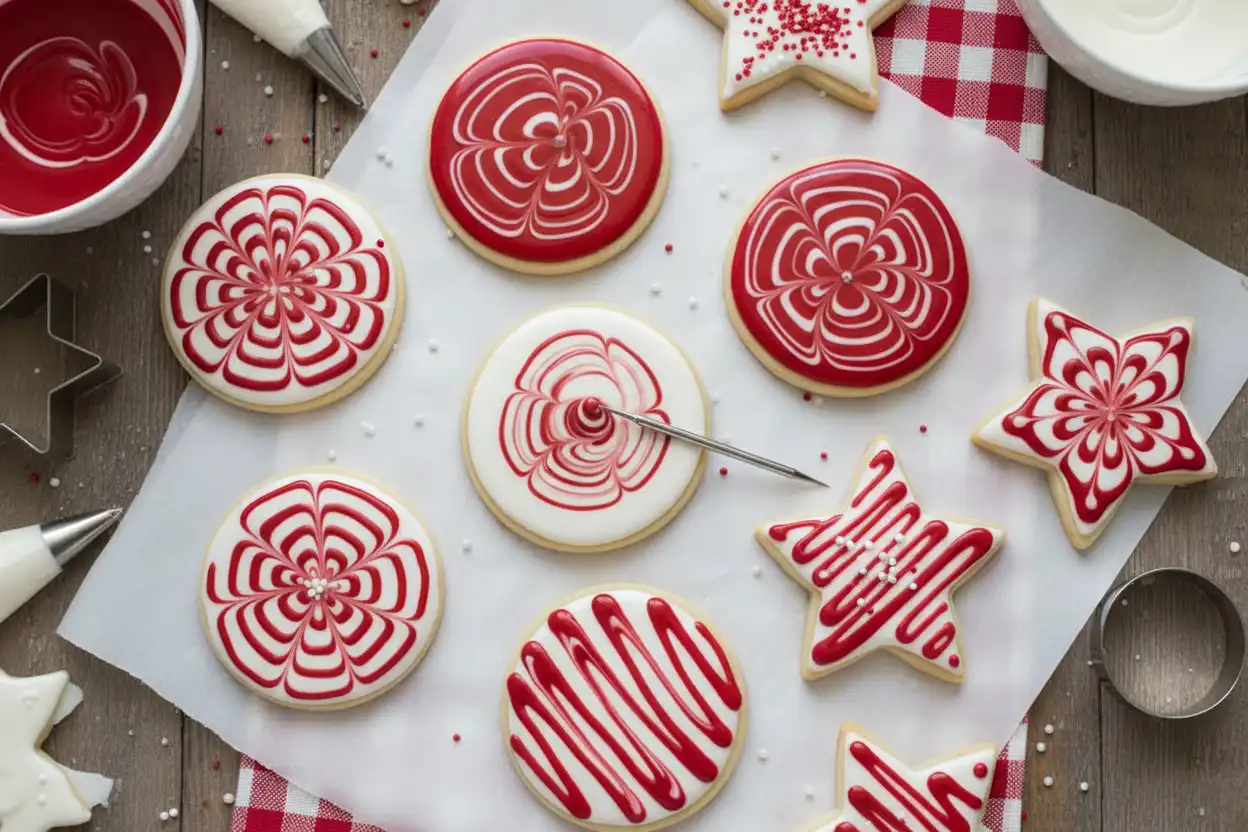
Flood your cookie with a base color (like white). While the base icing is still completely wet, pipe dots or lines of another color (like red or green) on top. Use a toothpick to drag through the wet icing, creating beautiful hearts, marbling, or festive holly patterns that settle perfectly flat.
2. Sparkling Sanding Sugar Accent
After outlining and flooding your cookie with royal icing, immediately sprinkle coarse sanding sugar or edible glitter over the wet areas. Shake off the excess once dry for a sparkling frost effect.
3. Stenciling on Dry Icing
Allow your base flood icing to dry completely for at least 8 hours. Place a food-grade stencil over the cookie, spread a thin layer of stiff contrasting icing over it, and lift gently to leave sharp, professional designs.
Troubleshooting Common Decorating Mistakes
Here is how to solve everyday royal icing and cookie problems:
Problem 1: Cookies spread and lose their shape
- Cause: Dough was too warm before baking, or too much leaving agent was used.
- Fix: Always chill your cut-out dough shapes in the fridge for 15 minutes right before baking.
then,Problem 2: Air bubbles in the dried icing
- Causes: Fast whipping traps air inside royal icing.
- Fix: Let your mixed icing sit covered on the counter for 10 minutes, then stir gently with a spatula to release trapped air before filling piping bags.
Problem 3: Icing color bleeds into neighboring sections
- Cause: The base layer did not dry enough before adding details, or icing was too wet.
- Fix: Allow each color section to dry for at least 30 minutes before piping another color right next to or on top of it.
Dietary Alternatives and Substitutions
Keep your holiday cookie platter inclusive for guests with special dietary needs:
- Gluten-Free Swap: Substitute the 360g all-purpose flour with a 1-to-1 gluten-free baking flour blend containing xanthan gum.
- Dairy-Free Swap: Replace butter with firm block vegan butter sticks. Keep it chilled while mixing.
- Vegan Icing Option: Replace meringue powder with aquafaba (whipped chickpea liquid) to create a plant-based royal icing that hardens beautifully.
Storing and Preserving Freshness
Decorated cookies take time to make, so preserving them correctly is crucial for holiday planning:
- Drying Time: Allow decorated cookies to dry flat at room temperature for 8 to 12 hours so the royal icing cures completely hard.
- Room Temperature Storage: Store cured cookies in an airtight container layered with parchment paper for up to 2 weeks.
- Freezing Finished Cookies: Stack fully dried cookies in an airtight container and freeze for up to 3 months. Thaw at room temperature inside the closed container to prevent condensation from smudging the icing.
Frequently Asked Questions
Can I decorate cookies without meringue powder?
Yes! You can use traditional powdered sugar mixed with a small amount of milk and corn syrup for a gloss icing, though it will take longer to set fully firm than royal icing.
How can I decorate Christmas cookies in advance?
You can decorate your cookies up to one week before serving if kept in an airtight container, or up to 3 months ahead if frozen after drying.
Why is my royal icing matte instead of shiny?
Drying cookies under a gentle desktop fan speeds up the drying process, which locks in a high-gloss, bakery-quality shine on your icing.What is your favorite holiday shape to decorate during the festive season? Do you love classic gingerbread men, sparkling snowflakes, or festive trees? Share your ideas in the comments below!
Christmas Cookie Decorating

- DOUGH INGREDIENTS:
- 225 grams Unsalted Butter (softened at room temperature)
- 200 grams Granulated White Sugar
- 1 Large Egg (approximately 50 grams, room temperature)
- 5 milliliters Pure Vanilla Extract (or 1 teaspoon)
- 360 grams All-Purpose Flour
- 6 grams Baking Powder (or 1.5 teaspoons)
- 3 grams Salt (or 0.5 teaspoon)
- ROYAL ICING INGREDIENTS:
- 500 grams Powdered Sugar (sifted)
- 30 grams Meringue Powder (or 4 tablespoons)
- 75 milliliters Warm Water (plus more for thinning consistency)
- 5 milliliters Vanilla Extract (use clear extract for pure white icing)
Digital Kitchen Scale: Ensures accurate ingredient ratios for perfect dough texture.
- Electric Hand Mixer or Stand Mixer: Essential for beating butter and whipping royal icing.
- Baking Sheets: Heavy-duty aluminum pans yield even browning.
- Parchment Paper: Prevents sticking and makes cleanup fast.
- Piping Bags and Couplers: Gives you control when outlining and flooding cookies.
- Scribe Tool or Toothpick: Used to pop air bubbles and smooth icing edges.
- Gel Food Coloring: Delivers rich holiday colors without thinning your icing consistency.