
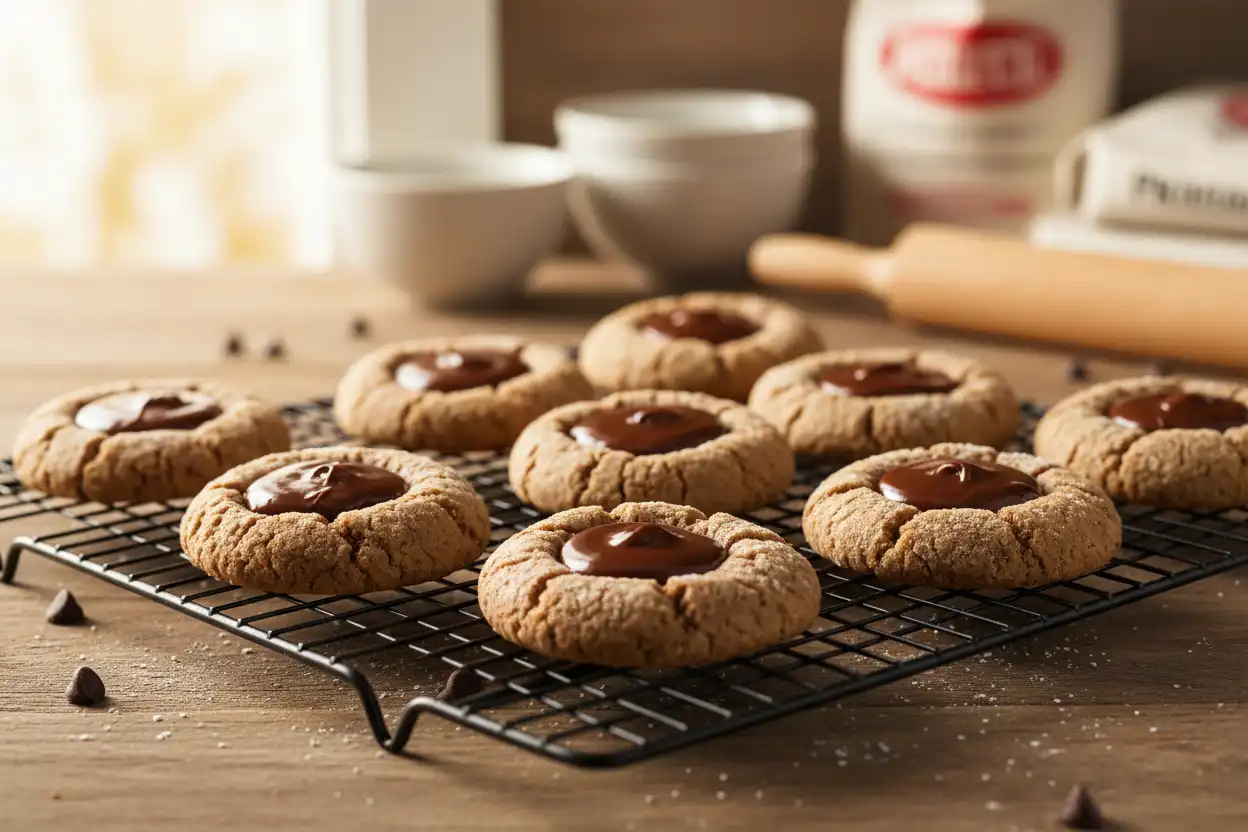
The very first time I attempted baking homemade chocolate thumbprint cookies in my kitchen, the whole process turned into an absolute disaster. I ended up with a baking tray filled with cracked, dry cocoa dough balls and spilled chocolate fudge. They looked more like tiny dark volcanoes that had erupted all over my parchment paper than beautiful bakery-style treats!After years of testing, tweaking ratios, and baking dozens of batches for family gatherings, I finally discovered the secret to making rich, tender cookies with a silky fudge center that never cracks, leaks, or turns rock hard.Whether you are baking for a holiday cookie swap, a weekend family treat, or simply satisfying a deep midnight chocolate craving, this foolproof recipe delivers incredible flavor and perfect visual results every single time.!
My Personal Kitchen Disaster (And How I Fixed It)
Early in my baking journey, I made the classic mistake of substituting whole eggs with plain egg whites to cut down on extra fat. I assumed it would keep the dough light while maintaining structure.The result was an absolute catastrophe.
The cookie bases baked into rubbery, dry discs that crumbled into dust the moment I tried to press a well into the centers.That frustrating afternoon taught me a valuable lesson: high-quality fat from real butter and egg yolks is non-negotiable for tender shortbread textures. The egg yolk provides rich emulsifiers that hold the cocoa structure together without making it tough.Another huge mistake I frequently made was using my warm thumb to press indents directly into room-temperature dough. The heat from my hands instantly softened the butter fat inside the dough, creating deep, unexpectedly structural cracks along the outer edges of every single cookie.Switching to the back of a smooth, cold round measuring spoon completely solved that issue overnight. It creates perfectly uniform, round wells for your rich chocolate ganache filling without tearing the delicate outer dough.
Why You Will Love This Recipe
Many home bakers run into issues with thumbprint recipes that flatten out into sad puddles in the oven or dry out into bland biscuits.This specific recipe uses a carefully balanced ratio of fat to flour, combined with a quick double-chill technique that locks in moisture and preserves shape.
- Zero Spreading in the Oven: Chilling the shaped dough twice prevents the butter fat from melting too rapidly during the initial baking phase.
- Silky Smooth Chocolate Filling: The custom heavy cream ganache center remains soft, shiny, and biteable even after cooling completely.
- Beginner Friendly Technique: You do not need any expensive stand mixers or advanced pastry skills to achieve professional baking results.
- Freezer-Friendly Meal Prep: You can roll and shape the dough weeks in advance, freeze the unbaked bases, and bake fresh cookies on demand.
Essential Kitchen Equipment
Gathering your tools before breaking out the flour ensures a smooth, fun, and stress-free baking session.
- Electric Hand Mixer or Stand Mixer: Essential for whipping the butter and sugar into a light, airy base.
- Large Glass Mixing Bowls: For combining wet ingredients and sifting dry powders cleanly.
- Heavy Aluminum Baking Sheets: Thick baking pans distribute heat evenly and prevent burnt bottoms.
- Parchment Paper Sheets: Keeps your cookie bottoms clean and stops delicate chocolate from sticking.
- 1-Tablespoon Cookie Scoop: Guarantees that every single cookie is identical in size for even baking times.
- 1/2 Teaspoon Round Measuring Spoon: The ideal round tool for shaping clean, crack-free center wells.
- Wire Cooling Rack: Allows air to circulate underneath the warm baked cookies, preventing soggy bottoms.
Ingredients Breakdown (Metric & Standard Measures)
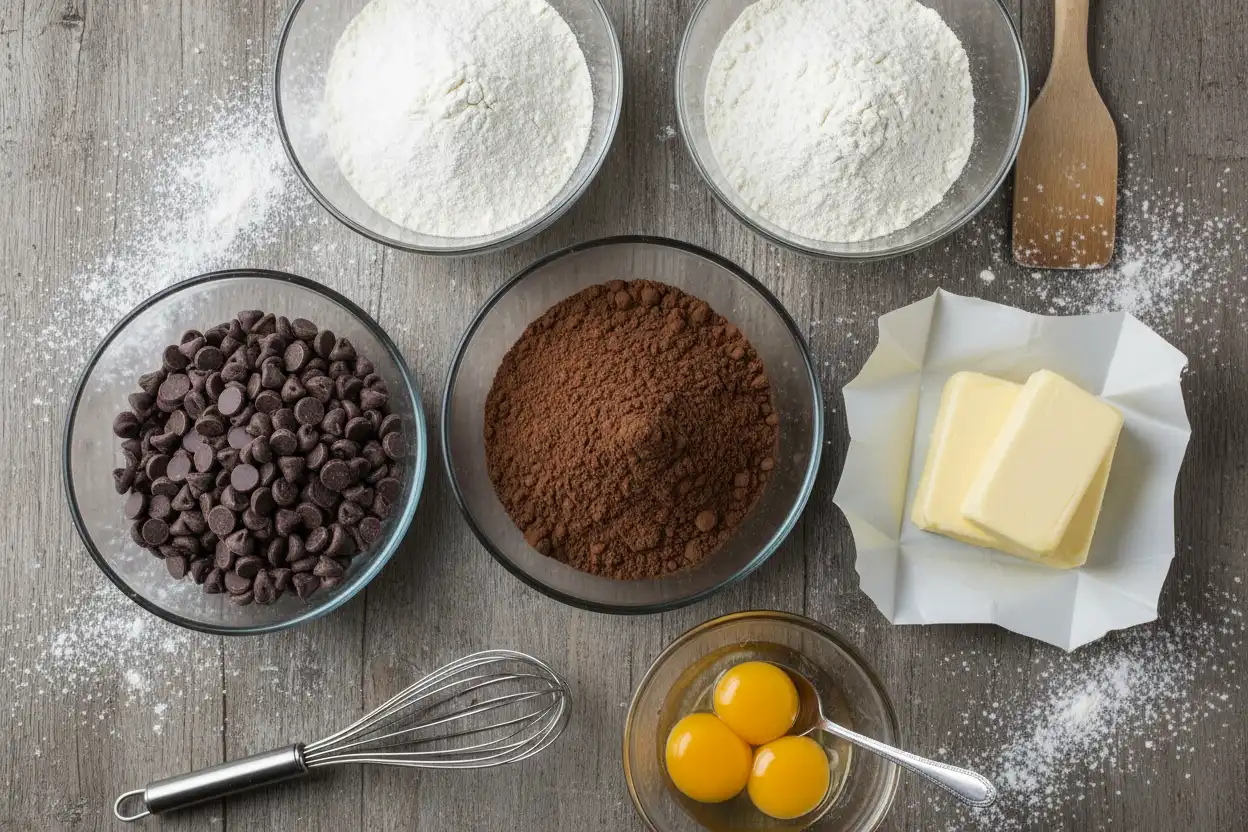
Using precise metric weight measurements in grams ensures your dough has the exact moisture ratio required to prevent cracking.
| Ingredient Name | Standard Volume | Precise Metric Weight | Kitchen Notes & Recommendations |
| Unsalted Butter | 1 cup (2 sticks) | 225 grams | Softened to room temperature (not melted) |
| Granulated White Sugar | 2/3 cup | 135 grams | Fine white sugar for smooth creaming |
| Large Egg Yolks | 2 large yolks | 35 – 40 grams | Room temperature (discards egg whites) |
| Pure Vanilla Extract | 1 teaspoon | 5 milliliters | High quality extract for deep flavor depth |
| All-Purpose Flour | 2 cups | 250 grams | Spooned and leveled precisely |
| Dutch-Process Cocoa Powder | 1/2 cup | 50 grams | Unsweetened Dutch cocoa for smooth dark color |
| Fine Sea Salt | 1/4 teaspoon | 1.5 grams | Enhances chocolate notes and cuts sweetness |
| Heavy Whipping Cream (Dough) | 1 to 2 tablespoons | 15 – 30 milliliters | Added only if your home kitchen air is very dry |
| Semi-Sweet Chocolate Chips | 1 cup | 175 grams | Real cocoa butter chips for smooth melting |
| Heavy Whipping Cream (Fudge) | 1/3 cup | 80 milliliters | Full fat cream for rich ganache filling |
| Unsalted Butter (Fudge) | 1 tablespoon | 14 grams | Adds brilliant shine to the cooled filling |
Step-by-Step Baking Instructions
Follow these clear, sequential steps to assemble your chocolate cookies with total confidence.
Preparation Time: 20 minutes
Baking Time: 10 minutes
Chilling Time: 35 minutes
Total Active Time: 1 hour 5 minutes
Yield: 24 individual cookies
Step 1: Cream the Butter and Sugar Thoroughly
Place your softened unsalted butter and granulated white sugar into a large mixing bowl.Turn your electric hand mixer to medium speed and beat the ingredients together for roughly 2 full minutes.Stop mixing when the butter mixture looks light, fluffy, and visibly paler in color.Use a flexible rubber spatula to scrape down the sides and bottom of the bowl so no dense butter pockets remain behind.
Step 2: Incorporate Wet Flavoring Ingredients
Add your 2 room-temperature egg yolks and pure vanilla extract straight into the fluffy butter base.Mix on low speed for roughly 45 seconds until the mixture turns glossy, thick, and fully uniform.Starting with room-temperature egg yolks prevents the cold butter fat from seizing up or separating during mixing.
Step 3: Sift and Combine Dry Ingredients
Set a fine-mesh sieve directly over a separate clean mixing bowl.Pass your all-purpose flour, Dutch-process cocoa powder, and fine sea salt through the mesh to eliminate any stubborn cocoa lumps.Slowly dump half of your sifted dry ingredients into the wet butter mixture while running your mixer on its lowest speed setting.Once partially combined, add the remaining half and mix just until a smooth, cohesive chocolate dough pulls away from the bowl edges.
Pro Baker Tip:If your kitchen air feels dry and the dough appears crumbly instead of smooth, drizzle in 1 tablespoon of heavy whipping cream and gently work it in with your hands.
Step 4: Portion and Roll Dough Balls
Line two large heavy aluminum baking sheets with pre-cut parchment paper sheets.Use your 1-tablespoon cookie scoop to measure out uniform portions of dark chocolate dough.Gently roll each portion between the palms of your clean hands until you form a perfectly round, smooth dough ball without surface lines.Arrange the rolled balls across your prepared baking sheets, leaving roughly 1.5 inches of space between each piece.
Step 5: Execute the First Chill Phase
Transfer your loaded baking sheets directly into your refrigerator.Allow the plain dough balls to chill completely undisturbed for 20 minutes.This crucial resting step relaxes the gluten strands inside the flour while cooling down the butter fat, making the dough pliable yet sturdy.
Step 6: Create Clean Center Indentations
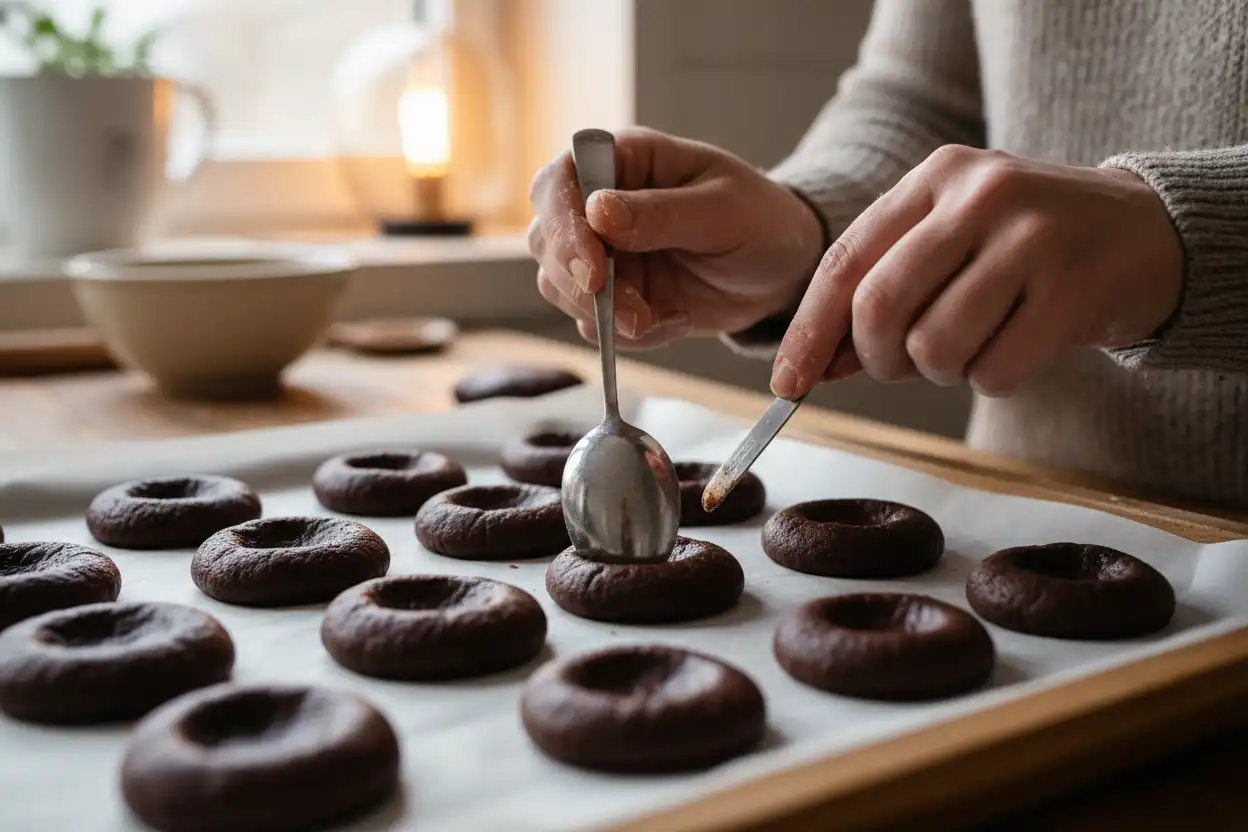
Pull your chilled baking sheets out of the refrigerator and set them on your workspace.Take the back of a smooth 1/2 teaspoon measuring spoon (or your clean, cold thumb) and gently press straight down into the middle of each ball.Press about halfway into the dough ball to carve out a wide, deep well for your chocolate ganache.If tiny hairline cracks appear along the outer perimeter, simply smooth them out using a single drop of water on your fingertip.
Step 7: Run the Second Chill & Preheat Oven
Preheat your conventional baking oven to 350°F (175°C) while your shaped cookies rest.Place the tray of indented dough balls right back into the refrigerator for a second cold rest lasting 15 minutes.This double-chill technique ensures that the deep center wells maintain their structural shape in the hot oven without collapsing outward.
Step 8: Bake to Perfection
Slide your chilled baking sheets onto the middle rack of your fully preheated oven.Bake at 350°F (175°C) for 9 to 11 minutes total.The outer edges should look firm and matte, while the center wells remain slightly soft to the touch.If the center wells puffed up slightly during baking, instantly re-press them down using the back of your round spoon while the cookies are piping hot out of the oven.Let the warm cookies remain on the hot pan for 5 minutes before carefully transferring them onto a wire rack to cool completely.
Step 9: Prepare the Rich Fudge Filling
Combine your semi-sweet chocolate chips, heavy whipping cream, and 1 tablespoon of unsalted butter inside a small microwave-safe glass bowl.Microwave the mixture in brief 20-second bursts, stopping to stir thoroughly with a dry metal spoon after every burst.After 2 or 3 warming cycles, the solid chocolate chips will melt down into a smooth, glossy, poured ganache.Allow your warm ganache to sit at room temperature for 5 minutes to thicken slightly into a scoopable fudge texture.
Step 10: Fill, Set, and Serve
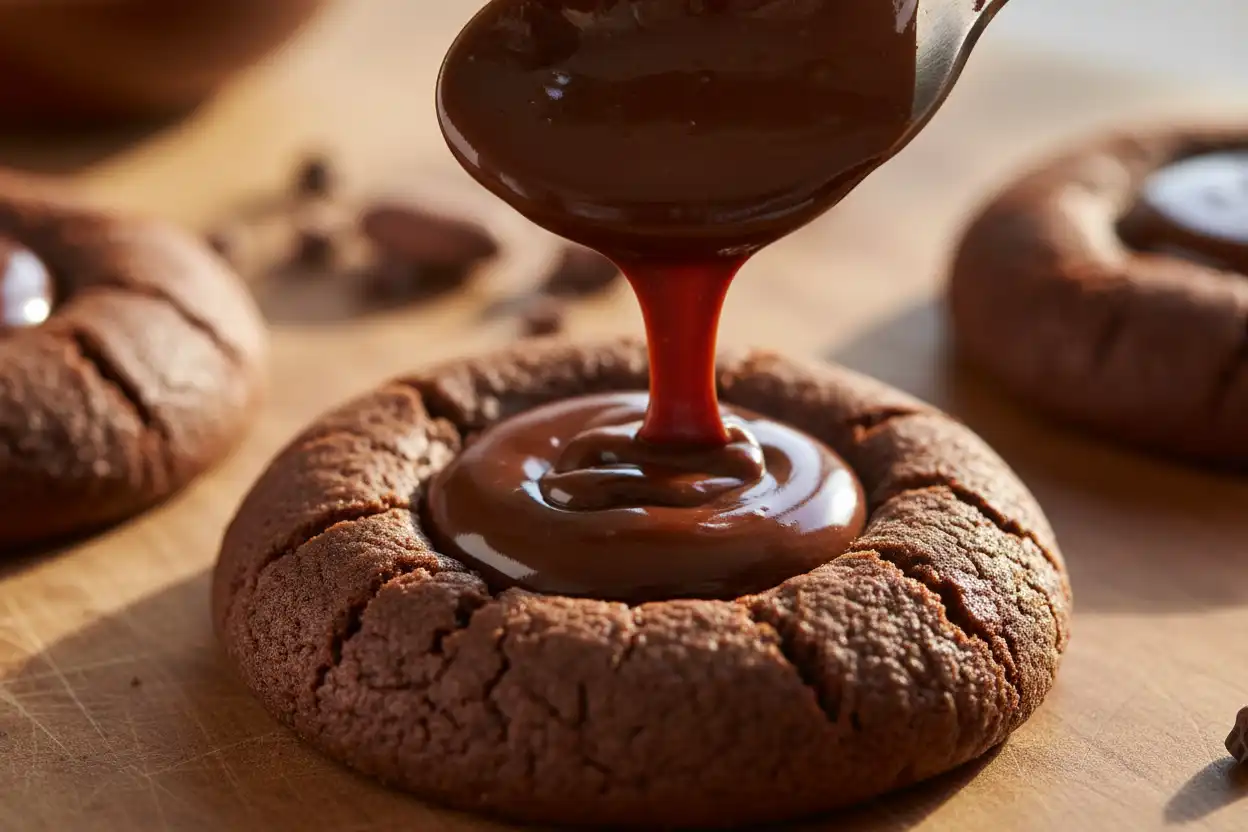
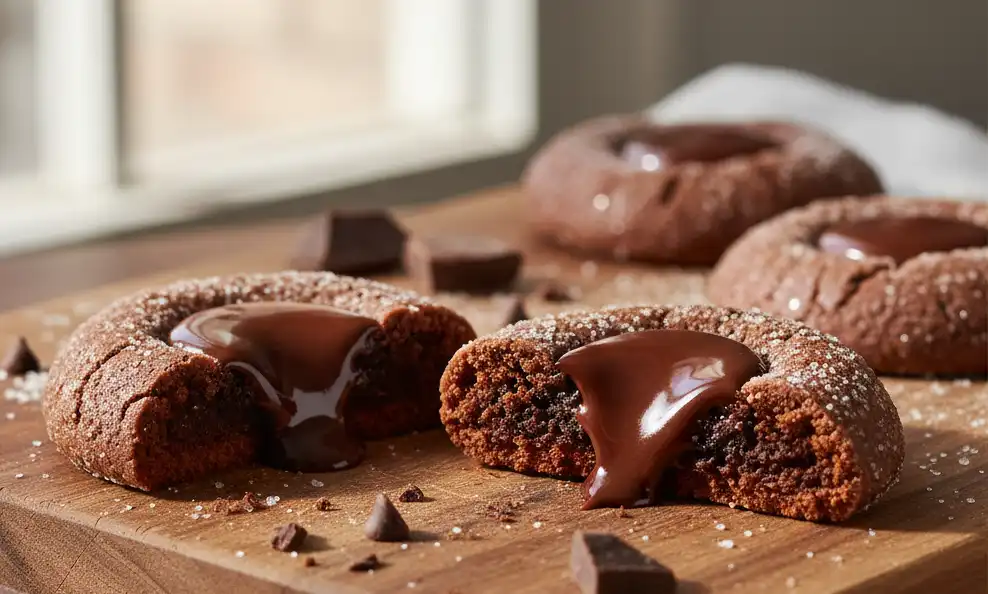
Spoon or pipe roughly 1 teaspoon of warm chocolate ganache into the center well of each completely cooled cookie.Fill the wells flush with the top edges for a gorgeous, high-end bakery appearance.Let the filled cookies sit out at room temperature for roughly 30 to 40 minutes until the glossy ganache sets into a firm, biteable fudge.
Pro Kitchen Tips for Success
- Accurate Flour Measurement: Always spoon your flour into measuring cups and level it off with a flat butter knife if you are not using a digital metric scale. Packing flour directly from the bag adds extra bulk that creates dry, crumbly cookies.
- Always Choose Dutch-Process Cocoa: Dutch-process cocoa powder has been neutralized of harsh acids, giving your baked treats a richer dark chocolate flavor, a smoother texture, and a deeper brown tone than natural cocoa powders.
- Keep Hands Cool During Rolling: If your hands run naturally warm, run them under ice-cold tap water and dry them completely before handling the raw dough balls to keep the butter cool.
- Avoid Hot Baking Sheets: Never place raw chilled dough onto a baking sheet that is still warm from a previous baking run. Hot pans melt the butter fat prematurely, causing heavy spreading.
Troubleshooting Common Baking Issues
Why did my cookie edges crack while pressing?
Cracks happen when the dough lacks sufficient liquid fat or when the dough fat is too cold and stiff. If your dough cracks during pressing, let the rolled balls sit at room temperature for 3 minutes before indenting, or smooth over cracks with a wet fingertip.
Why did my cookies turn out flat and greasy?
Flat cookies are almost always caused by over-softened or melted butter, or skipping the required chilling steps entirely. Always use firm, room-temperature butter that yields slightly to finger pressure rather than soft, oily butter.
Why did my fudge filling turn out grainy or dull?
Grainy chocolate ganache occurs when the chocolate melts at too high a temperature or comes into accidental contact with water droplets. Always melt your chocolate slowly in brief intervals and ensure all glass bowls and spoons are completely dry.
Delicious Recipe Variations
Once you have mastered this classic chocolate shortbread base, feel free to experiment with creative seasonal fillings!
- Salted Caramel Twist: Fill the baked centers with thick homemade caramel sauce and top with a sprinkle of flaky sea salt.
- Peanut Butter Fudge Duo: Warm 2 tablespoons of smooth creamy peanut butter and swirl it straight into your dark chocolate ganache before filling.
- Festive Peppermint Crunch: Dust finely crushed peppermint candy canes over the wet chocolate filling right before it sets for a winter holiday treat.
- Raspberry Chocolate Delight: Spoon a tiny quarter-teaspoon of seedless red raspberry jam into the bottom of each well before topping with dark ganache.
Storage, Prep Ahead, and Freezing Guide
Keep your freshly baked chocolate treats tasting fresh with these simple storage guidelines.
Room Temperature Storage:
Store fully finished cookies inside a clean airtight container in a single flat layer. If stacking is necessary, place sheets of parchment paper between each layer to protect the fudge centers. They stay fresh, tender, and delicious at room temperature for up to 5 days.
Freezing Raw Cookie Dough:
Roll the dough into balls and press the center wells into each piece. Place the raw shaped bases onto a tray and freeze until rock hard, then transfer them into a heavy-duty freezer bag for up to 2 months. Bake straight from frozen, adding roughly 2 extra minutes to the total bake time.
Freezing Baked Cookie Bases:
You can freeze fully baked cookie bases (without ganache filling) inside an airtight container for up to 3 months. Thaw them completely at room temperature, then prepare fresh, warm ganache filling right before serving for maximum freshness.
Frequently Asked Questions
Can I use whole eggs instead of separate egg yolks?
It is strongly recommended to stick strictly to egg yolks. Whole eggs introduce egg white liquid, which creates a bouncy, cake-like texture instead of a tender, melt-in-your-mouth shortbread crumb.
Why is my chocolate ganache not signing up?
If your ganache stays runny after 40 minutes, your liquid ratio contained too much heavy cream. You can fix this easily by melting a few extra chocolate chips directly into the warm mixture to increase solids.
Should I store these cookies inside the refrigerator?
Refrigeration is not necessary unless your home kitchen is extremely hot or humid. Keeping them stored inside an airtight container at room temperature keeps the cookie crumb tender and the filling soft.
Estimated Nutritional Information
Serving Size: 1 cookie
Calories: 145 kcal
Carbohydrates: 18g
Net Protein: 2g
Total Fat: 8g
Saturated Fat: 5g
Sodium: 35mg
Total Sugar: 10g
These incredible
chocolate thumbprint cookies combine rich cocoa flavor, tender buttery textures, and a smooth fudge center that everyone will adore. Put on your apron, follow these simple steps, and enjoy a batch of pure homemade baking satisfaction today!
Chocolate Thumbprint Cookies

- Unsalted Butter (1 cup (2 sticks),225 grams,Softened to room temperature (not melted))
- Granulated White Sugar (2/3 cup,135 grams,Fine white sugar for smooth creaming)
- Large Egg Yolks (2 large yolks,35 – 40 grams,Room temperature (discards egg whites))
- Pure Vanilla Extract (1 teaspoon,5 milliliters,High quality extract for deep flavor depth)
- All-Purpose Flour (2 cups,250 grams,Spooned and leveled precisely)
- Dutch-Process Cocoa Powder (1/2 cup,50 grams,Unsweetened Dutch cocoa for smooth dark color)
- Fine Sea Salt (1/4 teaspoon,1.5 grams,Enhances chocolate notes and cuts sweetness)
- Heavy Whipping Cream (Dough,1 to 2 tablespoons,15 – 30 milliliters,Added only if your home kitchen air is very dry)
- Semi-Sweet Chocolate Chips (1 cup,175 grams,Real cocoa butter chips for smooth melting)
- Heavy Whipping Cream (Fudge,1/3 cup,80 milliliters,Full fat cream for rich ganache filling)
- Unsalted Butter (Fudge,1 tablespoon,14 grams,Adds brilliant shine to the cooled filling)
Electric Hand Mixer or Stand Mixer: Essential for whipping the butter and sugar into a light, airy base.
- Large Glass Mixing Bowls: For combining wet ingredients and sifting dry powders cleanly.
- Heavy Aluminum Baking Sheets: Thick baking pans distribute heat evenly and prevent burnt bottoms.
- Parchment Paper Sheets: Keeps your cookie bottoms clean and stops delicate chocolate from sticking.
- 1-Tablespoon Cookie Scoop: Guarantees that every single cookie is identical in size for even baking times.
- 1/2 Teaspoon Round Measuring Spoon: The ideal round tool for shaping clean, crack-free center wells.
- Wire Cooling Rack: Allows air to circulate underneath the warm baked cookies, preventing soggy bottoms.