
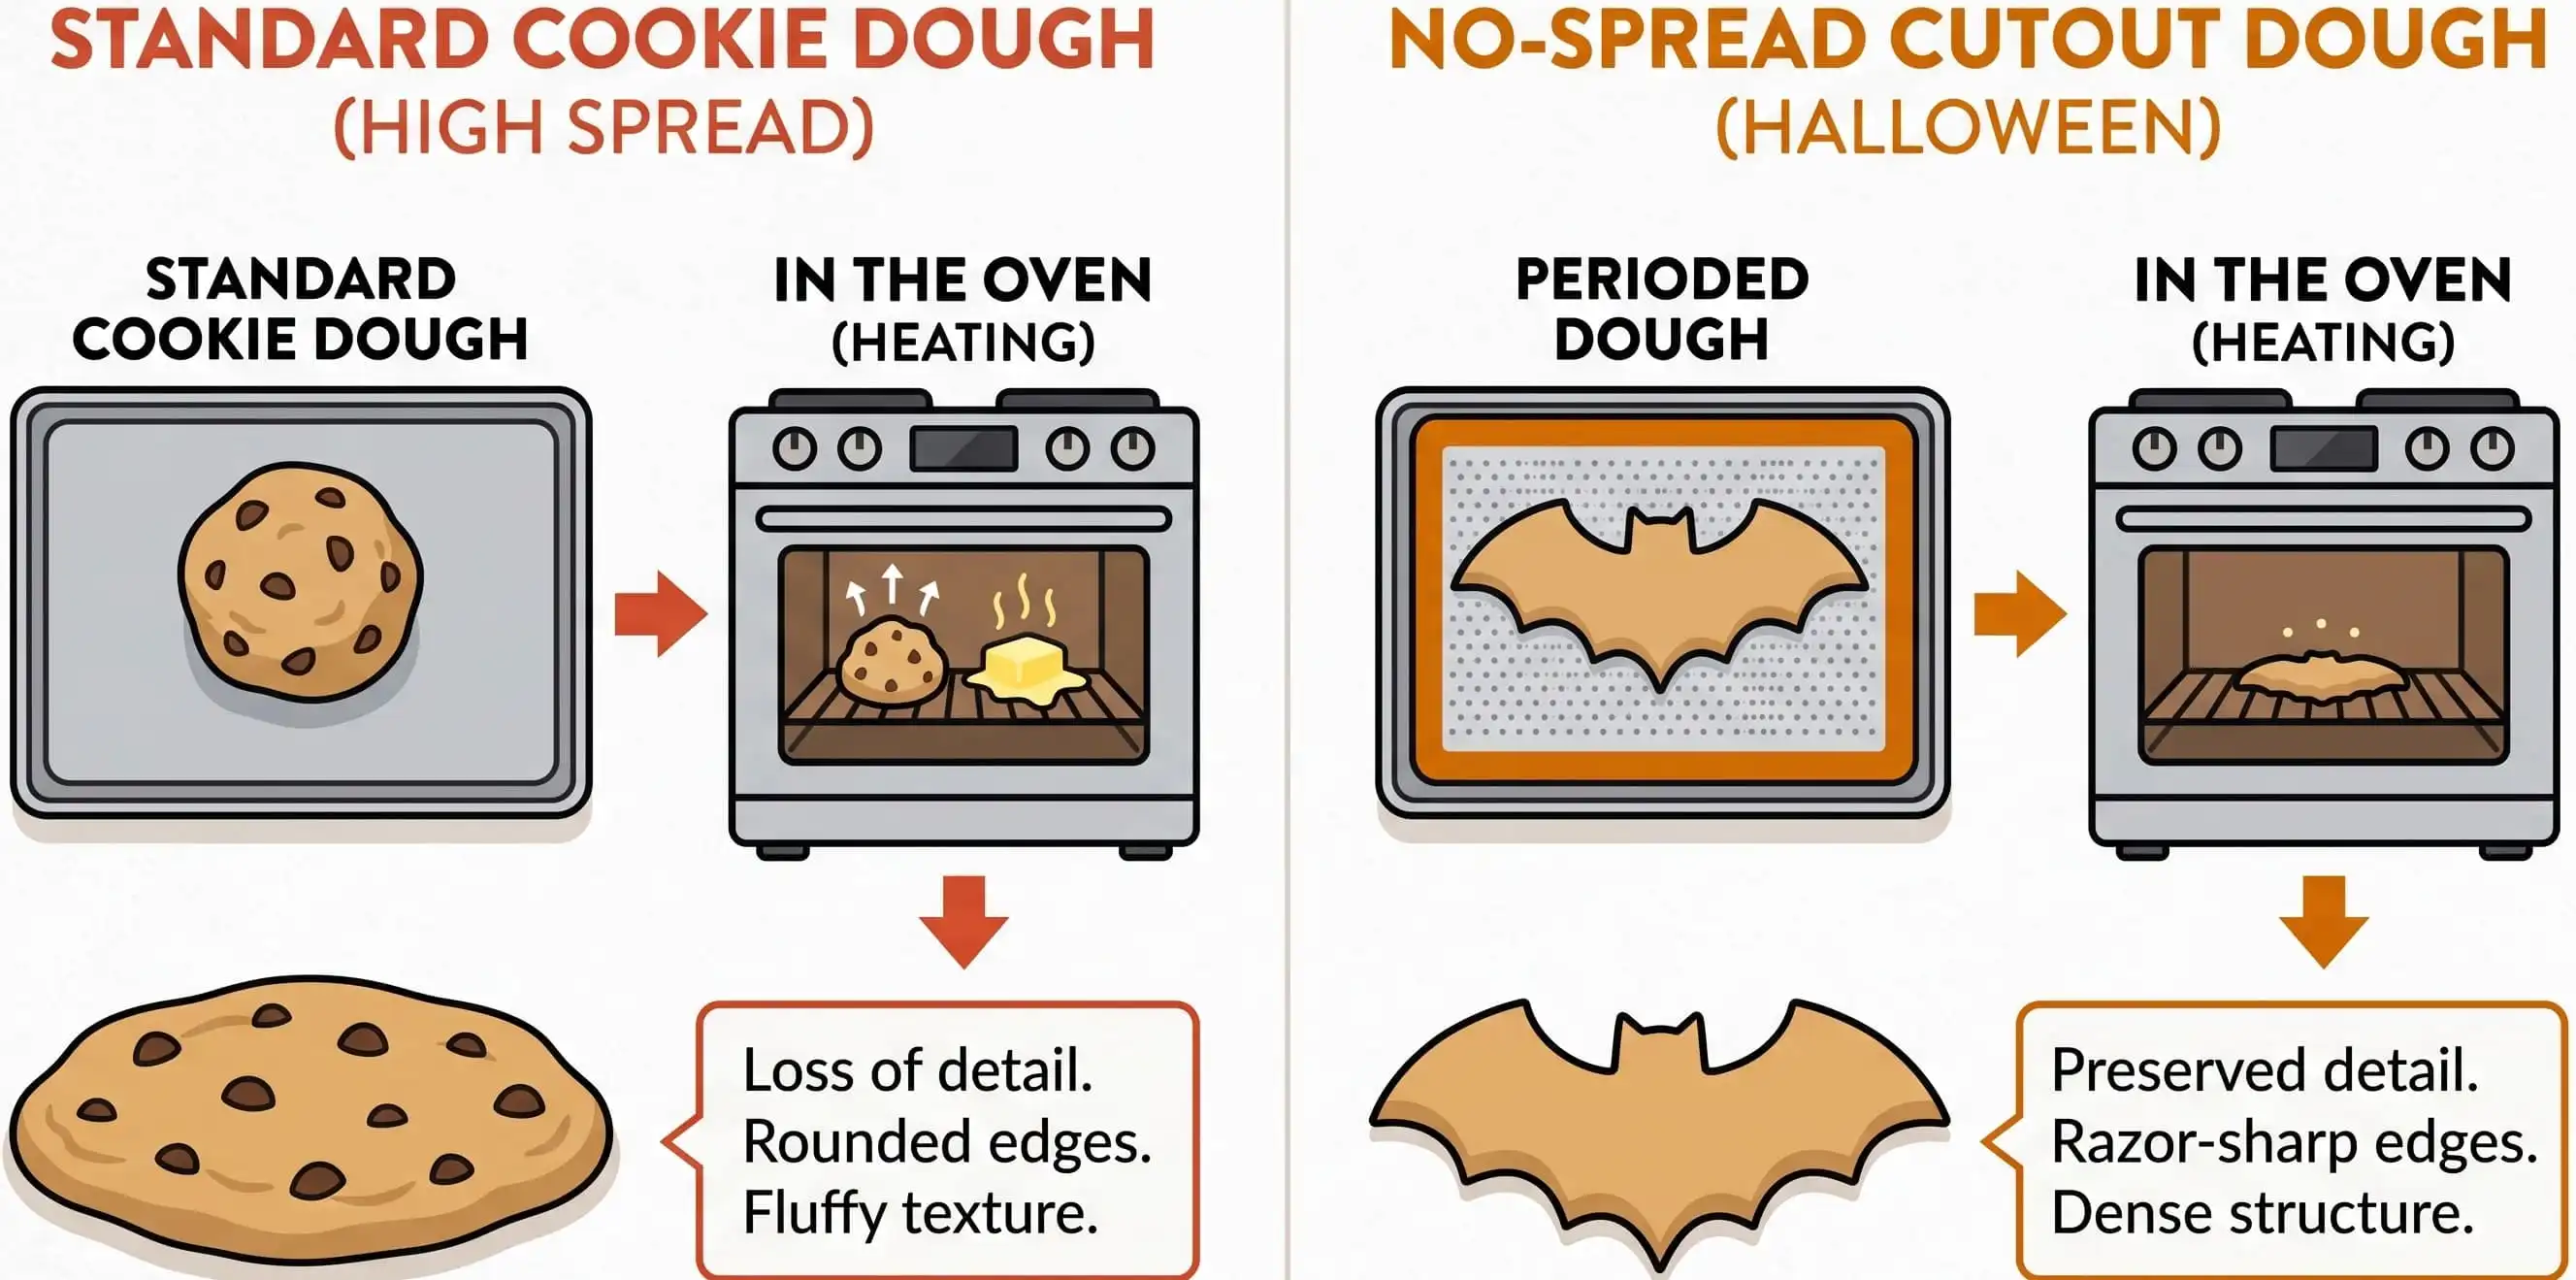
To keep Halloween cookie cutter cookies from losing their shape in the oven, eliminate chemical leaveners like baking powder and baking soda. Use cold, unsalted butter and avoid whipping excess air during the creaming stage.
Roll the dough immediately between two sheets of parchment paper, then chill the rolled slabs for at least 30 to 60 minutes before cutting. Always place cut shapes back into the freezer for 10 minutes directly before baking at 350°F (177°C).
- Maintain temperature control: Keep the dough chilled right until the pan enters the oven.
- Use structural flour ratios: A 3:2:1 flour-to-butter-to-sugar weight ratio provides crisp definition without toughness.
- Dust cutters correctly: Dip cutters in cornstarch or flour between cuts to prevent dough distortion.

Introduction
Baking Halloween cookie cutter cookies brings creativity, festive tradition, and culinary craft together. Whether you are hosting a themed party, baking with your children, or preparing gift boxes for friends, cutout cookies make an impressive centerpiece.
Detailed cutters like spiderwebs, bats with pointed wingtips, and skeleton limbs often pose unique baking challenges. Standard cookie dough melts, spreads, and distorts in the oven, turning intricate shapes into unrecognizable blobs.
This guide provides tested, no-spread formulas and professional decorating methods. You will learn the exact steps to create razor-sharp edges, smooth royal icing finishes, and festive treats that taste as good as they look.
The Science of No-Spread Cookie Dough
Successful cutout cookies rely on controlling fat melting, gluten development, and aeration. Understanding how these factors interact allows you to bake crisp shapes reliably every time.
Fat Ratios and Butter Temperature
Butter provides flavor and tenderness, but its melting point sits between 90°F and 95°F (32°C to 35°C). If the fat melts before the flour proteins and starches set in the oven, the dough spreads outward.
Keep your butter around 60°F to 65°F (15°C to 18°C) when combining it with sugar. The butter should bend without breaking, but it must not feel oily or warm to the touch.
Why Chemical Leaveners Ruin Intricate Cutouts
Baking powder and baking soda release carbon dioxide gas when heated. In drop cookies, this creates a light crumb and pleasant rise.
In detailed cutout cookies, internal gas bubbles push boundaries outward and blur sharp angles. Omitting chemical leaveners keeps your dough flat, compact, and structurally identical to the cutter silhouette.
Flour Protein and Gluten Structure
All-purpose flour with a 10% to 11.5% protein content strikes the ideal balance. It gives the cookie sufficient structural integrity to hold delicate points without becoming tough or chewy.
Overworking the dough creates excess gluten, which causes the baked cookies to shrink or distort. Mix only until the flour absorbs the wet ingredients completely.
Base Recipes for Halloween Cutouts
These tested base doughs provide distinct flavors while maintaining zero-spread precision during baking.
1. Classic Vanilla-Almond No-Spread Sugar Cookie Dough
This traditional base offers a smooth, level canvas designed specifically for royal icing decoration.
- Unsalted Butter (cool room temperature): 1 cup (226g)
- Granulated White Sugar: 1 cup (200g)
- Large Egg (cold): 1 (50g)
- Pure Vanilla Extract: 1.5 teaspoons (7.5ml)
- Almond Extract: 0.5 teaspoon (2.5ml)
- All-Purpose Flour (spooned and leveled): 3 cups (360g)
- Cornstarch: 2 tablespoons (16g)
- Fine Table Salt: 0.75 teaspoon (4.5g)
2. Spooky Dark Chocolate Black Cocoa Dough
Black cocoa gives this cookie an intense, Oreo-style flavor and an earthy dark hue without artificial dyes.
- Unsalted Butter: 1 cup (226g)
- Granulated White Sugar: 1 cup (200g)
- Large Egg: 1 (50g)
- Pure Vanilla Extract: 2 teaspoons (10ml)
- All-Purpose Flour: 2.5 cups (300g)
- Black Cocoa Powder: 0.5 cup (50g)
- Cornstarch: 2 tablespoons (16g)
- Fine Table Salt: 0.75 teaspoon (4.5g)
3. Spiced Pumpkin Cardamom Molasses Dough
A sturdy, aromatic option that holds razor-sharp edges and pairs well with spiced glazes and royal icing.
- Unsalted Butter: 0.75 cup (170g)
- Dark Brown Sugar (packed): 0.75 cup (150g)
- Unsulphured Molasses: 0.33 cup (80ml)
- Large Egg: 1 (50g)
- All-Purpose Flour: 3.25 cups (390g)
- Ground Cinnamon: 1.5 teaspoons (4g)
- Ground Ginger: 1.5 teaspoons (4g)
- Ground Cardamom: 0.5 teaspoon (1g)
- Fine Table Salt: 0.5 teaspoon (3g)
Step-by-Step Baking Process
Follow this systematic process to eliminate sticking, tearing, and shape distortion.
Step 1: Make the Dough Without Over-Mixing
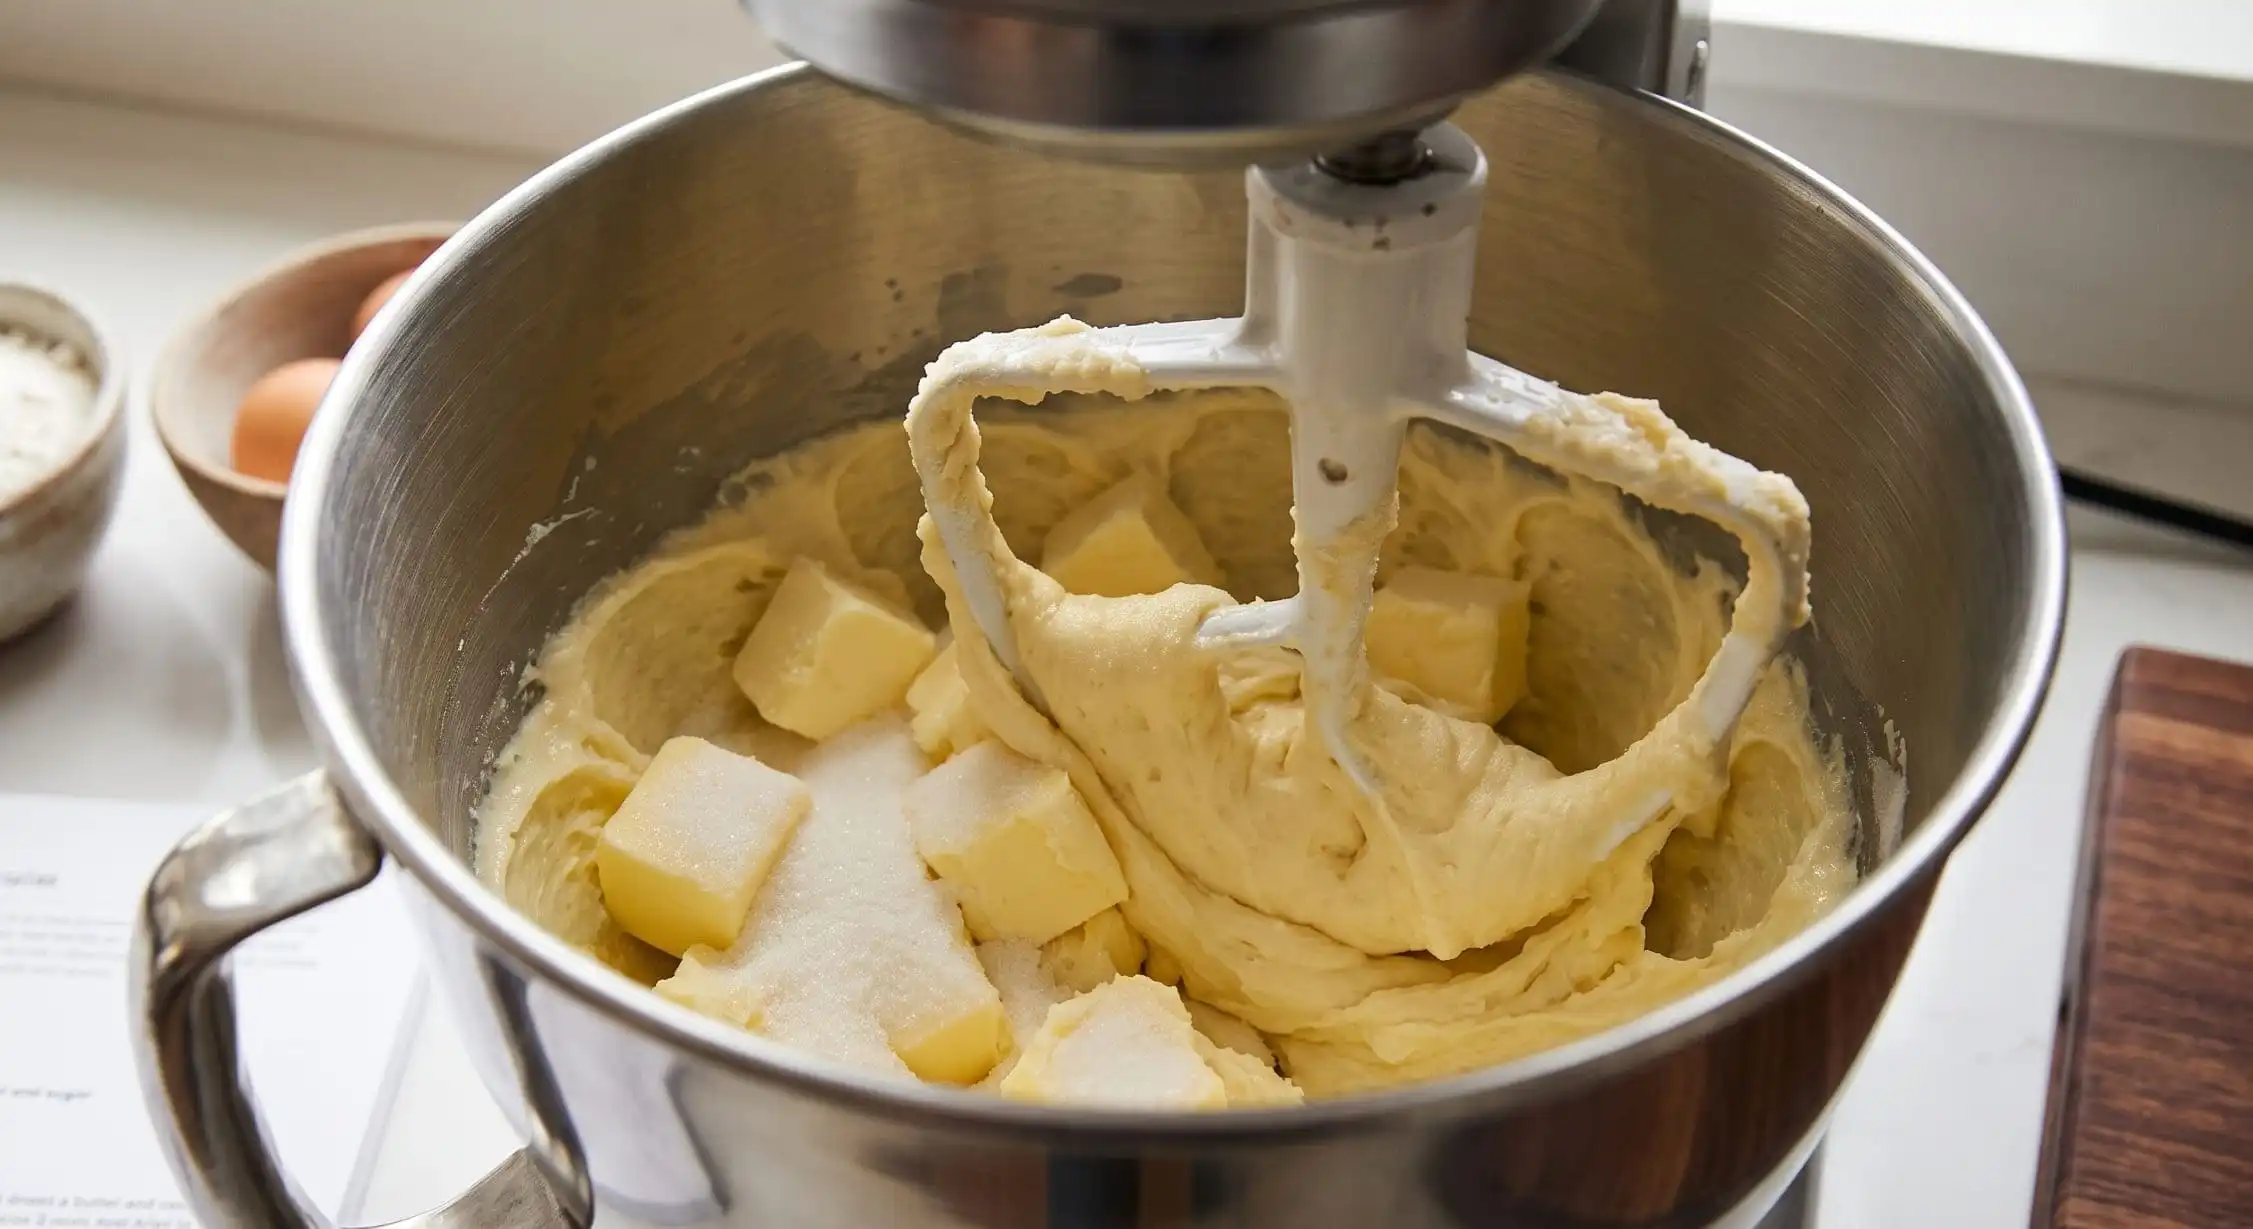
What: Cream the cool butter and granulated sugar for 90 seconds on medium-low speed until homogeneous. Add the egg and extracts, mixing until incorporated. Add dry ingredients on low speed just until dough clusters form.
Why: High-speed beating traps micro air pockets that expand in the oven and cause surface ripples.
How: Use a stand mixer fitted with a paddle attachment. Finish kneading by hand for 10 seconds to bring stray flour together.
Pro Tip: If the dough feels crumbly, add 1 teaspoon of milk at a time until it gathers smoothly.
Step 2: Roll Immediately Between Parchment
What: Divide dough in half. Place one half between two large sheets of parchment paper and roll to an even 1/4-inch (6mm) thickness.
Why: Freshly made dough rolls easily without cracking. Rolling between parchment eliminates extra counter flour that makes cookies dry.
How: Use an adjustable rolling pin with guide rings to maintain uniform thickness from center to edge.
Common Mistake: Rolling chilled dough blocks causes deep fractures and uneven sheet thickness.
Step 3: First Chill Phase
What: Slide the rolled dough sheets onto a flat baking tray and chill in the refrigerator for 45 minutes, or freeze for 15 minutes.
Why: Chilling solidifies the butter, allowing the cutter to shear through the dough with clean, vertical cuts.
How: Keep sheets stacked flat to prevent warping.
Step 4: Cut and Transfer Shapes
What: Peel off the top parchment sheet. Press cutters straight down into the dough with firm, even pressure. Do not twist the cutter.
Why: Twisting flares the bottom edge, creating distorted silhouettes during baking.
How: Pull the excess dough away from the cutouts first. Lift the stable parchment or use a small offset spatula to move cutouts to a lined baking sheet.
Pro Tip: Leave 1 inch (2.5cm) of space between cookies on the baking sheet.
Step 5: Flash Freeze Before Baking
What: Place the baking sheet with cut shapes into the freezer for 10 minutes while preheating the oven to 350°F (177°C).
Why: Flash freezing lowers dough temperature so the outer structure sets before the interior butter melts.
How: Clear a flat shelf in your freezer ahead of time to accommodate the sheet pan.
Step 6: Bake and Cool
What: Bake at 350°F (177°C) for 10 to 12 minutes for medium cookies, or 8 to 10 minutes for smaller shapes.
Why: Pulling cookies when the tops look matte ensures a soft bite and prevents browning on light designs.
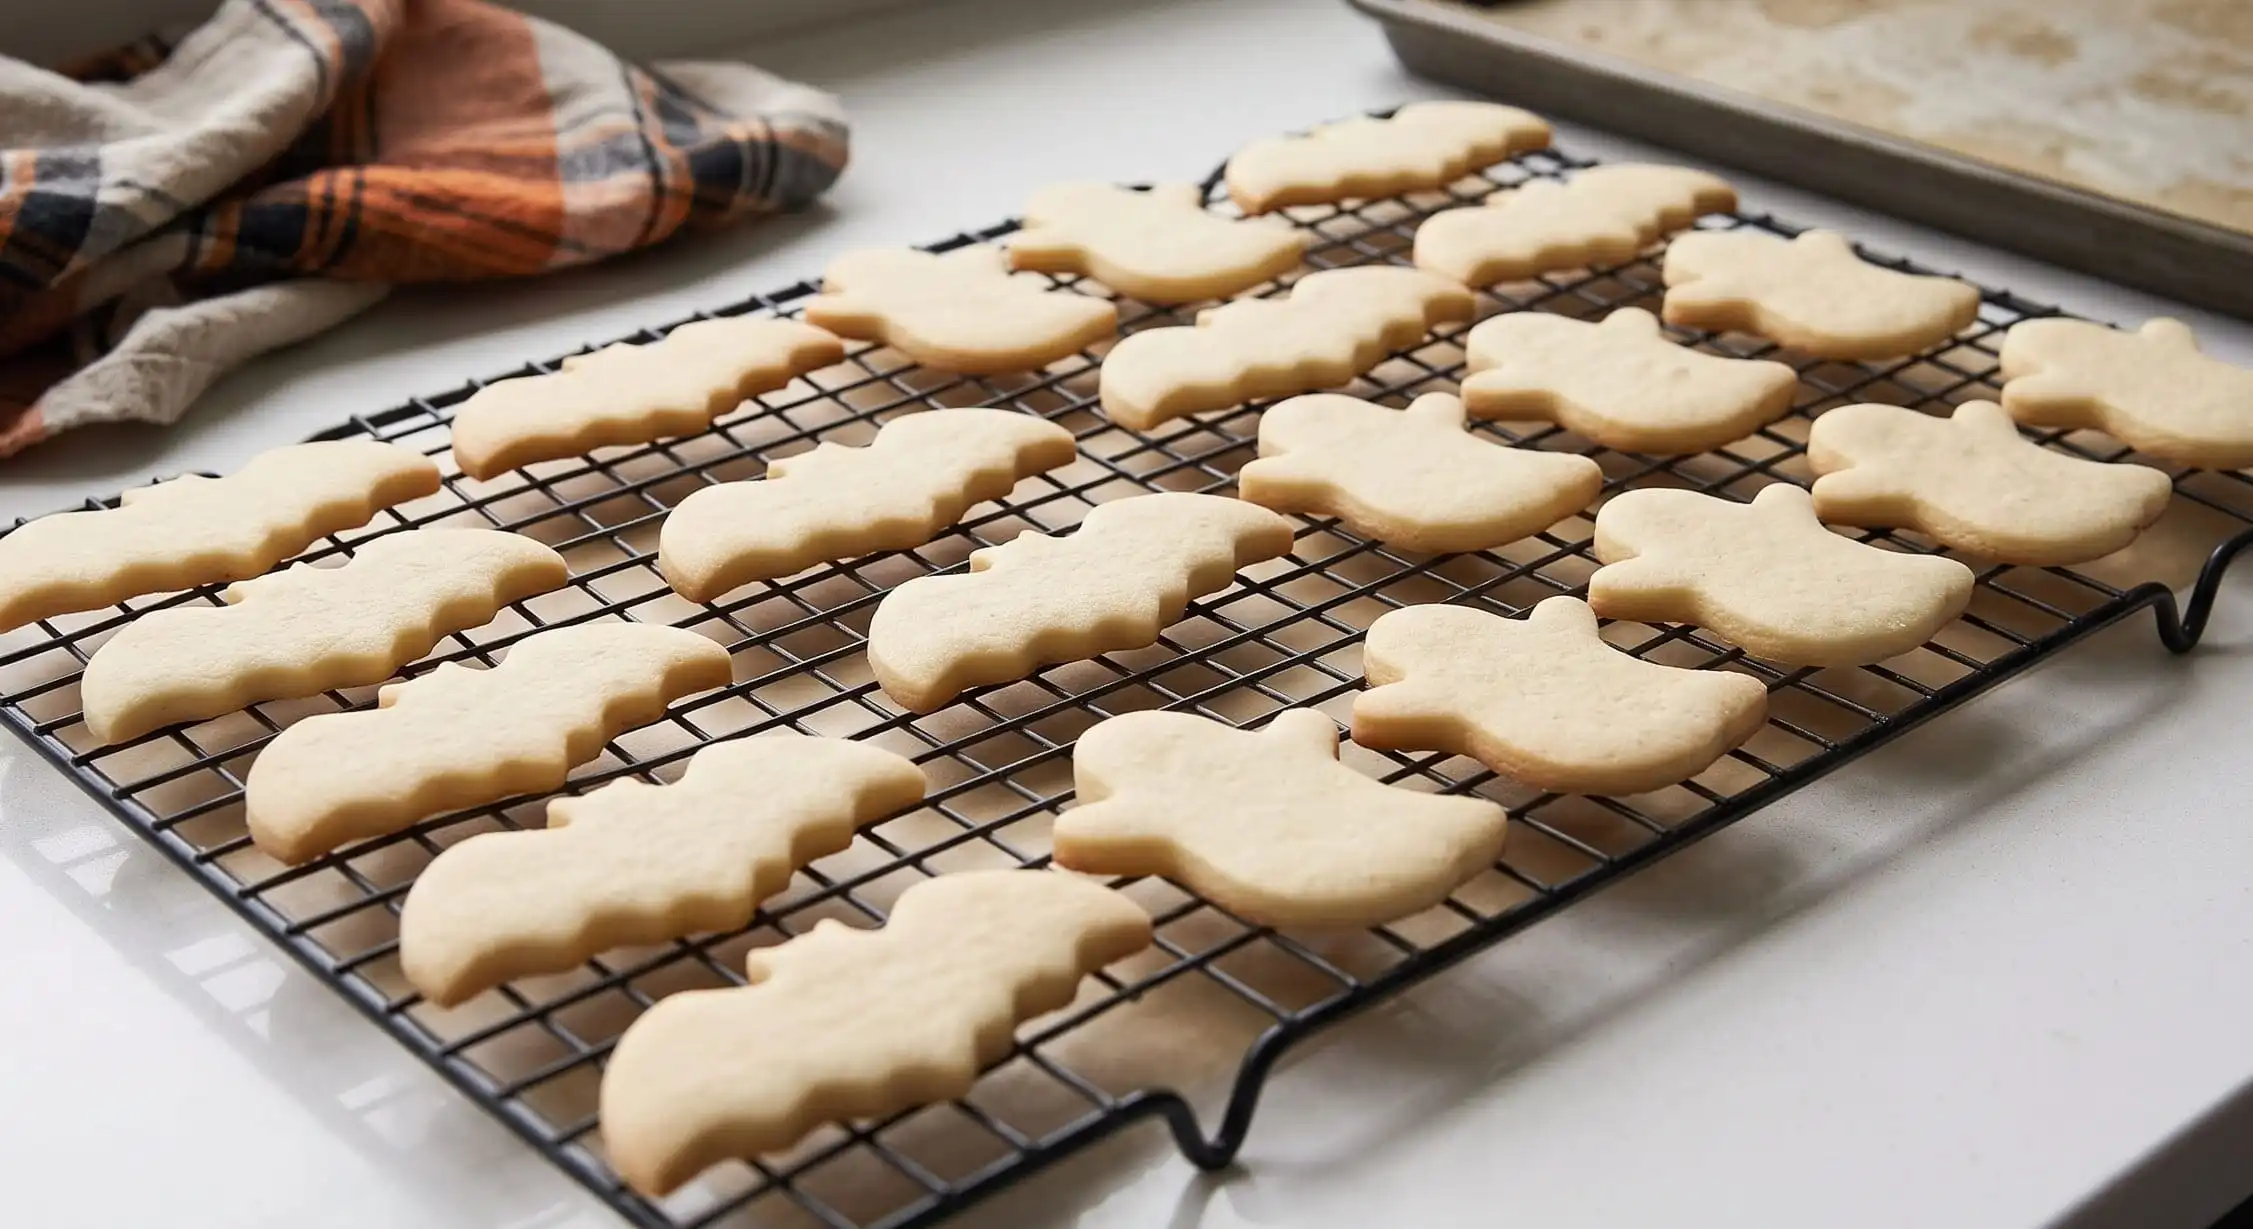
How: Cool on the baking sheet for 10 minutes, then transfer to a wire cooling rack until completely cold.
Common Mistake: Moving warm cookies immediately causes delicate extensions, like bat wings, to snap.
Decorating Techniques and Icing Consistencies
Precision decorating depends heavily on mastering your icing consistency. Royal icing remains the gold standard for decorated cutout cookies.
Royal Icing Formulation
- Powdered Sugar (sifted): 4 cups (480g)
- Meringue Powder: 3 tablespoons (30g)
- Warm Water: 1/3 cup (80ml), adjusted by teaspoons
- Clear Flavoring Extract: 1 teaspoon (5ml)
Beat ingredients in a clean bowl with a paddle attachment on low speed for 5 minutes until soft, glossy peaks appear. Add drops of water to achieve specific consistencies.
The Three Essential Consistencies
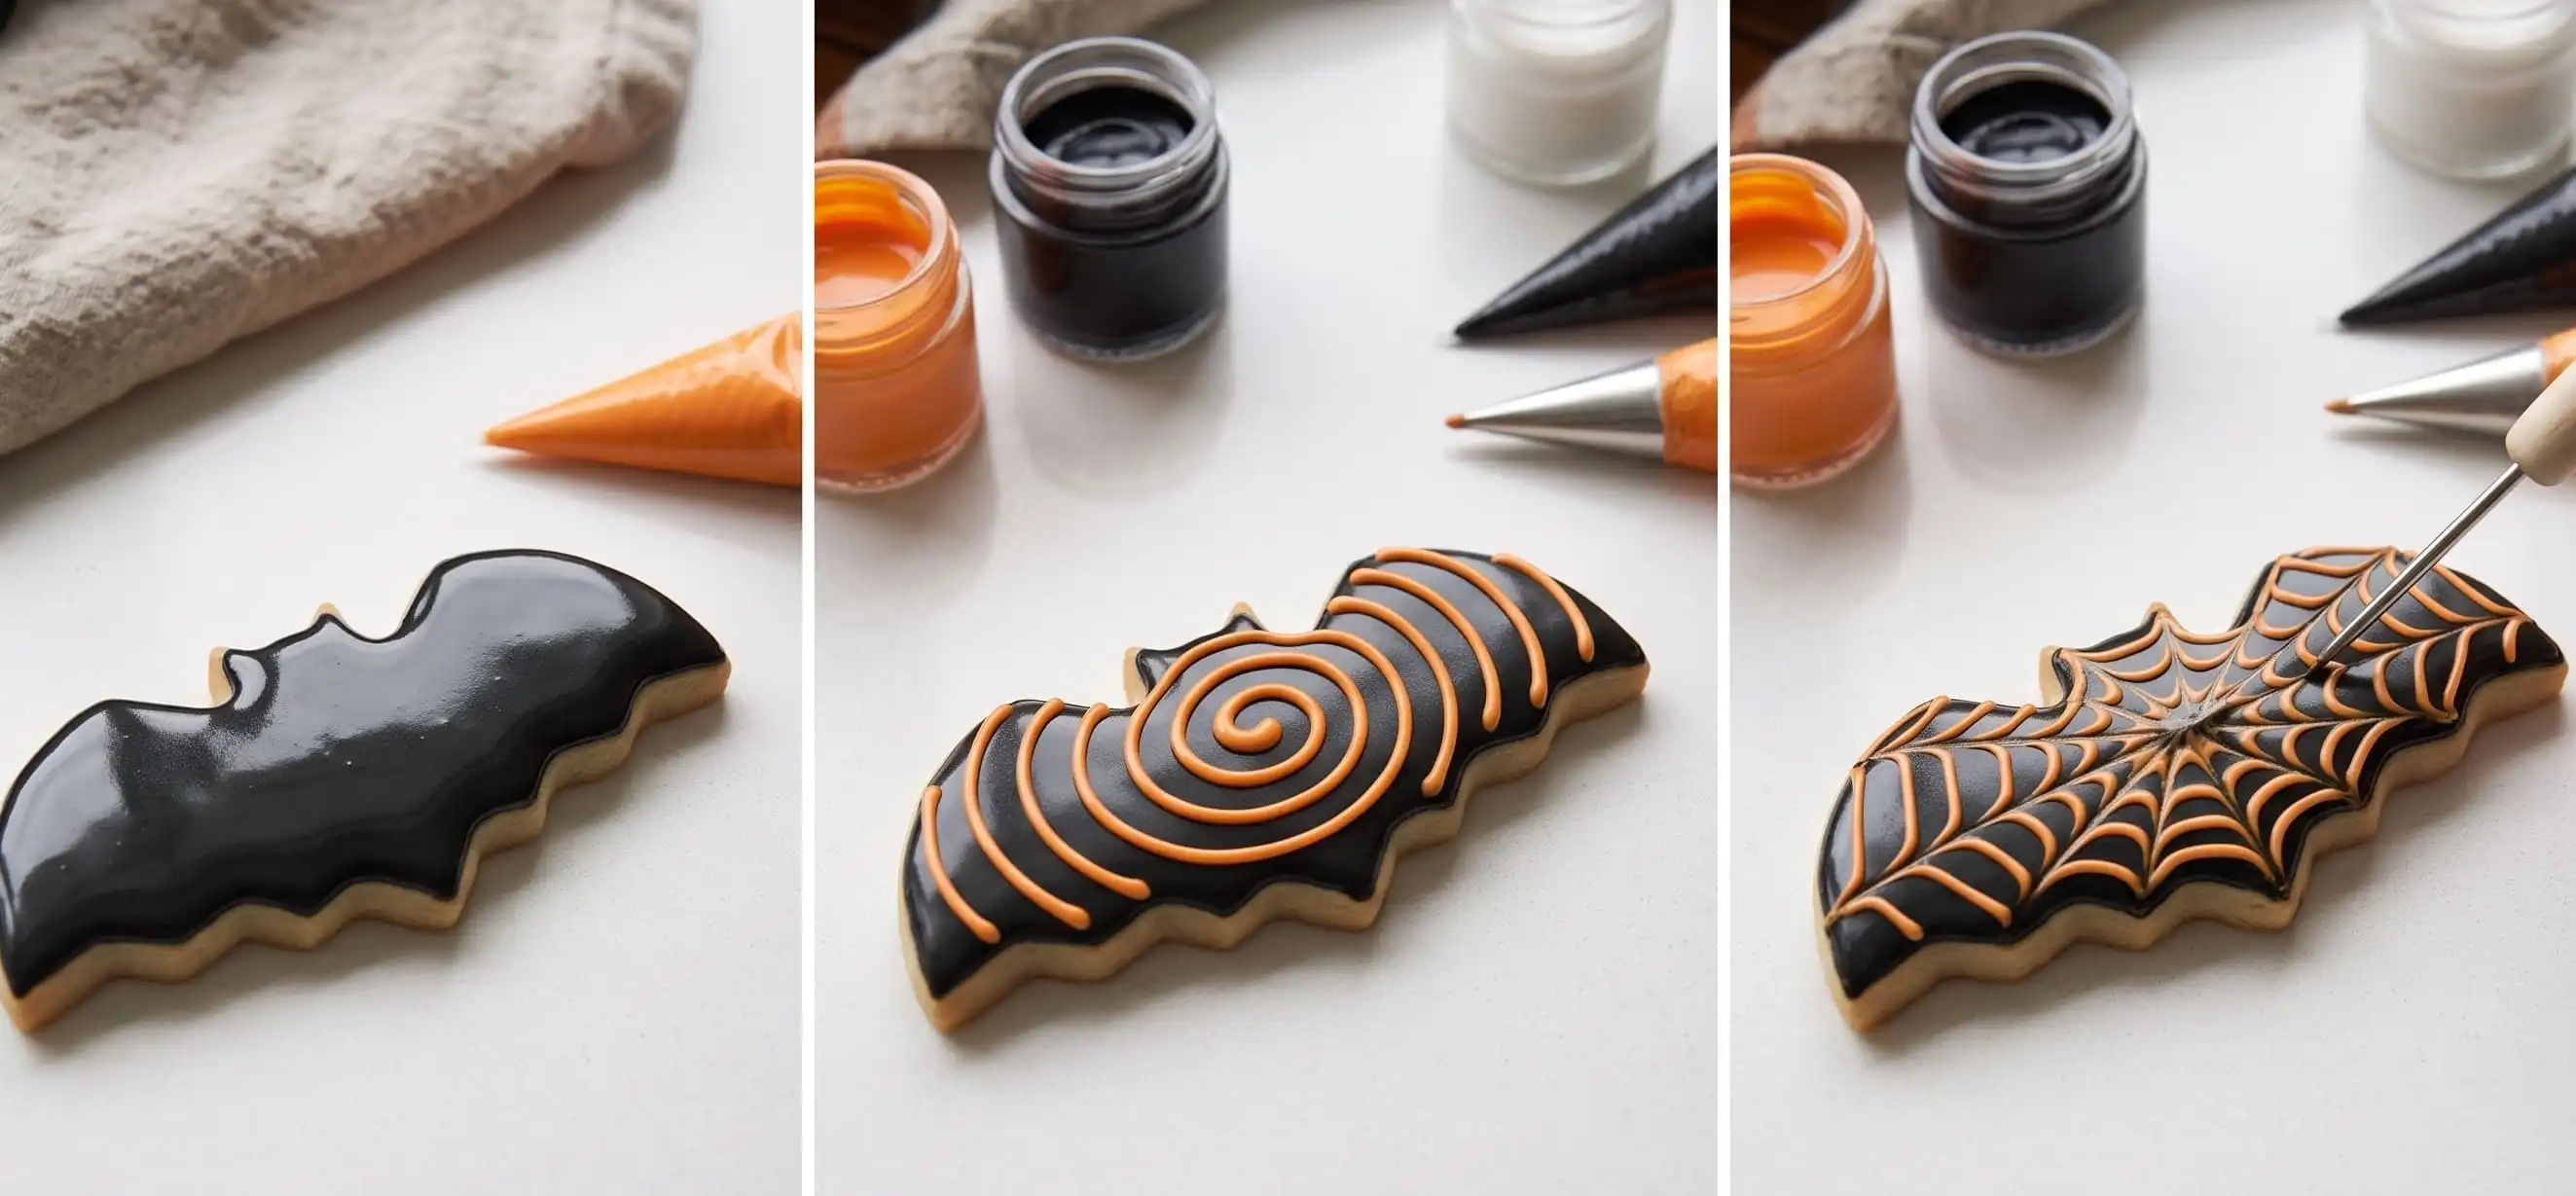
- Outline / Stiff Consistency: Holds a firm peak like toothpaste. Used for piping fine details, spiderweb strands, lettering, and borders.
- Flood Consistency: Levels out completely in 15 to 18 seconds when drawn through with a knife. Fills large surfaces smoothly without dripping off edges.
- Medium / Hybrid Consistency: Levels out in 20 to 25 seconds. Useful for single-bag piping where you outline and flood simultaneously.
Coloring and Air Pocket Elimination
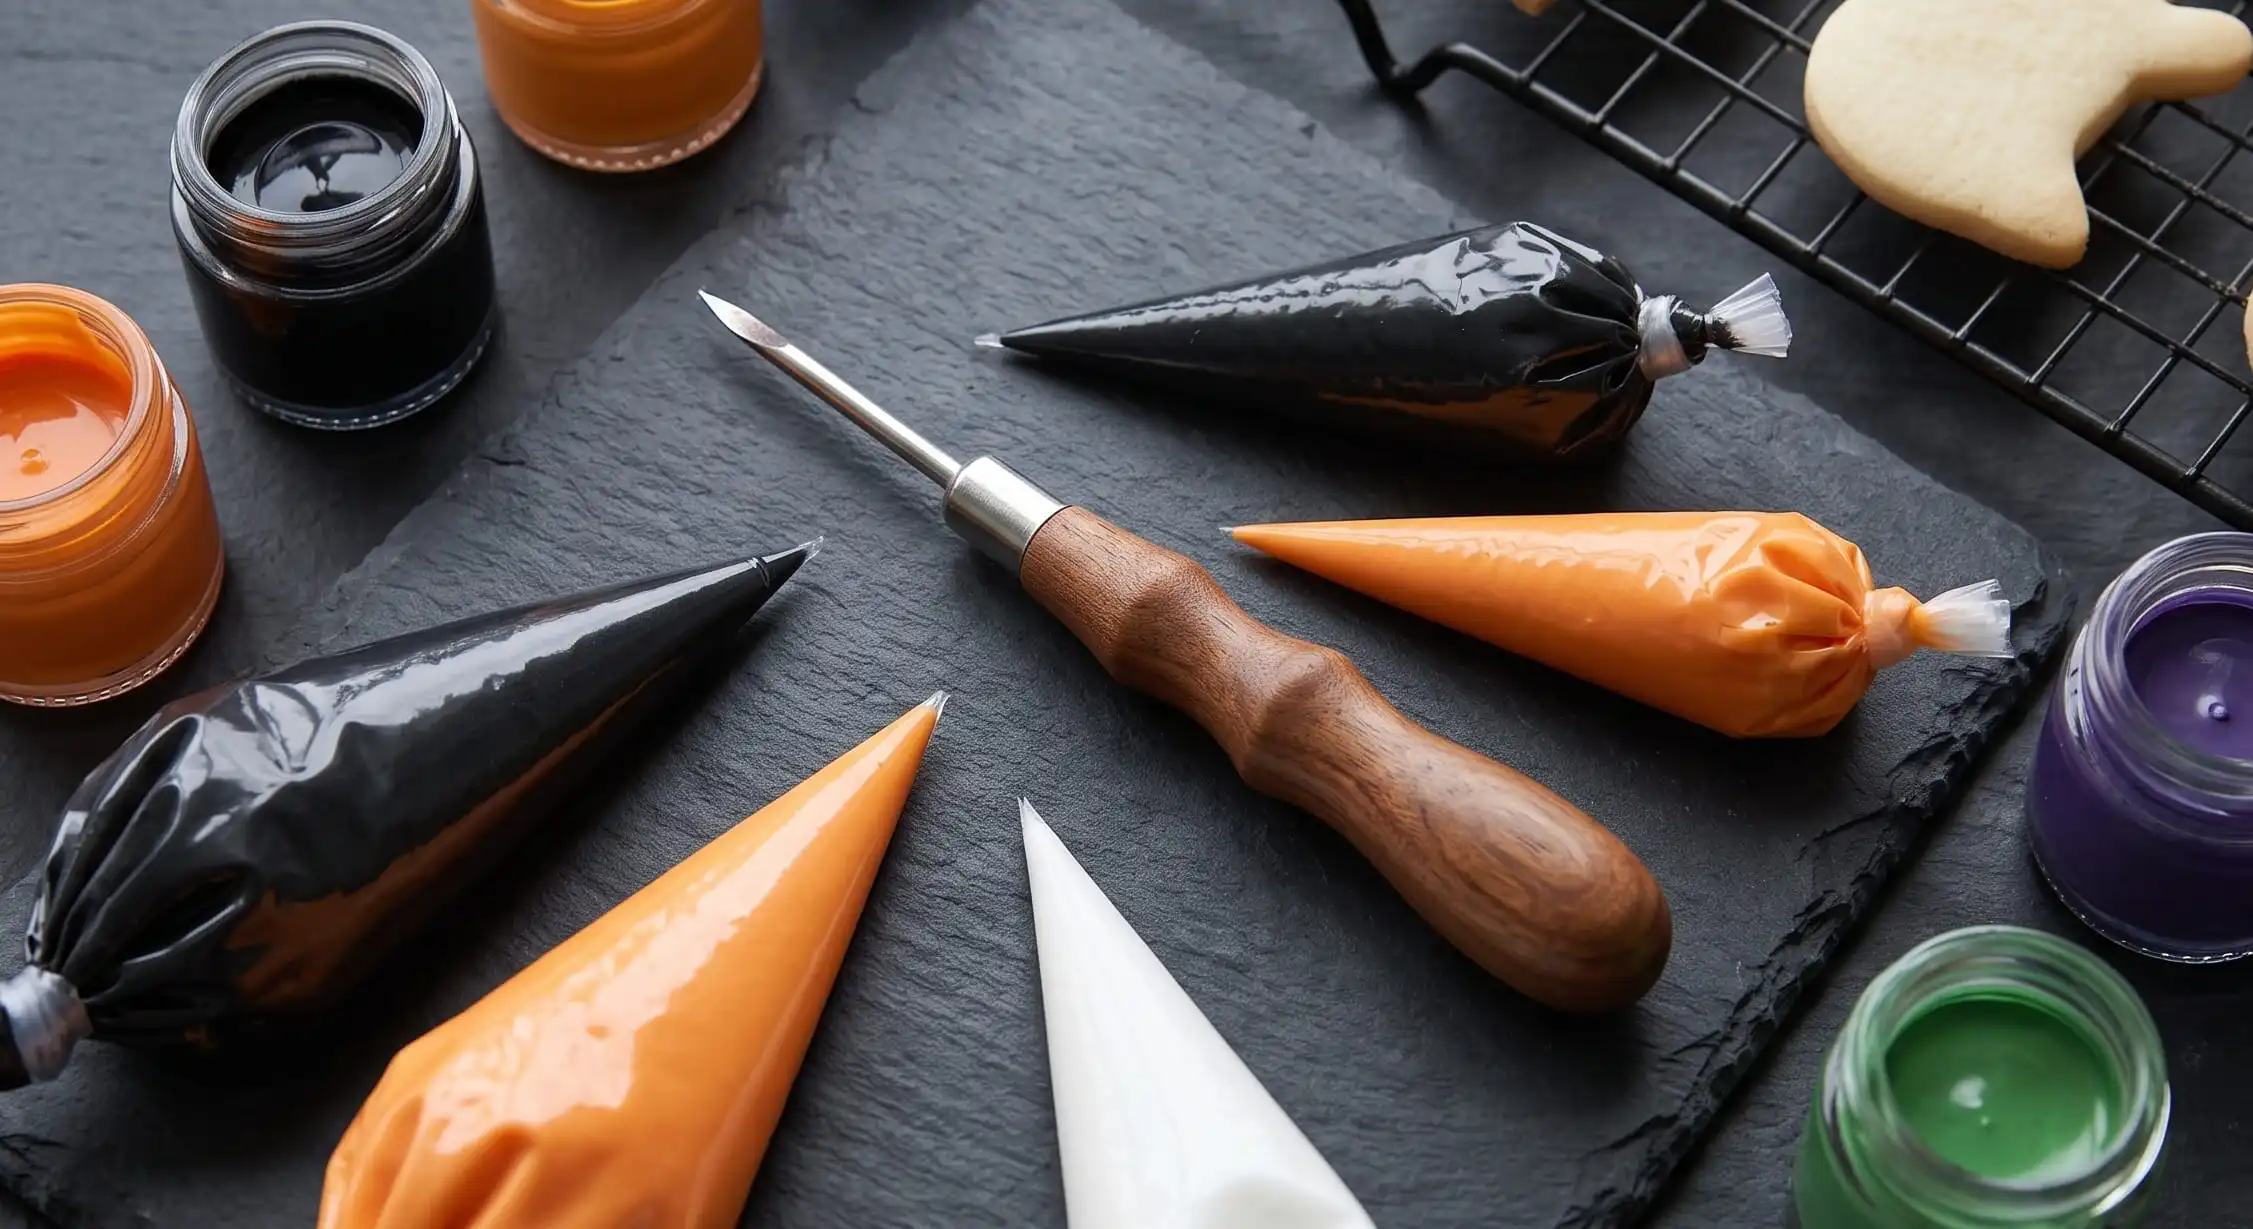
Use concentrated gel paste food colors rather than liquid food coloring. Liquid food coloring alters icing consistency and creates dull, diluted tones.
To prevent craters and air bubbles, let mixed icing sit covered with a damp towel for 15 minutes before bagging. Use a fine metal scribe tool or toothpick to pop surface bubbles right after flooding.
6 Iconic Halloween Cookie Designs
These beginner-to-advanced designs use standard Halloween cutters with efficient piping techniques.
1. Spooky Minimalist Ghosts
Flood a ghost-shaped cookie with pure white flood icing. Use your scribe tool to pull the icing into the tail points. While wet, drop two dots of black flood icing for the eyes and an oval for the mouth (wet-on-wet technique).
2. Textured Bandage Mummies
Flood an arch, gingerbread person, or tombstone shape with black icing and let dry for 2 hours. Using a flat ribbon tip (Wilton #44) and stiff white icing, pipe overlapping diagonal lines across the cookie, leaving a small gap for candy eyes.
3. Classic Webbed Pumpkins
Flood a pumpkin cutout in bright orange icing. Immediately pipe concentric black circles or arcs over the wet base. Drag a scribe tool outward from center to edge to create a web effect, cleaning the tip between strokes.
4. Midnight Sanding-Sugar Bats
Outline and flood bat cookies with charcoal or black icing. While wet, generously coat the surface with black sanding sugar. Let sit for 10 minutes, then shake off the excess for a shimmering, textured finish.
5. Bubbling Witch’s Cauldron
Flood the lower pot with black icing. After 1 hour, pipe neon green flood icing over the top rim to simulate boiling potion. Drop assorted round candy pearls into the green icing to create potion bubbles.
6. Floral Day of the Dead Skulls
Flood skull shapes in stark white. Once cured overnight, pipe colorful rosettes around the crown using a small star tip (Wilton #16) and add detailed black eye filigree with a fine #1 round tip.
Cookie Dough and Icing Comparison Table
Use this reference table to match the right dough, icing type, and decorating method to your skill level and event timeline.
| Recipe / Medium | Drying Time | Stackability | Skill Level | Best Halloween Use Case |
|---|---|---|---|---|
| Vanilla Sugar Dough | Bakes in 10 min | High (Rigid flat top) | Beginner | All-purpose canvas, ghosts, pumpkins |
| Black Cocoa Dough | Bakes in 11 min | High (Sturdy crumb) | Intermediate | Bats, spiders, tombstones, skeletons |
| Spiced Cardamom Dough | Bakes in 12 min | High (Dense structure) | Intermediate | 3D cookie houses, rustic autumn leaves |
| Royal Icing | 8–12 Hours | Excellent (Dries hard) | Intermediate to Advanced | Intricate designs, favor bags, shipping |
| Simple Sugar Glaze | 4–6 Hours | Moderate (Soft interior) | Beginner | Baking with kids, quick dips, sprinkles |
| Crusting Buttercream | 1–2 Hours (Skin only) | Low (Requires boxes) | Beginner | Party platters served same day |
Expert Tips and Edge-Case Scenarios
Professional bakers use these refined techniques to solve challenging decorating situations.
Preventing Icing Color Bleed in Humid Climates
High humidity causes rich black, red, and purple food dyes to bleed into white backgrounds. Use concentrated gel colors sparingly, and let base flood layers dry completely for 6 to 8 hours before piping contrasting colors on top.
Place decorated cookies in an air-conditioned room with a tabletop fan blowing gently across the trays. The constant airflow sets the surface quickly and prevents moisture migration.
Working with Tiny or Sharp Cutout Extensions
Narrow areas like cat tails and witch broomsticks burn faster than the main cookie body. Cut these extensions slightly thicker than the rest of the sheet, or shield the edges loosely with foil strips during the final 3 minutes of baking.
Always bake cookies of similar size on the same sheet. Mixing small 1-inch bat cookies with large 4-inch pumpkin cutouts leads to uneven baking.
Re-Rolling Dough Scraps Cleanly
Re-rolling scraps multiple times incorporates air and toughens gluten. Gather scrap strips together, press them into a flat block without aggressive kneading, and roll them out once more between parchment.
Save third-round scraps for simple small shapes like mini stars or drops that bake quickly without needing sharp edge definition.
Common Mistakes and How to Fix Them
Learn how to identify and avoid common pitfalls throughout the baking and decorating process.
1. Puffy, Rounded Cookie Edges
Why It Happens: Using leaveners (baking powder or baking soda) or over-creaming warm butter introduces excess aeration.
How to Avoid It: Omit leavening agents entirely from cutout recipes and cream butter on low-medium speed for no more than 90 seconds.
2. Sunken Icing Centers (Cratering)
Why It Happens: Small, narrow flooded sections (like spider legs or eyeball centers) contain trapped air that collapses as moisture evaporates.
How to Avoid It: Use a slightly thicker flood consistency (18 to 20 seconds) in small areas. Dry cookies in front of a countertop fan or in a dehydrator on the lowest setting (95°F / 35°C) for the first 30 minutes.
3. Dimpled, Uneven Cookie Bottoms
Why It Happens: Trapped steam under parchment paper creates pockets that distort the cookie base.
How to Avoid It: Bake on perforated silicone baking mats (like a Silpain). The mesh allows steam to escape downward, producing completely flat bottoms.
4. Fragile, Breaking Cookie Shapes
Why It Happens: Rolling the dough thinner than 1/4 inch (6mm) creates delicate cookies that break easily under the weight of royal icing.
How to Avoid It: Use rolling pin guide rings to maintain a uniform 1/4-inch to 5/16-inch thickness across the entire slab.
Kitchen Best Practices and Timeline Planning
Managing the baking and decorating stages over multiple days keeps the process organized and stress-free.
Recommended 3-Day Production Schedule
- Day 1: Prepare and Cut the Dough. Mix your dough, roll between parchment sheets, chill, cut shapes, and freeze the cutouts unbaked.
- Day 2: Bake and Base Flood. Bake cookies in the morning. Mix royal icing colors in the afternoon and apply base flood coats. Let cure overnight.
- Day 3: Detail Work and Packaging. Pipe fine lines, textures, and lettering. Let sit for 6 hours, then package into airtight treat bags.
Packaging and Storage Guidelines
Ensure royal icing has dried for a full 12 to 24 hours before bagging. Store cookies in food-grade heat-sealed cellophane bags to preserve freshness for up to 3 weeks at room temperature.
Do not store decorated cookies in the refrigerator, as condensation forms on the chilled royal icing when brought to room temperature, dissolving fine lines and causing colors to run.
Recommended Tools and Equipment
These key tools help you achieve precise cuts and consistent decorating results.
- Adjustable Rolling Pin: Rolling pins fitted with color-coded thickness guide rings ensure flat, even slabs.
- Perforated Silicone Baking Mats: Promotes even heat conduction and eliminates warped cookie bottoms.
- Tipless Piping Bags: Thin polyethylene bags allow you to cut precise openings without needing metal couplers.
- Metal Scribe Tool: Pops air bubbles and guides flood icing cleanly into tight corners.
- Dough Scraper / Offset Spatula: Transfers chilled dough cuts to sheet pans without stretching silhouettes.
Related Baking Guides
Expand your holiday baking repertoire with these complementary resources:
Educational Resources
Consult these reputable culinary references for deeper insight into food science and safe kitchen practices:
- King Arthur Baking: Reference guides on baker’s percentages, flour protein comparisons, and dough temperatures.
- USDA Food Safety and Inspection Service: Proper storage guidelines for egg-based icings and room-temperature baked goods.
Key Takeaways
- Omit leaveners: Never use baking powder or baking soda in detailed Halloween cutouts.
- Roll before chilling: Roll freshly mixed dough between parchment sheets before chilling for a smooth, flat surface.
- Flash freeze: Place cut shapes in the freezer for 10 minutes right before baking to lock in sharp outlines.
- Master consistency: Use 15-second flood icing for smooth bases and stiff-peak icing for dimensional details.
- Plan ahead: Break dough preparation, baking, and decorating into separate stages across 2 or 3 days.
Summary
Baking clean, sharp Halloween cookie cutter cookies is all about proper temperature control and balanced ingredients. By skipping leavening agents, chilling your dough sheets thoroughly, and managing your icing consistencies, you can create professional-quality cookies right at home.
Gather your favorite Halloween cutters, prepare your dough slabs in advance, and enjoy crafting spooky, delicious treats for your family and friends this season.
Frequently Asked Questions
Why do my Halloween cutout cookies lose their shape in the oven?
Cookies spread when butter melts before the flour proteins set. This happens if the dough gets too warm, has too much air whipped in during creaming, or contains chemical leaveners like baking powder. To fix this, omit leaveners, keep the dough cold, and flash-freeze cut shapes for 10 minutes before baking.
Should I roll out cookie dough before or after chilling?
Roll your dough immediately after mixing, while it is soft and pliable, between two sheets of parchment paper. Chilling the dough after rolling creates perfectly flat slabs that cut cleanly without requiring extra bench flour, which can dry out the cookies.
What thickness is best for Halloween cookie cutter cookies?
A thickness of 1/4 inch (6mm) is standard for sugar cookies, providing enough structural stability to hold royal icing without breaking. For delicate shapes with thin extensions, such as bat wings or skeleton bones, roll dough to 5/16 inch (8mm) for extra durability.
How do I prevent dough from sticking inside intricate cutters?
Dip your cookie cutters in cornstarch or all-purpose flour before pressing into the dough. Always work with cold, firm dough sheets. If dough gets trapped in tight corners, use a fine scribe tool or a soft culinary paintbrush to release it gently without damaging the edges.
How long does royal icing take to dry on cutout cookies?
Royal icing forms a thin surface skin in 20 to 30 minutes, but requires 8 to 12 hours at room temperature to cure completely. To speed up the process, place decorated cookies in front of a gentle tabletop fan or in a food dehydrator set to 95°F (35°C) for the first hour.
Can I freeze decorated Halloween cookies?
Yes, fully cured royal icing cookies freeze well for up to 3 months. Layer them between parchment paper inside an airtight container. When thawing, leave the container sealed on the counter for several hours to prevent condensation from forming directly on the icing.
What is black cocoa, and why is it used for Halloween cookies?
Black cocoa is an ultra-alkalized cocoa powder that provides a deep, natural black color and an Oreo-like chocolate taste. Using black cocoa powder eliminates the need for large amounts of black artificial food dye, which can leave a bitter aftertaste.