
Quick Answer: How to Make a Cookie in a Frying Pan
To make a cookie in a frying pan on the stovetop, melt 4 tablespoons (56g) of unsalted butter directly in an 8-inch skillet over low heat. Whisk in 50 grams of granulated sugar and 55 grams of brown sugar, cool slightly, then blend in 1 egg yolk and 1/2 teaspoon of vanilla extract.
Gently fold in 95 grams of all-purpose flour, 1/4 teaspoon of baking soda, a pinch of salt, and 85 grams of chopped chocolate. Press the dough flat, cover with a tight-fitting lid, and cook on the lowest flame for 12 to 16 minutes until the edges set and the center turns matte.
- Optimal Pan: Well-seasoned 8-inch cast iron or heavy-bottomed stainless steel.
- Burner Setting: Ultra-low heat to avoid scorching the base before the center bakes.
- Lid Requirement: Must use a tight lid to trap ambient steam and radiate downward heat.
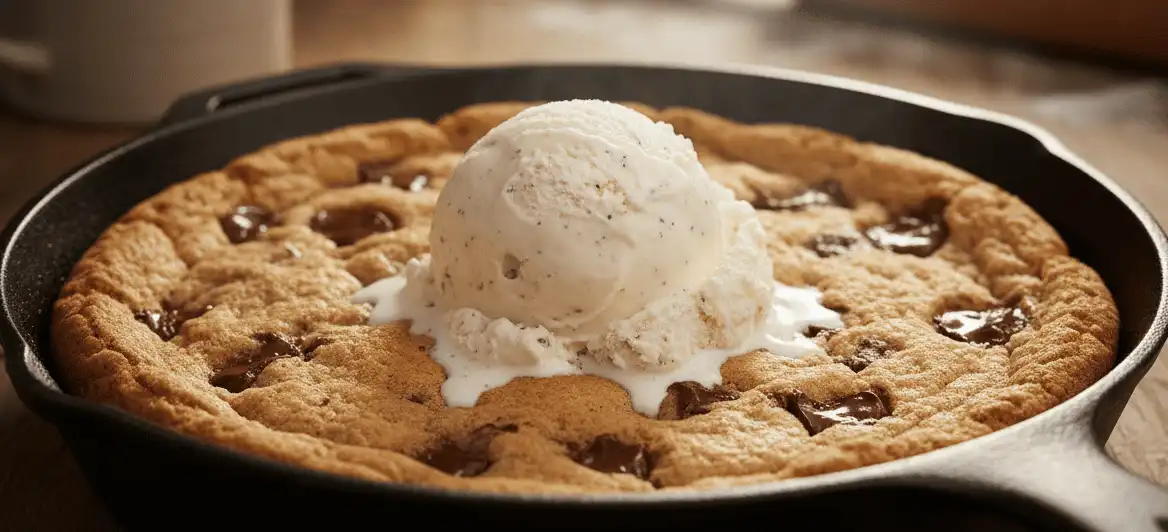
Why Bake a Cookie in a Frying Pan?
Baking a cookie in a frying pan bridges the gap between casual comfort food and elevated pastry work. It eliminates the need to preheat a large oven, chill sheet pans, or scoop individual dough portions. You assemble, cook, and serve the dessert in a single cooking vessel.
The culinary texture produced by a pan is unique. Direct contact with conductive metal yields a deep, caramelized bottom crust that standard baking sheets rarely match. Meanwhile, the interior stays soft, dense, and molten.
This method solves common domestic kitchen problems. It keeps your kitchen cool during summer months and provides freshly baked goods in dorm rooms, RV kitchens, and vacation rentals without reliable ovens. Anyone with a working stovetop burner can master it.
Thermodynamics: Stovetop vs. Oven Baking
Traditional oven baking relies on indirect convection and radiant heat. Hot air circulates around the dough, cooking the top, sides, and bottom simultaneously at a uniform pace. This surrounding warmth dries the surface, driving Maillard browning and sugar caramelization evenly across the entire exterior crust.
Stovetop pan cooking functions primarily via conductive heat transfer. Energy moves directly from the burner into the bottom of the pan and upward into the dough mass. Without intervention, conductive heat burns the base of a thick cookie long before the top surface solidifies.
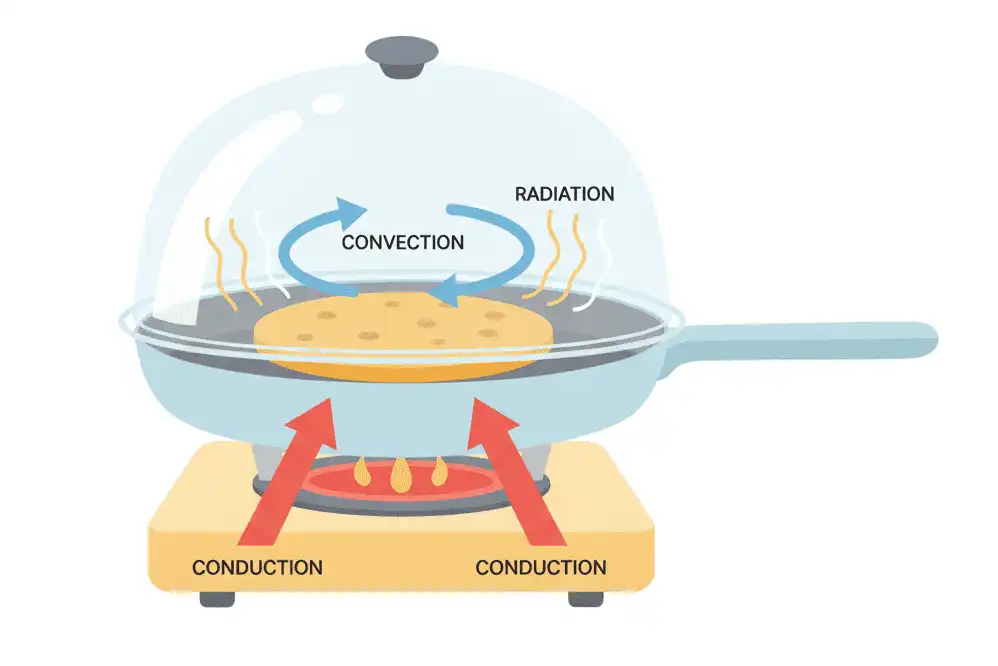
You can overcome this vertical thermal gradient by trapping steam with a heavy lid. As moisture evaporates from the butter and eggs, the trapped vapor collects beneath the lid, condensing and circulating radiant energy downward. This convective loop cooks the top surface without requiring an open flame overhead.
Residual heat must also be accounted for in skillet baking. Heavy metals hold thermal energy long after you turn off the burner. Pulling the pan off the burner 2 to 3 minutes before the center looks fully done guarantees you will not overcook the dessert through carryover heating.
Selecting the Best Pan Material
The metal composition of your skillet dictates heat dispersion, crust crunch, and sticking tendencies. Not every frying pan performs identically when handling dense, sugary doughs.
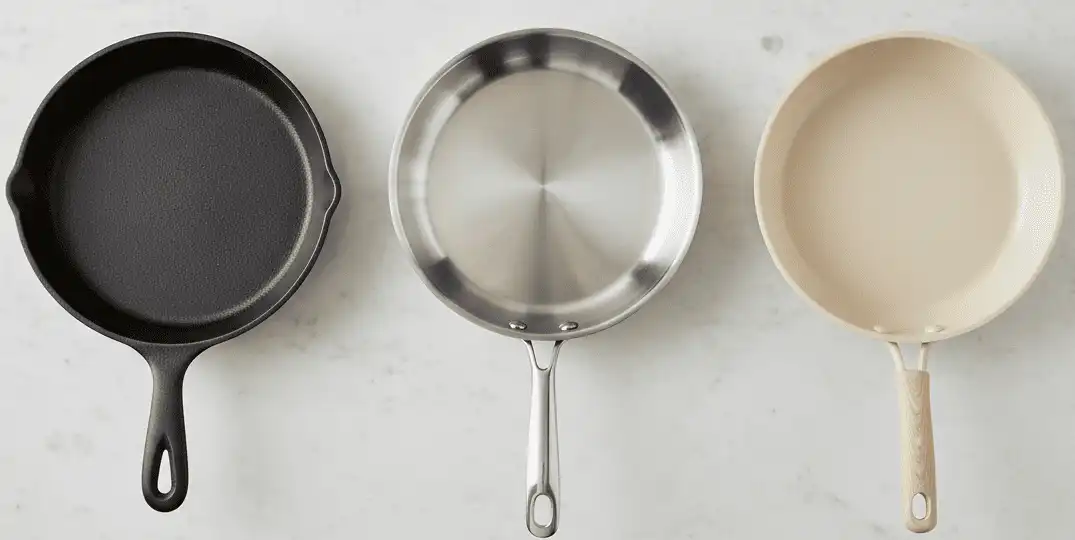
Cast Iron Skillets
Cast iron is the gold standard for baking cookies on a burner. It possesses high volumetric heat capacity, meaning it absorbs energy slowly and radiates it with exceptional uniformity. This thermal stability reduces hot spots created by narrow burner flames.
A well-seasoned cast iron pan naturally releases caramelized sugars without stripping your crust. The dark surface enhances radiant heat transfer, creating an intensely crisp exterior perimeter. Always choose an 8-inch to 10-inch skillet for standard single-batch recipes.
Carbon Steel Pans
Carbon steel shares many benefits with cast iron but responds much faster to burner adjustments. It weighs less and heats up rapidly, making it suitable for responsive temperature control. The slick patina of cured carbon steel prevents dough from gripping the bottom.
Because carbon steel is thinner than cast iron, it can produce localized scorched rings over aggressive gas flames. You must keep your burner dial at its absolute minimum when working with carbon steel. Pair it with a heat diffuser plate for optimal results.
Tri-Ply Stainless Steel
Stainless steel skillets lined with an aluminum core distribute heat quickly across the entire cooking surface. This aluminum layer minimizes scorching over central burner flames. The lighter interior color also lets you monitor butter browning with precision.
The primary hurdle with stainless steel is surface adhesion. Sugars and proteins naturally bond to hot stainless surfaces. To prevent sticking, you must coat the bottom and sides thoroughly with butter, or cut a small round of parchment paper to line the base.
Non-Stick (PTFE and Ceramic)
Non-stick frying pans offer effortless release and clean effortlessly. They are an accessible, low-risk choice for beginners worried about sticking dough. You can slide the finished cookie onto a serving plate without leaving crust behind.
However, non-stick coatings cannot develop the deep, crunchy Maillard crust that cast iron generates. Never preheat empty non-stick cookware on high heat, and avoid metal utensils when scooping or cutting the cookie. Ceramic non-stick coatings provide slightly superior browning compared to standard PTFE pans.
Ingredient Chemistry and Ratios
Standard drop cookie dough does not translate cleanly to a frying pan without minor adjustments. The enclosed moisture of a covered skillet changes how sugars melt and flours set. Balancing your ingredient ratios ensures a crisp edge and a tender, fully cooked center.
Flour Selection and Protein Content
All-purpose flour with a protein content between 10% and 11.5% produces the best structural balance. This level provides sufficient gluten to trap expanding gas bubbles without turning the cookie tough. High-protein bread flours make stovetop cookies rubbery, while low-protein cake flours lack the structure to support heavy chocolate chunks.
Sugar Hydration: White vs. Brown
Granulated white sugar promotes spreading and creates brittle, caramelized outer edges through crystallization. Brown sugar contains molasses, which adds hygroscopic moisture, acidity, and rich toffee notes. Acidity in brown sugar reacts with baking soda to give your dough immediate vertical lift.
A ratio leaning toward brown sugar (roughly 60% brown to 40% white) yields the classic gooey center of a skillet cookie. Increasing white sugar produces a firmer, snappier crumb that holds up well when sliced into wedges.
Butter Dynamics: Melted vs. Creamed
Traditional drop cookies rely on creaming room-temperature butter with sugar to incorporate micro-pockets of air. For a frying pan cookie, melted butter is vastly superior. Melting creates a dense, chewy texture reminiscent of a fudge brownie.
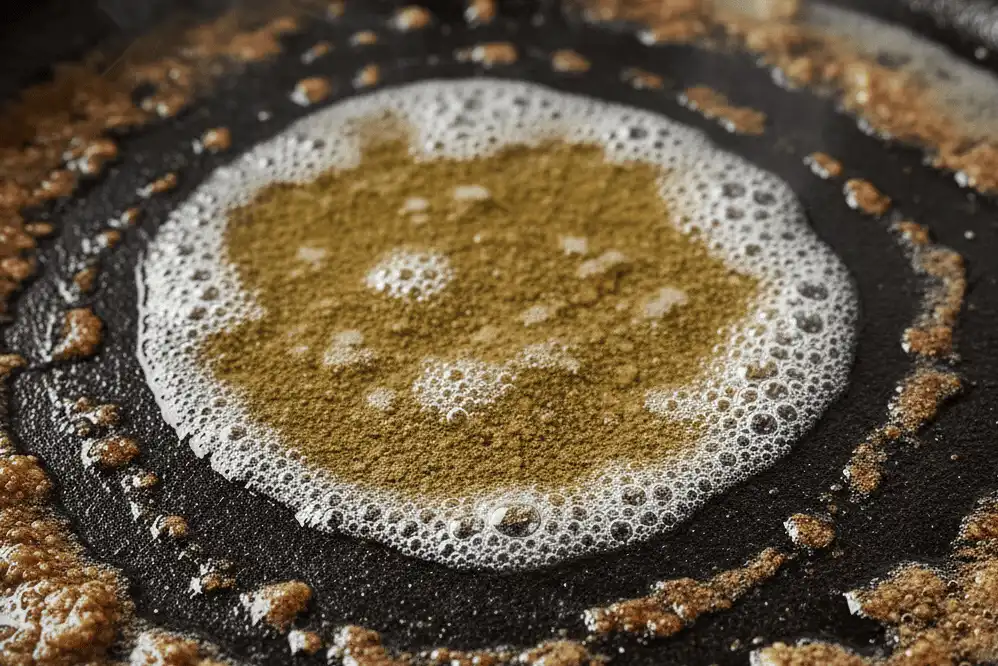
Browning your butter directly inside the frying pan before adding sugar adds an extra layer of depth. Browning vaporizes water content and toast milk solids, infusing nutty aromatic notes into the dough. Let the hot butter cool to lukewarm before adding eggs to avoid curdling.
Egg Emulsification
Whole eggs provide moisture, structure, and leavening via steam. In a covered frying pan, excess water trapped under the lid can turn dough unpleasantly spongy. Using an egg yolk alongside a whole egg—or simply using single yolks for small batches—adds rich fat while limiting excess hydration.
Master Recipe: Stovetop Chocolate Chip Pan Cookie
This recipe is calibrated for a standard 8-inch frying pan or cast iron skillet. It delivers an ultra-chewy center, crisp edges, and molten pools of chocolate directly on the stovetop.
| Ingredient | Metric (Weight) | US Volume | Functional Purpose |
|---|---|---|---|
| Unsalted Butter | 56 g | 4 tablespoons (1/4 cup) | Fat base, tender crumb, rich flavor |
| Light Brown Sugar | 55 g | 1/4 cup firmly packed | Moisture, chewiness, caramel note |
| Granulated White Sugar | 50 g | 1/4 cup | Edge crispness and surface browning |
| Egg Yolk (Large) | 18 g | 1 large yolk | Lecithin for emulsion, fudgy texture |
| Pure Vanilla Extract | 3 g | 1/2 teaspoon | Aromatic enhancer |
| All-Purpose Flour | 95 g | 3/4 cup level | Primary structure and gluten web |
| Baking Soda | 1.5 g | 1/4 teaspoon | Chemical leavening and browning |
| Fine Sea Salt | 1.5 g | 1/4 teaspoon | Balances sweetness, strengthens gluten |
| Semi-Sweet Chocolate | 85 g | 1/2 cup coarsely chopped | Molten pockets of rich cocoa |
| Flaky Sea Salt (Maldon) | To finish | Pinch | Textural contrast and finish |
Step-by-Step Cooking Instructions
Follow these detailed steps to cook a cookie in a frying pan without burning the bottom or drying out the crumb.
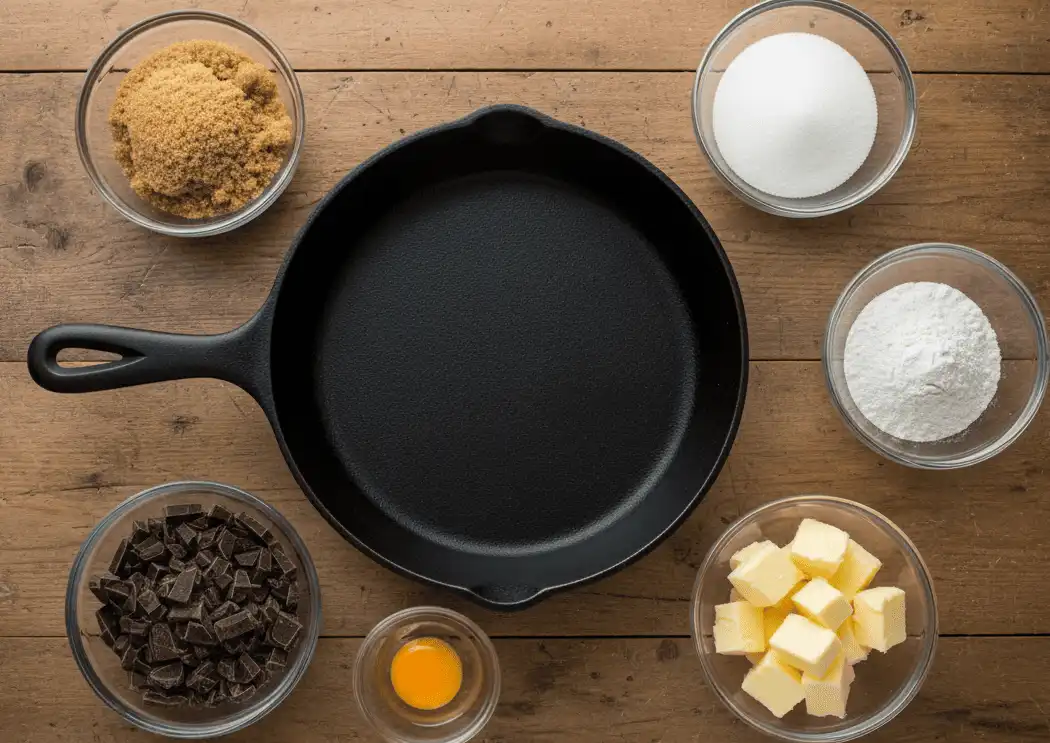
Step 1: Pan Preparation and Fat Melting
What: Melt the unsalted butter directly over low heat in your 8-inch frying pan.
Why: Melting the butter directly inside the pan saves dishes and seasons your cookware before cooking the batter. It coats every interior crevice with protective fat.
How: Place the pan over low heat on your smallest burner. Cut butter into small cubes so it melts evenly. Swirl the pan occasionally until the butter liquifies completely into a clear, foaming liquid.
Common Mistake: Boiling the butter until the water evaporates completely, which dries out the final dough. Remove the pan from heat as soon as the butter is fully melted.
Pro Tip: Allow the butter to froth gently for an extra 60 seconds until light golden specks form on the bottom. This adds an irresistible toasted hazelnut profile.
Step 2: Sugar Dissolution and Thermal Drop
What: Whisk both brown and white sugars directly into the melted butter off the heat.
Why: Blending sugar into warm fat draws out natural molasses oils without fully dissolving sugar crystals. This creates the signature chewy bite and shiny surface crust.
How: Pull the skillet off the burner and place it on a heatproof trivet. Pour in both sugars. Whisk vigorously with a fork or silicone whisk for 45 to 60 seconds until the mixture looks like glossy wet sand.
Common Mistake: Adding eggs while the skillet and butter mixture are still scorching hot, which scrambles the yolk.
Pro Tip: Touch the exterior base of the pan with your palm. If it feels mildly warm rather than hot, it is safe to incorporate your raw yolk.
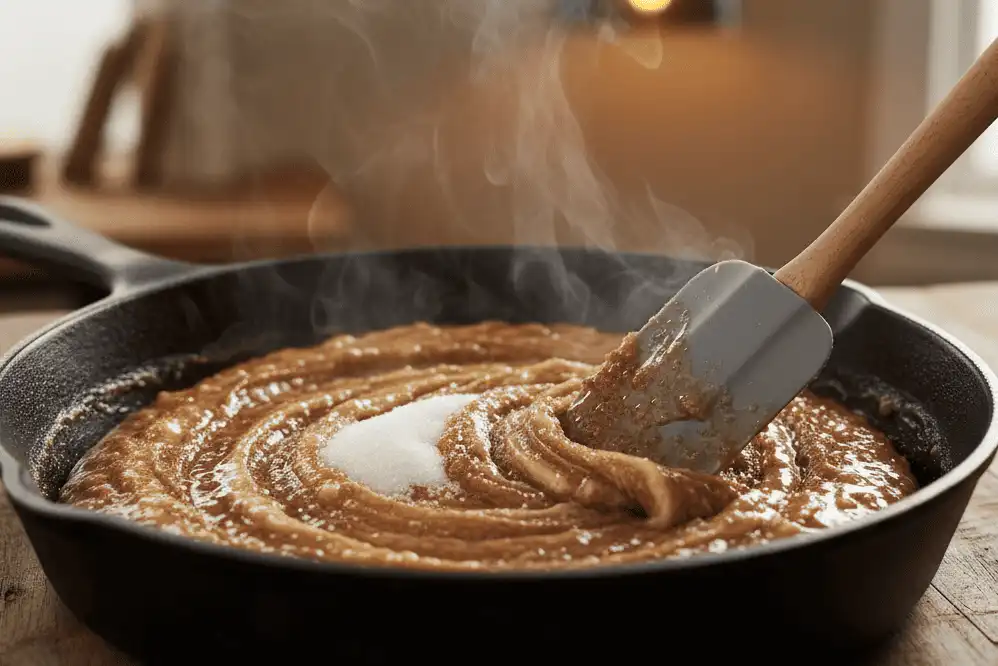
Step 3: Emulsification
What: Add the egg yolk and pure vanilla extract to the lukewarm sugar-butter mixture.
Why: The natural lecithin in the egg yolk bonds the melted fat with the sugary syrup. This prevents butter from leaking out of the cookie dough while baking.
How: Drop the egg yolk and vanilla into the center of the pan. Whisk vigorously in tight circles for 60 seconds. The mixture will lighten from a dark grainy brown to a smooth, pale butterscotch ribbons.
Common Mistake: Inadequate whisking. If fat separates around the perimeter of your sugar paste, your cookie will turn out greasy.
Pro Tip: Use an egg yolk straight from the refrigerator. The cold yolk drops the overall temperature of the pan faster, making it ready for flour.
Step 4: Incorporating Dry Ingredients
What: Fold in the all-purpose flour, baking soda, and fine sea salt.
Why: Gentle folding prevents over-developing gluten. Excessive gluten produces a tough, bready texture instead of a tender cookie.
How: Dump the flour, baking soda, and salt directly on top of the wet mixture. Switch from a whisk to a flexible silicone spatula. Cut down through the center, scrape the pan wall, and fold the dough over itself until no white flour streaks remain.
Common Mistake: Overworking the dough by stirring aggressively in rapid circles, which activates gluten bands.
Pro Tip: Sift the flour and baking soda through a small wire strainer over the pan to eliminate small leavening clumps.
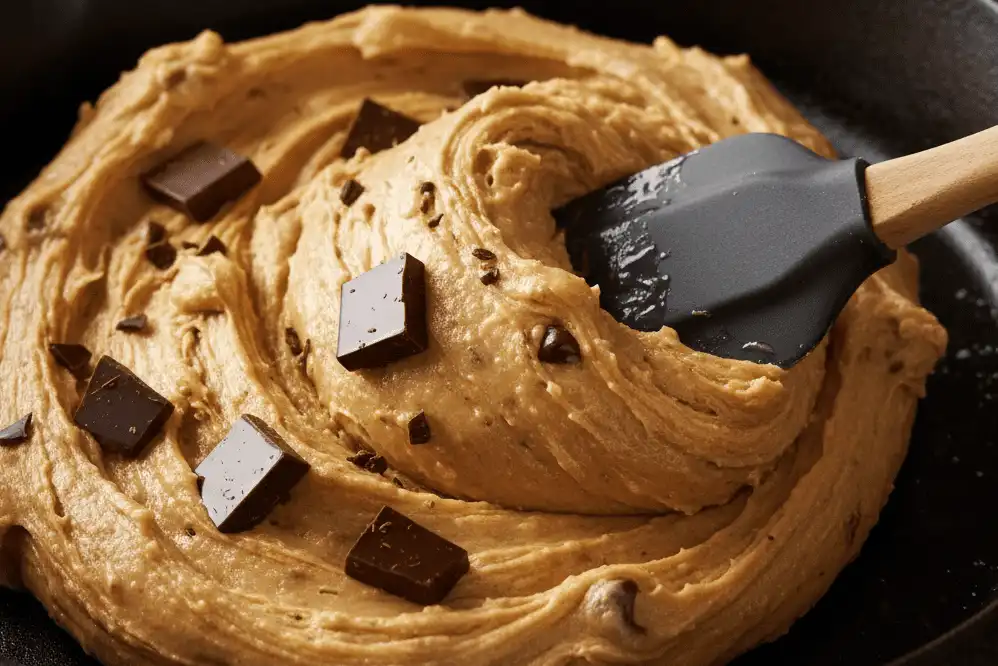
Step 5: Chocolate Distribution and Surface Flattening
What: Fold in the chopped chocolate and press the dough out into a uniform layer across the pan bottom.
Why: Even thickness ensures that all portions of the cookie cook at an identical rate across the thermal surface.
How: Dump two-thirds of the chopped chocolate into the dough and fold gently. Press the dough flat across the pan using clean fingers or an offset spatula. Scatter the remaining chocolate chunks across the top surface, pressing them gently into the dough.
Common Mistake: Pushing dough too far up the sides of the pan, which creates burnt outer rims.
Pro Tip: Chopped baking bars perform better than chocolate chips. Bars contain no stabilizers, creating glossy pools of melted chocolate across the top.
Step 6: The Stovetop Bake
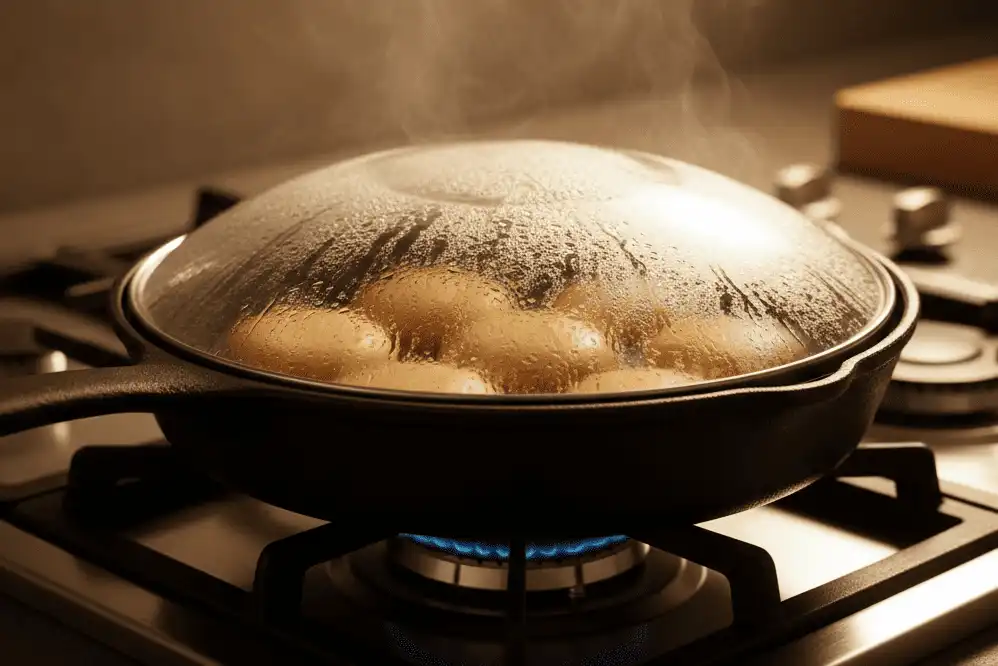
What: Cover the skillet with a snug lid and cook over low heat for 12 to 16 minutes.
Why: A secure lid traps moisture, creating an enclosed sauna that steams and sets the top crust while the base caramelizes.
How: Place the covered pan on your smallest stovetop burner. Turn the dial to the absolute lowest setting. Check the cookie at the 10-minute mark by briefly lifting the lid: the rim should look puffed and firm, while the center appears soft and matte.
Common Mistake: Setting the burner to medium heat. Sugars in direct contact with metal scorch before heat can travel upward.
Pro Tip: If your lid lacks a steam hole and builds heavy condensation droplets, wrap the underside of the lid in a clean kitchen towel to catch drips.
Step 7: The Carryover Rest
What: Remove the pan from heat and let it rest undisturbed for 8 to 10 minutes.
Why: Dense cookware holds significant residual thermal energy. Residual heat finishes setting the center dough away from direct flame.
How: Set the hot skillet onto a heat-resistant cooling rack or unlit burner. Remove the lid immediately to stop steam buildup and let the crust crisp up. Sprinkle the top with flaky sea salt.
Common Mistake: Digging into the cookie immediately. Liquid starches need time to settle and hold their shape.
Pro Tip: Top with a scoop of premium whole-milk vanilla bean ice cream at minute eight for the perfect temperature contrast.
Pan Material Comparison Guide
Every frying pan conducts heat differently. The table below illustrates how different cooking vessels perform for making stovetop pan cookies.
| Cookware Material | Heat Retention | Browning Potential | Sticking Risk | Difficulty Rating |
|---|---|---|---|---|
| Cast Iron Skillet | Exceptional (Sustained) | Superior (Crisp, deep crust) | Low (if seasoned) | Beginner-Friendly |
| Carbon Steel Pan | Moderate to High | High (Crisp bottom) | Low (with good patina) | Intermediate |
| Tri-Ply Stainless Steel | Moderate | Moderate to High | High (Requires parchment) | Advanced |
| Non-Stick (PTFE/Ceramic) | Low to Moderate | Low (Soft, pale bottom) | Zero (Effortless release) | Beginner-Friendly |
| Enameled Cast Iron | Exceptional | High (Gentle browning) | Moderate (Needs light grease) | Easy |
Stovetop Heat Management & Flame Taming
Controlling your heat is the single most important skill when making a cookie in a frying pan. Traditional ovens distribute heat evenly around food, whereas stove burners shoot intense, concentrated energy right into the bottom of the pan.
Standard gas burners often run too hot even on their lowest dial setting. If you see smoking fat or smell scorched sugar within the first five minutes, your heat is too aggressive. Shift the skillet to your smallest simmer burner immediately.
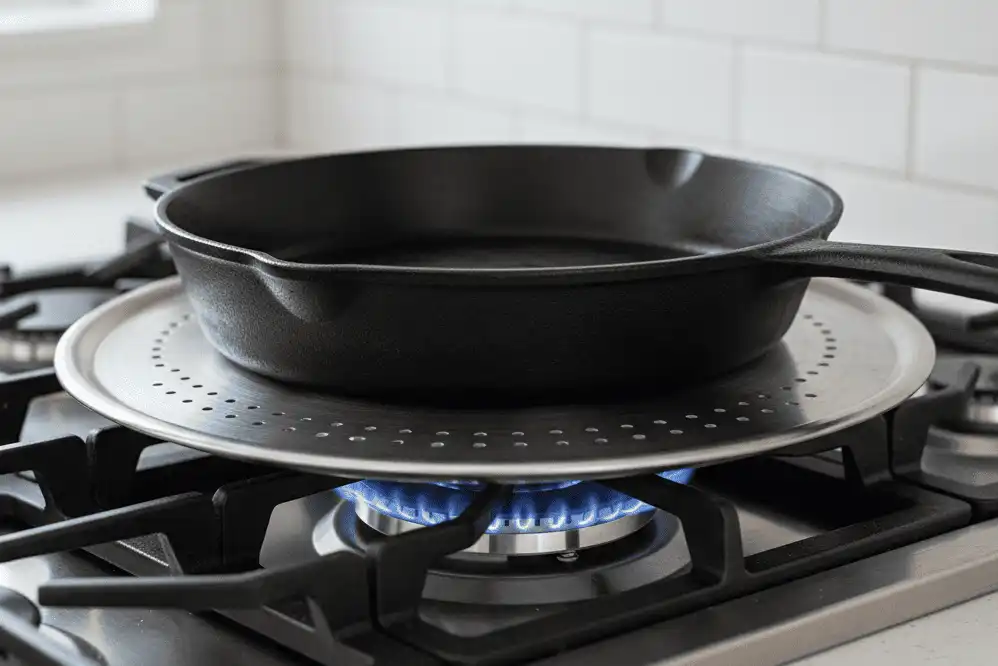
A metal heat diffuser plate acts as an indispensable heat shield for pan baking. This inexpensive steel or cast-iron disc sits directly on the burner grate below your skillet. It breaks up direct flames, spreading heat outward for an even, gentle bake.
If you don’t own a heat diffuser, you can stack two heavy cast-iron pans. Place a larger 10-inch or 12-inch cast iron skillet directly on the stove flame, then nest your 8-inch skillet inside it. This double-pan technique buffers harsh heat spikes, shielding your delicate cookie base from direct thermal shock.
Electric coil and induction ranges present unique challenges. Electric coils transfer heat through uneven contact rings, which can burn circular marks into the dough. Induction cooktops generate heat quickly inside the pan base without ambient air warmth, making a heavy lid crucial for trapping rising heat.
Gourmet Flavor Variations and Dietary Substitutions
Once you master the base chocolate chip dough, adapt the recipe to suit your favorite flavor profiles or dietary needs.
Double Chocolate Espresso Pan Cookie
Reduce the all-purpose flour to 75 grams. Sift in 20 grams of Dutch-processed cocoa powder and 1 teaspoon of instant espresso powder along with the dry ingredients. Swap semi-sweet chocolate chunks for a blend of white chocolate and milk chocolate chips.
Campfire S’mores Skillet Cookie
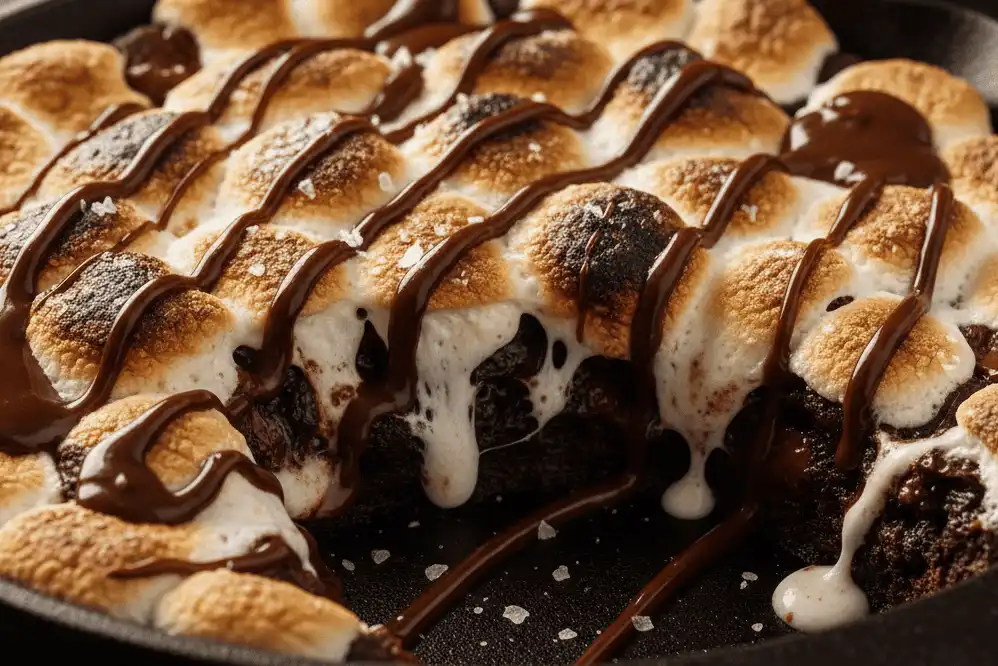
Replace 25 grams of all-purpose flour with finely ground graham cracker crumbs. Fold mini marshmallows and milk chocolate chunks into the dough. During the final three minutes of covered cooking, scatter additional marshmallows over the top, then brown them with a kitchen blowtorch.
Oatmeal Cinnamon Raisin Skillet
Reduce all-purpose flour to 60 grams and incorporate 40 grams of old-fashioned rolled oats. Add 3/4 teaspoon of ground Vietnamese cinnamon and a dash of ground nutmeg. Fold in 50 grams of Thompson raisins and 30 grams of chopped toasted pecans.
Gluten-Free Flour Modification
Swap all-purpose flour with a high-grade 1-to-1 gluten-free baking blend that includes xanthan gum. Gluten-free flours absorb moisture more slowly than wheat flour. Let the mixed dough rest inside the pan for 10 minutes before lighting your burner to allow the starches to hydrate fully.
Dairy-Free and Vegan Adaptation
Substitute dairy butter with an equal weight of European-style cultured vegan block butter (avoid soft tub spreads, which contain excess water). Replace the egg yolk with 1 tablespoon of aquafaba (chickpea liquid) or 1 tablespoon of unsweetened applesauce mixed with 1/4 teaspoon of vegetable oil. Finish with certified dairy-free dark chocolate chunks.
Troubleshooting Common Pan Cookie Mistakes
Stovetop baking requires quick adjustments on the fly. Here is how to diagnose and correct common mistakes when making a cookie in a frying pan.
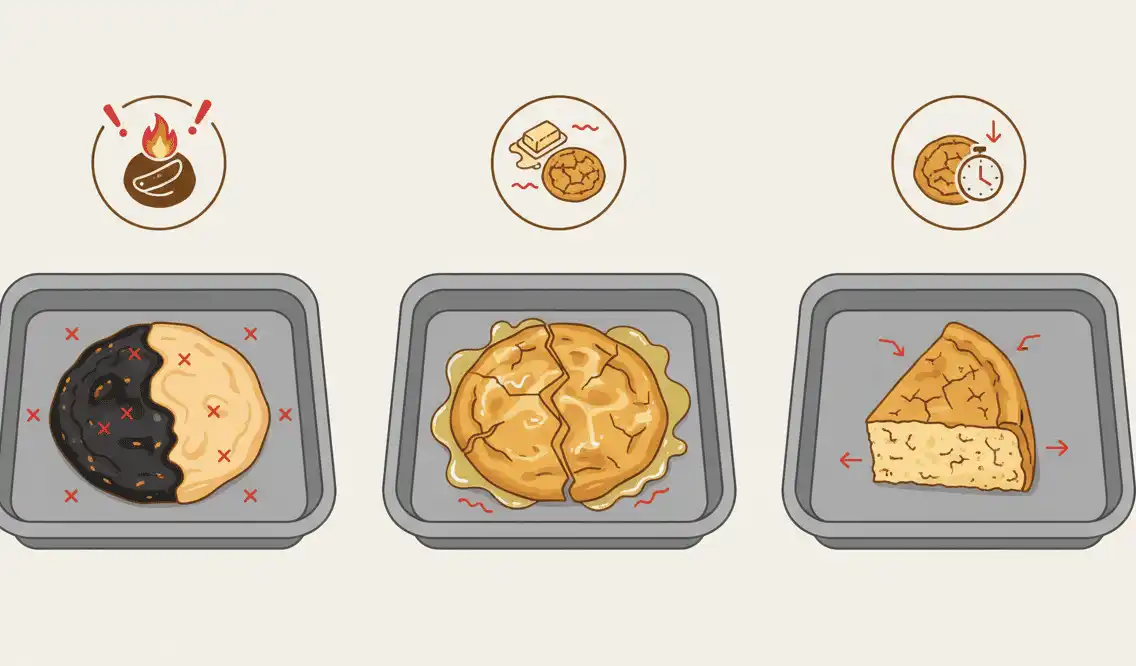
Problem 1: Burnt Bottom with a Soupy, Raw Top
Cause: Burner heat was set too high, or the pan was cooked without a lid. Conduction burned the base before trapped heat could set the top.
Solution: Lower the burner to its lowest setting and always use a lid. If your flame runs hot, use a heat diffuser. If the base browns too quickly, move the covered pan off direct heat and let residual warmth finish cooking the center.
Problem 2: Oily Dough with Leaking Melted Fat
Cause: The butter-sugar emulsion split, often because the egg yolk was added to hot butter, or the dough was stirred excessively.
Solution: Let melted butter cool until warm to the touch before whisking in the egg yolk. Whisk the yolk vigorously for one full minute to create a stable emulsion before folding in dry ingredients.
Problem 3: Tough, Dry, or Cake-Like Texture
Cause: Using too much flour, overmixing the dough, or leaving the cookie on the heat for too long.
Solution: Weigh your flour using a digital kitchen scale instead of scooping with volume cups. Fold dry ingredients only until the flour disappears, and pull the pan off the heat while the center is still soft.
Problem 4: Cookie Stuck Firmly to the Pan
Cause: Using unseasoned cast iron or stainless steel without sufficient butter or parchment paper.
Solution: Swirl a thin coating of butter across the base and lower walls of the pan before adding dough. For stainless steel pans, place a fitted round of parchment paper on the bottom before spreading your dough.
Kitchen Best Practices
Adhering to foundational professional pastry standards turns an average stovetop dessert into an extraordinary one.
- Measure by Weight: Use a digital gram scale. A cup of scooped flour can swing between 120 and 160 grams, which drastically alters moisture levels in single-skillet cookies.
- Monitor Pan Size: Stick to an 8-inch pan for this recipe. Spreading this dough across a 10-inch or 12-inch skillet thins out the batter, causing it to overcook and lose its gooey center.
- Select Quality Chocolate: Choose chocolate bars with 60% to 70% cacao. Chop them by hand with a chef’s knife to create a balance of fine chocolate dust and thick chunks.
- Manage Condensation: Lift your lid straight up and away when checking your bake. Tipping the lid drips water onto the cookie surface, creating wet, soggy patches.
- Respect Carryover Heat: Turn off the burner before the cookie looks completely done. The dense metal base continues cooking the bottom for another 5 to 10 minutes off the flame.
Essential Equipment and References
Having the right kitchen tools makes cooking cookies in a frying pan foolproof:
- 8-inch Cast Iron Skillet: Brands like Lodge provide uniform thermal mass and natural non-stick properties.
- Universal Pan Lid or Heatproof Glass Lid: A clear glass lid allows you to monitor the dough without letting out heat.
- Flame Tamer / Heat Diffuser: Essential for taming hot gas flames and electric heating coils.
- Digital Kitchen Scale: Ensures reliable ingredient measurements every single time.
- Silicone Spatula: Lets you fold dough gently and scrape the pan clean without scratching surfaces.
- Infrared Surface Thermometer: Helps you check pan surface temperatures (target 275°F–300°F / 135°C–149°C for low-heat stovetop baking).
Authority References
For deeper dives into the culinary physics and kitchen safety standards referenced in this guide, consult these resources:
- King Arthur Baking Company: Baker’s Reference Guide to Ingredient Weights and Measures.
- USDA Food Safety and Inspection Service (FSIS): Cooking Standards and Egg Safety Guidelines.
- Exploratorium Science of Cooking: The Chemical Role of Fats, Sugars, and Gluten in Heat Transfer.
- National Center for Home Food Preservation: Thermal Dynamics of Modern Cookware Materials.
Key Takeaways
- Heat Control Is Everything: Run your burner on the lowest setting possible, and use a heat diffuser if your flame runs hot.
- Lids Are Mandatory: Stovetop cookies require a tight-fitting lid to trap moisture and radiate convective heat downward onto the top crust.
- Prioritize Pan Weight: Heavy cast iron or thick tri-ply cookware buffers against direct burner heat, preventing burnt bases.
- Emulsify Properly: Whisk your egg yolk thoroughly into lukewarm butter and sugar to stop oils from separating during cooking.
- Rely on Residual Heat: Pull the pan off the burner while the center remains slightly glossy; carryover heat finishes the bake.
Final Thoughts
Making a cookie in a frying pan changes how you approach baking. It turns a batch of pantry staples into an impressive, restaurant-style dessert in under twenty minutes without touching an oven dial.
Grab your favorite skillet, turn your burner to low, and treat yourself to a warm, gooey, skillet-baked treat tonight.
Frequently Asked Questions
Can I bake this frying pan cookie inside an oven instead?
Yes. If your frying pan is oven-safe, preheat your oven to 350°F (175°C). Assemble the dough directly in the pan following the recipe steps, then bake uncovered on the center rack for 14 to 18 minutes. The edges will turn golden brown while the center stays delightfully soft and gooey.
Why is my frying pan cookie burnt on the bottom and raw in the middle?
This happens when the stovetop burner is set too high or the pan is cooked without a lid. Cookware transfers heat directly into the base of your dough via conduction. Keep your flame on low, use a heat diffuser plate, and cover the pan tightly with a lid to trap steam and cook the top.
Can I make a pan cookie using a non-stick frying pan?
Yes, standard non-stick and ceramic-coated pans work well. They release the baked cookie cleanly without sticking to the pan. However, non-stick coatings will not produce the same deep, crunchy bottom crust that cast iron creates. Avoid using metal spoons or knives inside non-stick pans.
Do I need to grease my frying pan before adding the cookie dough?
If you melt the butter directly inside the pan as directed, the residual butter fat coats the surface and prevents sticking. However, if you are using an unseasoned cast iron skillet or a stainless steel pan, brush the base with extra butter or line the bottom with a small circle of parchment paper.
Can I use store-bought refrigerated cookie dough in a frying pan?
Yes. Press roughly 8 to 10 ounces (225g to 280g) of pre-made chilled cookie dough flat across an 8-inch skillet, keeping the thickness around 1/2 inch. Cover the pan with a snug lid and cook over low heat on the stovetop for 12 to 15 minutes until the edges are set.
How do I store and reheat leftover frying pan cookies?
Let the cookie cool completely, cut it into wedges, and store them in an airtight container at room temperature for up to three days. To reheat, warm a slice in a dry frying pan over low heat for 3 to 4 minutes, or microwave for 15 seconds to restore its soft, gooey center.
What size frying pan works best for this recipe?
An 8-inch frying pan or skillet is ideal for this single-batch recipe. It yields the perfect dough thickness of about half an inch. If you use a 10-inch or 12-inch skillet, increase all ingredient quantities by 50% to 100% so the cookie doesn’t spread too thin and burn.
Why did my pan cookie turn out greasy?
A greasy pan cookie means the butter-sugar emulsion split during mixing. This occurs if you stir your egg yolk into butter that is still hot, or if the dough is stirred too vigorously. Let melted butter cool until warm, then whisk the yolk thoroughly to bind the fat before adding flour.