
Table of Contents
- Featured Recipe Overview
- Introduction
- The Science of White Chocolate and Raspberry
- Ingredient Selection and Chemical Function
- Choosing the Right Raspberry: Fresh, Frozen, or Freeze-Dried
- Step-by-Step Baking Protocol
- Fruit Format Performance Comparison
- Pro Baker Techniques and Advanced Methods
- Common Mistakes and How to Avoid Them
- Storage, Dough Freezing, and Best Practices
- Recommended Tools and Equipment
- Related Recipe Suggestions
- Authority Baking References
- Key Takeaways
- Final Thoughts
- Frequently Asked Questions
Quick Summary: How to Bake Perfect White Chocolate Raspberry Cookies
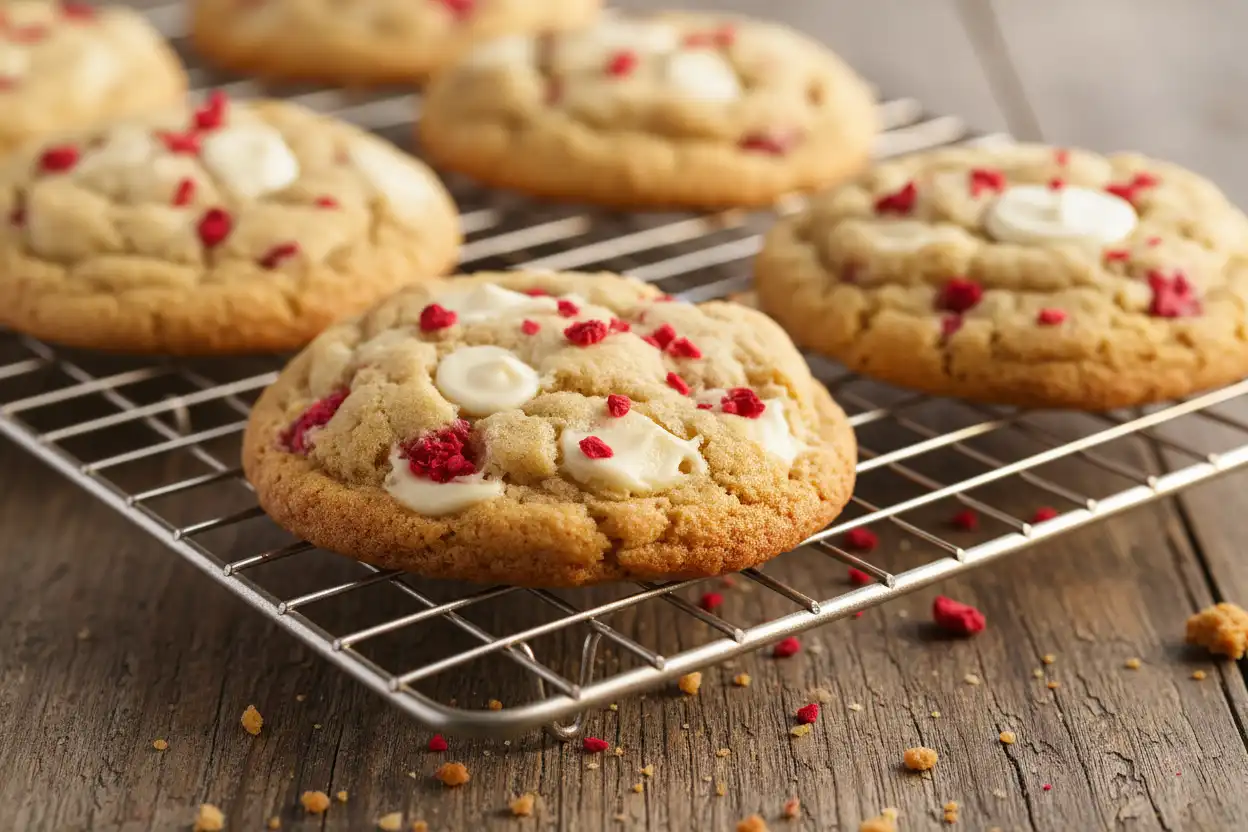
Baking exceptional white chocolate raspberry cookies requires managing fruit moisture while balancing rich cocoa butter with bright berry acidity. Using freeze-dried raspberries prevents excess water from making dough soggy, while pure white chocolate blocks melt into rich, creamy pockets. Chilling dough for at least two hours solidifies fat and controls spread during baking.
Combine creamed unsalted butter, light brown sugar, and granulated sugar with flour, cornstarch, and real vanilla. Gently fold in chopped white chocolate and crushed freeze-dried raspberries. Bake at 350°F (177°C) for 10 to 12 minutes until edges turn golden brown while centers remain soft.
White chocolate raspberry cookies combine sweet cocoa butter with sharp, tangy fruit. Getting this recipe right requires careful control of moisture and fat. Without proper technique, raspberries release extra water into dough, creating soggy spots or flat, spread-out cookies.
This comprehensive guide covers ingredient roles, fruit options, temperature control, and exact baking steps. Home bakers will learn how to handle delicate berries and high-sugar chocolate cleanly. The result is a baker-quality cookie featuring golden edges, chewy centers, and balanced flavor.
The Science of White Chocolate and Raspberry
White chocolate lacks cocoa solids, relying entirely on cocoa butter, sugar, and milk solids for flavor. This profile delivers a rich, milky sweetness with minimal natural bitterness. Pairing white chocolate with raspberries creates balance because fruit acids cut through heavy fats.
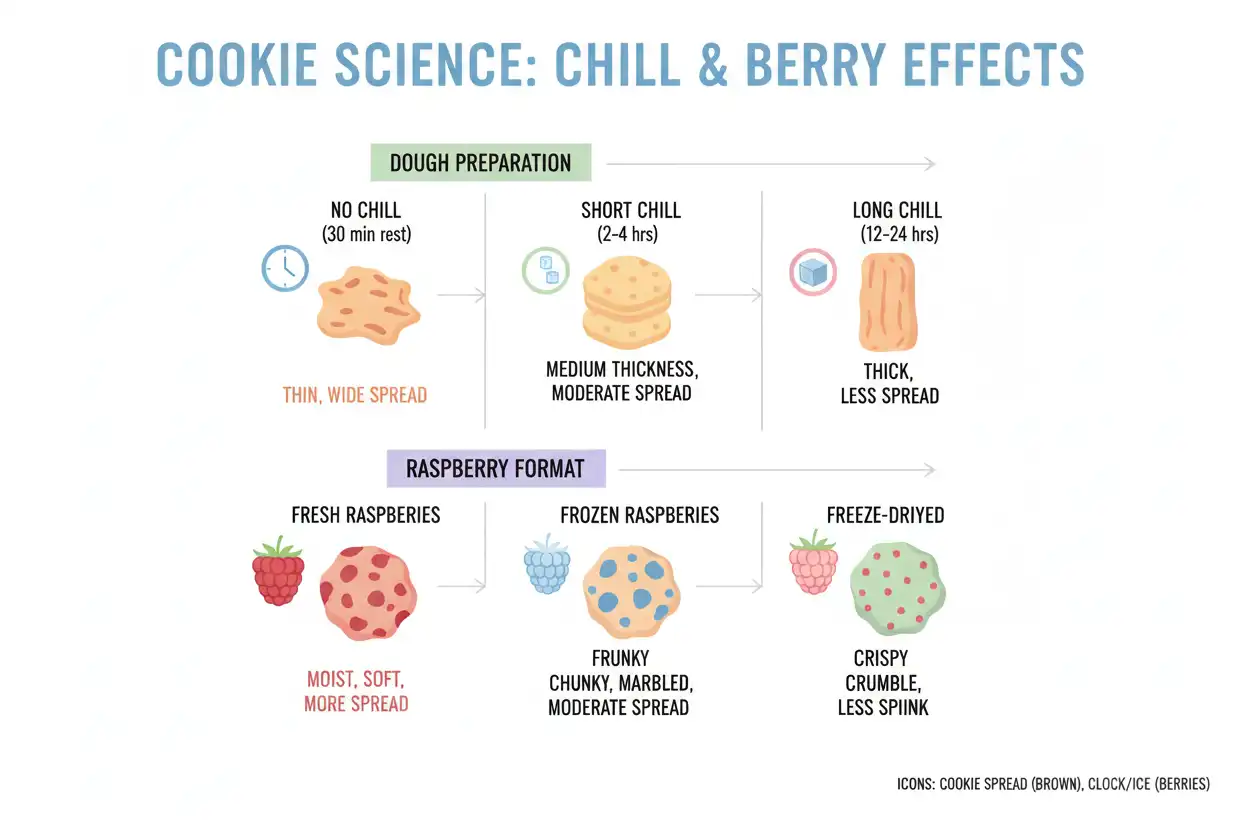
Raspberries contain citric and malic acids, which provide sharp tartness on the palate. However, fresh raspberries consist of roughly 85% water by weight. Heat forces this trapped water to turn into steam during baking, which breaks gluten networks and weakens cookie structure.
Controlling moisture determines whether your cookie ends up soft and chewy or thin and greasy. Using low-moisture berry formats preserves dough stability while keeping flavor concentrated. Managing fat solidifying temperatures ensures chocolate chunks hold shape while dough bakes into a structured matrix.
Ingredient Selection and Chemical Function
Flour and Starch Balance
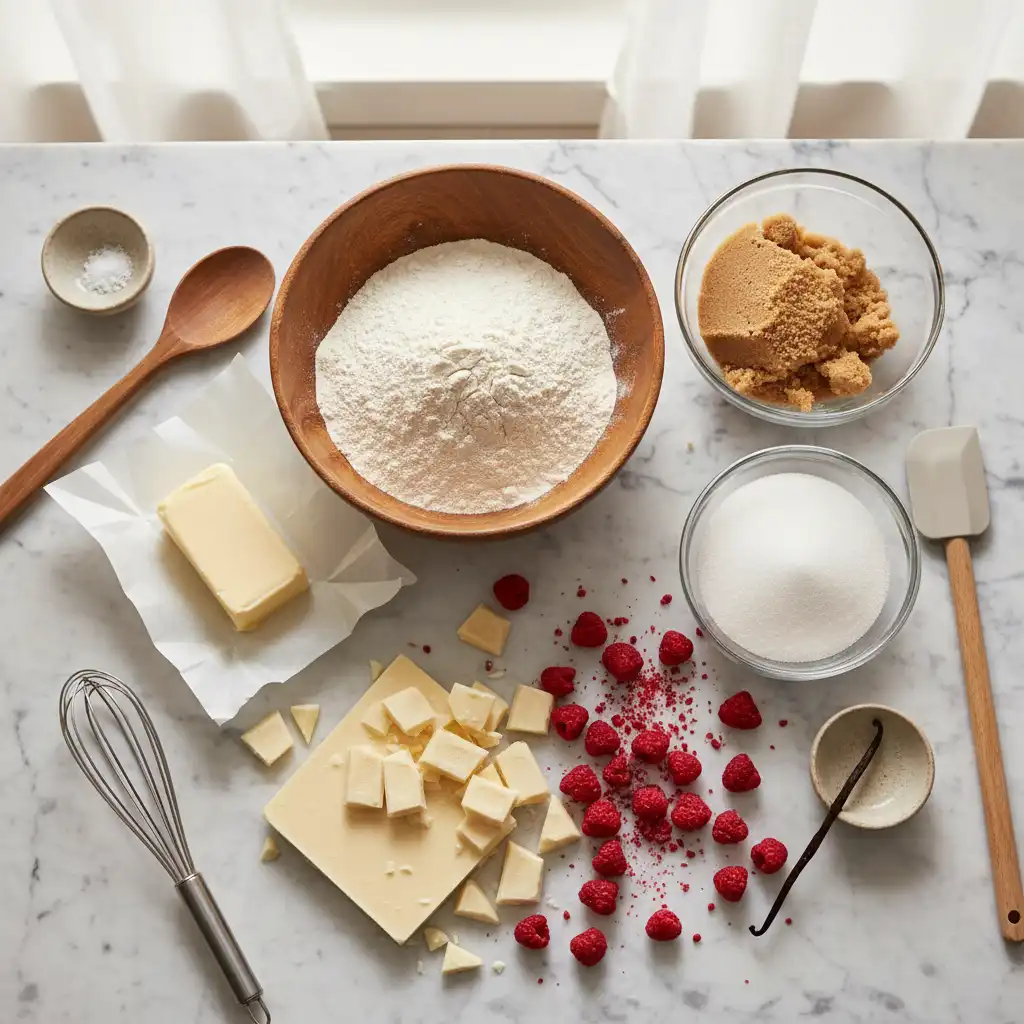
Unbleached all-purpose flour provides the structural framework for dough through gluten formation. Aim for a protein content between 10% and 11.5% to maintain flexibility without becoming tough. Adding a small amount of cornstarch weakens gluten bonds slightly, yielding a tender, melt-in-your-mouth interior texture.
Fats and Emulsification
Unsalted butter allows accurate control over total sodium levels in the recipe. Creaming room-temperature butter with sugars incorporates small air pockets that expand gently in the oven. Egg yolks add lecithin, a natural emulsifier that binds fat and water molecules together into a cohesive dough.
Sugar Ratios and Moisture Retention
Light brown sugar contains molasses, which adds hygroscopic properties that retain moisture after baking. Granulated white sugar promotes edge crispness and subtle spreading as it melts under heat. A 2:1 ratio of brown sugar to white sugar produces chewy centers alongside lightly browned edges.
Selecting White Chocolate
Real white chocolate must contain at least 20% cocoa butter by weight. Standard baking chips often replace cocoa butter with palm oil to help chips retain rigid shapes under heat. Chopping block white chocolate yields uneven chunks that melt smoothly into rich, buttery pools within warm dough.
Choosing the Right Raspberry: Fresh, Frozen, or Freeze-Dried
Selecting the right raspberry format dictates final cookie texture, dough stability, and appearance. Each option interacts differently with flour proteins and fats during mixing and baking.
Freeze-Dried Raspberries
Freeze-drying extracts water while leaving fruit structure, color, and acidity intact. Because freeze-dried fruit introduces virtually no water to dough, it eliminates soggy spots completely. Lightly crushing freeze-dried berries creates uniform distribution without streaking dough red.
Fresh Raspberries
Fresh berries offer vibrant flavor, but their delicate skins rupture easily under mixing paddles. Released juices add liquid to flour, leading to uneven spreading and dough discoloration. If using fresh fruit, fold whole berries gently into chilled dough right before placing pans into the oven.
Frozen Raspberries
Frozen berries remain firm during early folding, but melt rapidly once dough enters the oven. Ice crystals attached to frozen fruit release extra liquid as heat rises. Never thaw frozen raspberries before adding them to dough, and toss pieces in flour to absorb surface moisture.
Raspberry Jam or Preserves
Swirling raspberry jam into dough provides pockets of concentrated sweet-tart flavor. However, high sugar content in jam lowers melting points, causing sugar to burn if it touches hot pans directly. Chill preserves thoroughly and drop small teaspoons into dough layers rather than mixing thoroughly.
Step-by-Step Baking Protocol
Step 1: Dry Ingredient Sifting
Sift 2.25 cups (270 grams) of all-purpose flour, 1 teaspoon of cornstarch, 0.5 teaspoon of baking soda, and 0.5 teaspoon of fine sea salt into a medium bowl. Sifting breaks up clumps and distributes leavening evenly through the dry mix. Set the bowl aside at room temperature.
Step 2: Fat and Sugar Creaming
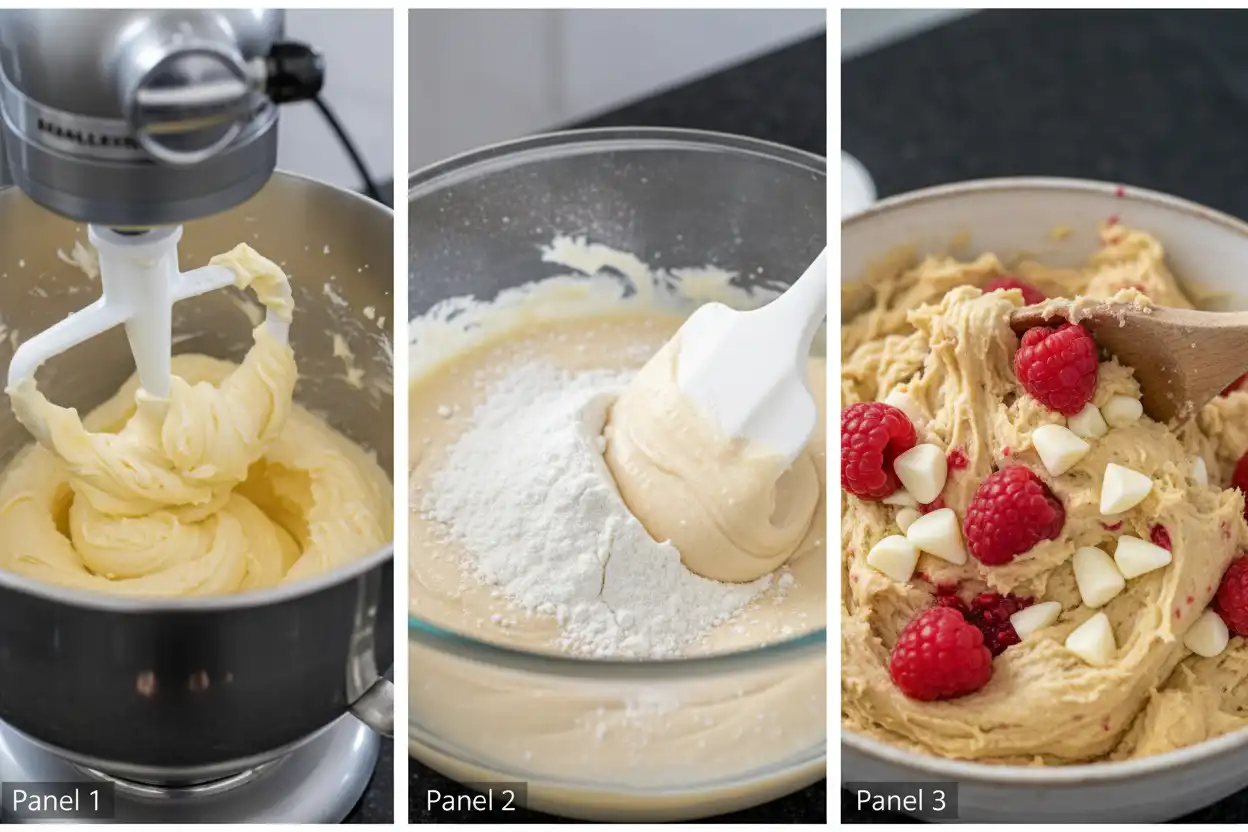
Place 0.75 cup (170 grams) of softened unsalted butter into a stand mixer fitted with a paddle attachment. Add 0.75 cup (150 grams) of packed light brown sugar and 0.5 cup (100 grams) of granulated sugar. Beat on medium speed for two minutes until light, creamy, and uniform.
Step 3: Wet Ingredient Integration
Add one large room-temperature egg, one extra egg yolk, and two teaspoons of pure vanilla extract to the creamed mixture. Beat on low speed for 60 seconds until fully incorporated. Scrape down the sides of the bowl with a silicone spatula to combine all ingredients evenly.
Step 4: Combining Dry and Wet Fractions
Pour the sifted dry mix into the wet batter all at once. Mix on lowest speed for 20 to 30 seconds, stopping as soon as faint flour streaks remain visible. Over-mixing develops excess gluten, which turns cookies tough instead of soft.
Step 5: Folding Add-Ins
Gently add 1 cup (170 grams) of coarsely chopped white chocolate block pieces to the bowl. Add 1 cup (20 grams) of lightly crushed freeze-dried raspberries. Fold ingredients together by hand using wide, sweeping motions until evenly distributed through dough.
Step 6: Portioning and Chilling
Scoop 3-tablespoon portions (roughly 60 grams each) of dough onto a parchment-lined tray using a cookie scoop. Cover the portioned dough loosely with plastic wrap. Refrigerate dough balls for at least two hours, or up to 24 hours, to solidify fats fully.
Step 7: Oven Setup and Baking
Preheat your oven to 350°F (177°C) with an oven rack positioned in the middle slot. Space chilled dough balls three inches apart on heavy aluminum baking sheets lined with fresh parchment. Bake for 10 to 12 minutes until edges look set and light golden brown.
Step 8: Pan Resting and Cooling
Remove baking sheets from the oven and allow cookies to rest on hot pans for five minutes. Residual heat sets soft centers without overcooking cookie bottoms. Transfer individual cookies onto wire cooling racks to cool completely before serving.
Fruit Format Performance Comparison
| Feature | Freeze-Dried Raspberries | Fresh Raspberries | Frozen Raspberries |
|---|---|---|---|
| Water Content | Less than 2% | Approximately 85% | High (Includes Surface Ice) |
| Dough Spread Risk | Very Low | High | Very High |
| Flavor Concentration | Intense and Tart | Fresh and Subdued | Slightly Diluted |
| Dough Discoloration | None | Moderate Pink Streaking | Heavy Pink Streaking |
| Prep Work Required | Light Crushing | Gentle Wash and Dry | Toss in Flour While Frozen |
Pro Baker Techniques and Advanced Methods

Browning Butter for Flavor: Melt butter in a saucepan over medium heat until golden brown specks appear at the bottom. Chill browned butter back to a solid, room-temperature state before creaming to preserve dough structure.
Topical Placement Strategy: Save a handful of chopped white chocolate pieces and raspberry crushed fragments before mixing dough. Press these saved toppings onto dough ball tops right before baking for professional visual appeal.
The Cookie Ring Method: Immediately upon removing baked cookies from the oven, place a large round cookie cutter over each warm cookie. Swirl cutter in quick circular motions against the baking sheet to pull edges into clean circles.
High-Altitude Adjustments: At elevations above 3,000 feet, decrease brown sugar by two tablespoons and increase flour by two tablespoons. Raise oven temperature by 15°F (8°C) to set cookie structure quickly and prevent excessive spreading.
Common Mistakes and How to Avoid Them
Flat, Greasy Cookies
Excessive spreading occurs when dough is baked warm or butter is over-creamed with sugar. Ensure dough rests in the refrigerator for at least two full hours before baking. Weigh ingredients with a digital scale to prevent under-measuring flour.
Wet, Doughy Centers Around Berries
Soggy pockets appear when fresh or thawed frozen berries leak liquid into surrounding flour during baking. Switch to freeze-dried raspberries to avoid excess liquid. If using fresh berries, pat them completely dry using paper towels before folding.
Burnt White Chocolate Bottoms
White chocolate burns easily because of high milk sugar levels and low heat tolerance. Always line baking pans with parchment paper or silicone mats to buffer direct heat. Avoid thin, dark non-stick pans that absorb heat rapidly.
Dry, Cake-Like Interior
Cakey textures happen when flour is scooped directly with measuring cups, packing too much flour into the recipe. Use a spoon to fluff flour into measuring cups before leveling off, or use a scale. Adding extra egg whites instead of extra yolks also dries out dough.
Storage, Dough Freezing, and Best Practices
Calibrate your oven using an independent oven thermometer to ensure exact temperatures before baking. Store baked cookies in an airtight container at room temperature with a slice of plain white bread. The cookies absorb moisture from bread, keeping soft centers fresh for five days.
Freeze individual dough balls on a baking sheet until solid, then transfer them to a freezer-safe zipper bag for up to three months. Bake frozen dough balls without thawing, adding two extra minutes to total oven bake time.
Recommended Tools and Equipment
- Digital Kitchen Scale: Ensures accurate flour and sugar weight measurements down to single grams.
- Spring-Loaded Cookie Scoop: Portions uniform dough balls for equal baking times across pans.
- Heavy Aluminum Baking Sheets: Distributes oven heat evenly without hot spots that burn bottoms.
- Oven Thermometer: Confirms true internal oven temperature before baking starts.
- Wire Cooling Racks: Allows air circulation underneath warm cookies to halt baking action smoothly.
Related Recipe Suggestions
- Brown Butter Chocolate Chip Cookies Recipe
- Soft-Baked White Chocolate Macadamia Nut Cookies
- Chewy Dark Chocolate Raspberry Fudge Brownies
- Classic Lemon Shortbread Bars Recipe
- Bakery Style Strawberry Sugar Cookies
Authority Baking References
Key Takeaways
- Freeze-dried raspberries provide concentrated tart flavor without introducing extra water to dough.
- Real white chocolate containing pure cocoa butter yields better texture than oil-based baking chips.
- Chilling dough for two hours hardens fats and prevents cookies from spreading flat during baking.
- Measuring flour by weight prevents dry, cakey textures caused by packed measuring cups.
- Resting warm cookies on hot baking sheets for five minutes sets soft centers without over-baking.
Final Thoughts
Baking delicious white chocolate raspberry cookies comes down to managing moisture, fat, and heat carefully. Choosing freeze-dried fruit and real cocoa butter keeps dough stable while delivering great sweet-tart flavor. Try this recipe for your next gathering or baking day to enjoy bakery-quality treats at home.
Frequently Asked Questions
Can I use fresh raspberries instead of freeze-dried ones?
Yes, you can use fresh raspberries, but they release moisture that causes dough spreading and pink streaks. Fold fresh berries in gently right before baking, or dust them lightly with flour to absorb extra surface wetness.
Why did my white chocolate burn during baking?
White chocolate burns easily because of sensitive milk solids and high sugar content. Line baking sheets with parchment paper, bake on light aluminum pans, and keep oven temperatures at or below 350°F (177°C) to prevent burning.
Why is chilling cookie dough necessary before baking?
Chilling hardens butter fat, preventing cookies from spreading too quickly in hot ovens. Chilling also allows flour time to hydrate fully, improving overall chewiness and flavor depth in the finished cookie.
Can I freeze white chocolate raspberry cookie dough?
Yes, scoop dough into portioned balls and freeze them on a baking sheet until solid. Transfer solid balls into an airtight bag for up to three months, and bake straight from frozen by adding two minutes to bake time.
How do I keep baked cookies soft for several days?
Store cooled cookies inside an airtight container with a slice of plain white bread. Cookies draw moisture from the bread slice, maintaining soft, chewy centers for up to five full days at room temperature.
Is it better to use white chocolate chips or cut-up chocolate blocks?
Chopped white chocolate blocks are better because they contain pure cocoa butter that melts into rich pools. Baking chips contain vegetable oils and stabilizers that help chips hold shape rather than melting smoothly.
Why did my cookies spread out flat on the pan?
Cookies spread flat when dough is warm, butter is over-creamed, or flour is under-measured. Chill dough thoroughly for two hours and measure flour using a digital kitchen scale for accurate ingredient balance.
How do I prevent my dough from turning pink during mixing?
Dough turns pink when fresh or frozen raspberries crush and release juice during mixing. Use freeze-dried raspberries or gently fold whole berries in by hand with a rubber spatula at the very end of mixing.