

How to Make Perfect Chocolate Mint Cookies
Perfect chocolate mint cookies rely on pairing high-fat Dutch-process cocoa powder with pure peppermint extract rather than spearmint flavorings. Blooming the cocoa in warm melted butter deepens the chocolate notes while coating flour proteins to create a fudgy, brownie-like interior. Chilling the dough for at least 60 minutes prevents excessive spreading and locks in moisture during baking.
Bake 2-ounce (55g) dough portions at 350°F (177°C) for 9 to 11 minutes until the edges are set and crackled while the centers remain soft. Top with chopped crème de menthe mints immediately upon removing the sheet from the oven so the chocolate pools into glossy, decadent pockets.
- Core Flavor Base: Dutch-process cocoa powder + pure peppermint extract.
- Ideal Texture Target: Crisp outer shell with a chewy, fudgy center.
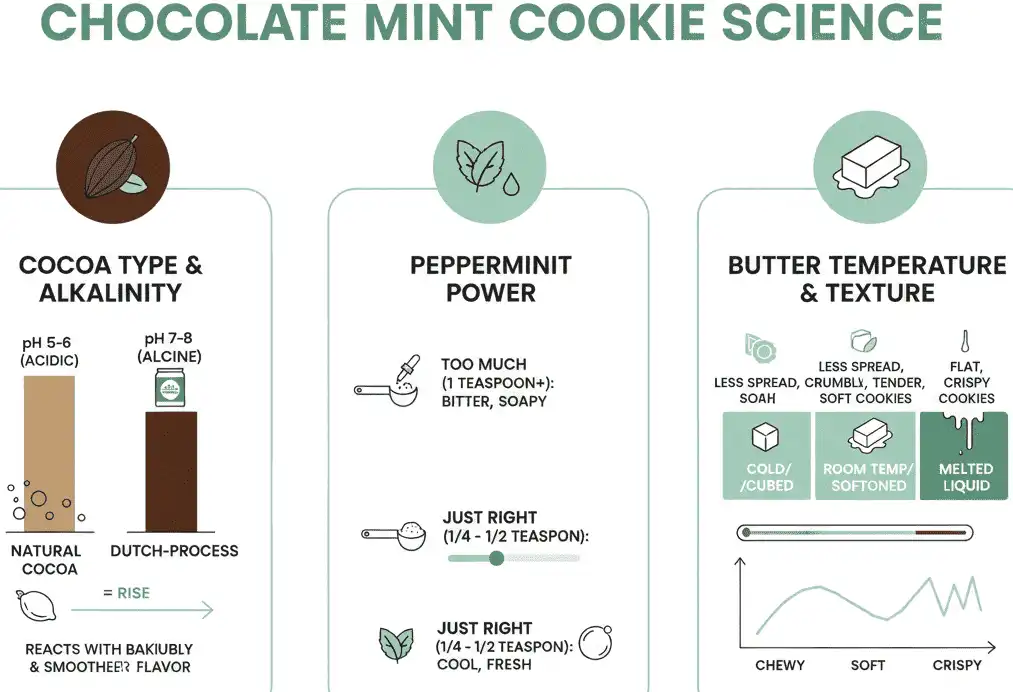
- Critical Rule: Measure peppermint extract in drops or fractions of a teaspoon to avoid medicinal flavor.
The combination of rich chocolate and refreshing mint remains a classic pairing in pastry kitchens. Balancing deep roasted cocoa notes with the cool sensation of menthol requires attention to ingredient ratios and baking science. A cookie that has too much mint tastes like toothpaste, while one with too little leaves the chocolate tasting flat.
This guide serves home bakers, holiday gift makers, and dessert enthusiasts who want bakery-level results. You will learn the exact chemistry behind cocoa selection, fat emulsification, and temperature control. Master these techniques to produce cookies with crackled tops, chewy centers, and a clean mint finish.
The Flavor Science of Chocolate and Mint
Menthol Receptors and Lipid Balancing
Menthol stimulates the TRPM8 cold-sensing nerve receptors in your mouth, tricking your brain into feeling a temperature drop. Chocolate contains dense fats, specifically cocoa butter and dairy lipids, which coat the tongue and palate. These lipids soften the sharp menthol sensation, creating a smooth and pleasant cooling effect.
Peppermint vs. Spearmint Chemistry
Peppermint (Mentha piperita) contains high concentrations of pure menthol, which provides the clean, icy snap needed to balance dark chocolate. Spearmint (Mentha spicata) is dominated by L-carvone, yielding an herbal, savory flavor that clashes with rich cocoa. Always choose pure peppermint extract or peppermint oil to avoid an unwanted herbal taste in baked cookies.
The Role of Alkalized Cocoa
Natural cocoa powder is acidic (pH 5.0 to 5.8) and carries sharp, fruity notes that compete with mint. Dutch-process cocoa is washed with an alkaline potassium carbonate solution, neutralizing acidity to a pH of 6.8 to 8.1. This alkalization yields an earthy, deep chocolate flavor profile that pairs smoothly with crisp peppermint oils.
Ingredient Anatomy and Chemistry
Cocoa Powders: Dutch-Process vs. Black Cocoa
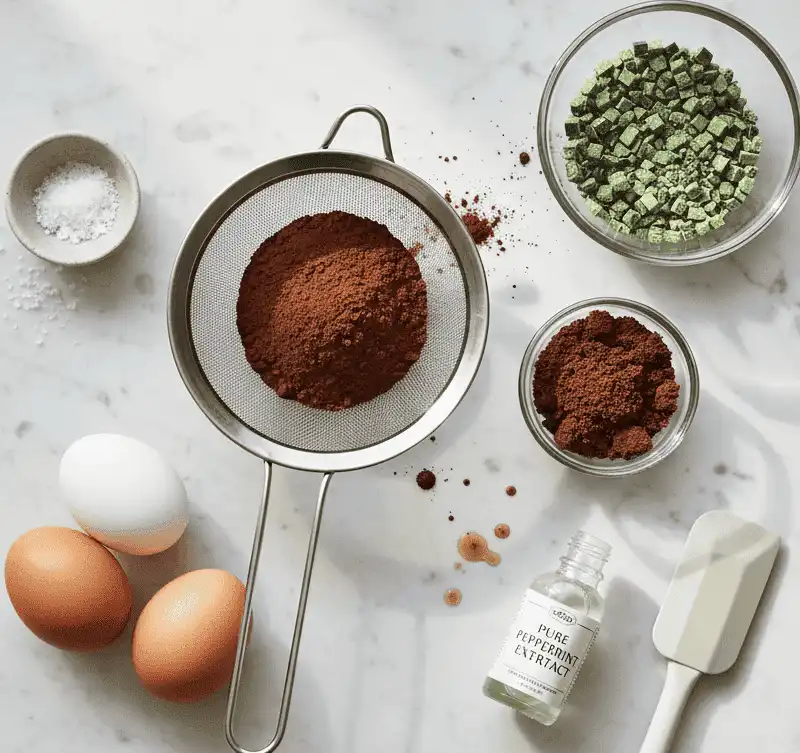
Dutch-process cocoa powder with 20% to 24% fat content provides optimal moisture and a rich chocolate base. Blending in 10% to 15% black cocoa powder adds an intense dark color and reminiscent flavor of classic wafer cookies. Avoid standard supermarket cocoa powders with less than 10% fat, as they yield dry and chalky cookies.
Sugar Crystallization and Moisture Retention
Dark brown sugar contains molasses, which is naturally hygroscopic and retains water molecules during and after baking. Granulated white sugar dissolves and recrystallizes at the cookie surface, creating delicate crusts and desirable surface fissures. Combining a 2:1 ratio of dark brown sugar to white sugar produces crackled tops over fudgy centers.
Fat Structure: Butter vs. Oil
Unsalted butter contains roughly 80% to 82% milkfat, 16% to 18% water, and 1% to 2% milk solids. The water in melted butter hydrates flour proteins to create a chewy crumb, while the fat carries volatile mint aromatics throughout the dough. Using melted butter instead of creamed softened butter yields a denser, fudgier cookie reminiscent of a brownie.
Mint Inclusions and Chocolate Types
Andes-style crème de menthe mints combine green confectionery layers with milk chocolate, melting into glossy pools upon baking. Semi-sweet chocolate chunks with 60% to 70% cacao content provide bitter balance against the sweet mint confectionery. Using chopped block chocolate instead of standard chips creates varied textures, from molten pools to fine chocolate shavings throughout the crumb.
Step-by-Step Master Recipe Protocol
Step 1: Blooming the Cocoa Powder
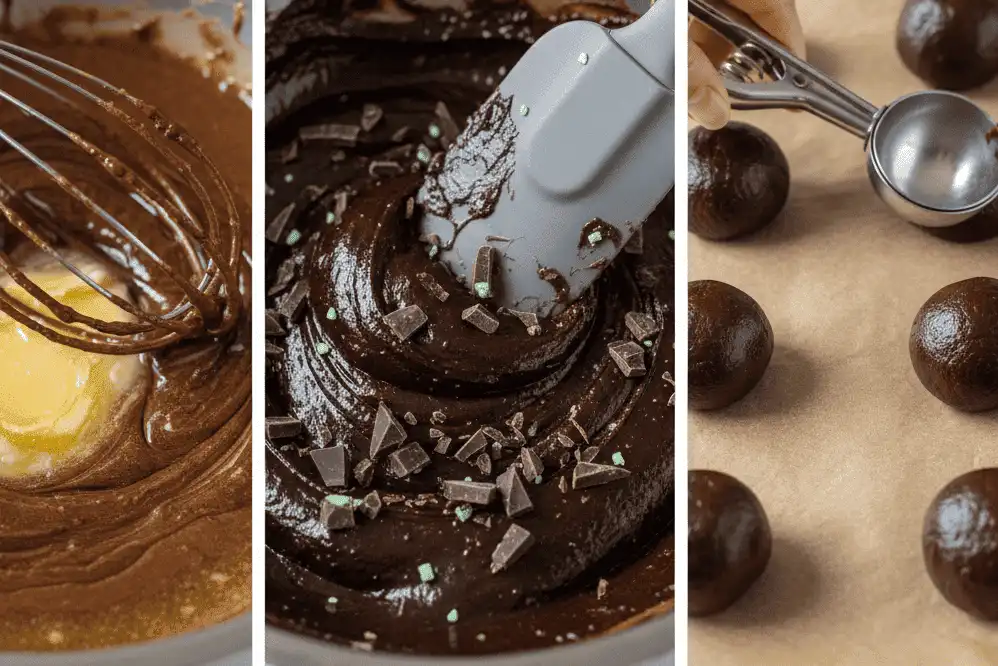
What: Whisk 0.75 cup (75g) of Dutch-process cocoa powder into 0.75 cup (170g) of warm melted unsalted butter.
Why: Heat dissolves cocoa solids and releases fat-soluble flavor compounds trapped inside the powder.
How: Melt the butter in a saucepan over medium-low heat, remove from heat, add the cocoa, and whisk until glossy.
Common Mistake: Boiling the butter with cocoa, which scorches the chocolate particles and creates bitterness.
Pro Tip: Add 0.5 teaspoon of instant espresso powder to the warm butter to intensify the chocolate flavor without adding coffee taste.
Step 2: Whipping Sugars and Eggs for Structure
What: Whisk 1 cup (200g) of dark brown sugar, 0.5 cup (100g) of granulated sugar, 2 large eggs, and 1 egg yolk.
Why: Aerating the egg proteins creates a ribbon stage that produces a shiny, crinkled cookie crust.
How: Beat with a stand mixer or hand whisk on medium-high speed for three full minutes until pale and thickened.
Common Mistake: Barely stirring the eggs and sugar, which results in a dull, matte cookie surface without crinkles.
Pro Tip: Ensure your eggs are at room temperature (around 68°F / 20°C) to allow maximum air incorporation.
Step 3: Dosing the Peppermint Extract
What: Add 0.75 teaspoon (3.7ml) of pure peppermint extract and 1 teaspoon (5ml) of pure vanilla extract into the egg mixture.
Why: Adding extracts to the wet emulsion ensures uniform flavor distribution across the entire dough batch.
How: Pour the extracts directly into the whipped egg and sugar mixture and mix on low speed for 30 seconds.
Common Mistake: Free-pouring mint extract from the bottle; extra drops can ruin the entire batch.
Pro Tip: Measure extract into a small separate spoon before adding it over the mixing bowl to prevent accidental spills.
Step 4: Incorporating the Bloomed Cocoa Base
What: Stream the warm butter-cocoa mixture into the whipped egg matrix.
Why: Blending the fats gently maintains the incorporated air bubbles while stabilizing the emulsion.
How: Pour the cocoa mixture down the inside edge of the bowl while running the mixer on low speed.
Common Mistake: Adding scorching hot butter, which curdles the raw eggs and ruins the dough structure.
Pro Tip: Check that the cocoa mixture is lukewarm (under 105°F / 40°C) before streaming it into the eggs.
Step 5: Folding Dry Ingredients and Inclusions
What: Fold in 1.25 cups (150g) of all-purpose flour, 1 teaspoon of baking powder, 0.5 teaspoon of fine sea salt, and 1.5 cups (250g) of chopped mint chocolate chunks.
Why: Gentle folding limits gluten development, keeping the finished cookie tender and chewy.
How: Use a broad silicone spatula to fold the dry ingredients until just a few flour streaks remain, then add the inclusions.
Common Mistake: Overworking the dough with a motorized mixer, leading to tough, bready cookies.
Pro Tip: Reserve one-third of the chopped mint chocolates to press into the tops of the dough balls right before baking.
Step 6: Chilling and Dough Maturation
What: Cover the bowl with plastic wrap and chill the dough in the refrigerator for at least 60 minutes.
Why: Chilling solidifies the milkfats and allows the flour starches to fully hydrate.
How: Place the covered bowl in the coldest section of your refrigerator for 1 to 24 hours.
Common Mistake: Baking warm dough directly from the bowl, which causes the cookies to spread into thin, greasy sheets.
Pro Tip: A 12-hour overnight chill produces a deeper caramel note as the natural enzymes break down starches into simple sugars.
Step 7: Portioning and Oven Calibration
What: Scoop 2-ounce (55g) dough portions onto parchment-lined heavy baking sheets, spaced 2.5 inches apart.
Why: Uniform sizing guarantees that all cookies bake evenly throughout the pan.
How: Use a #20 spring-loaded cookie scoop to form level rounds of chilled dough.
Common Mistake: Placing chilled dough onto hot baking sheets from a previous batch, which prematurely melts the bottom fat.
Pro Tip: Always let your baking sheets return to room temperature before scooping new dough onto them.
Step 8: Baking, Pan Banging, and Setting
What: Bake at 350°F (177°C) for 9 to 11 minutes; tap the pan firmly against the oven rack at minute 8.
Why: Tapping the pan collapses rising air pockets, creating rippled edges and a dense, fudgy center.
How: Bake on the center rack, tap the pan once or twice, and remove when the edges are firm but centers are soft.
Common Mistake: Over-baking dark chocolate dough because you cannot see browning cues easily.
Pro Tip: Use a large round cookie cutter to swirl around warm cookies immediately out of the oven to shape them into perfect circles.
Cookie Style Comparison Table
| Style | Cocoa Type | Fat Source | Chill Time | Texture Profile | Shelf Life |
|---|---|---|---|---|---|
| Fudgy Mint Crinkle | High-Fat Dutch Cocoa | Melted Butter | 60+ Minutes | Crisp shell, brownie center | 4 to 5 Days |
| Crispy Mint Wafer | Black & Dutch Blend | Creamed Butter/Shortening | 120 Minutes | Snappy, dry, crunchy | 21+ Days |
| Mint Chip Bakery | Natural Cocoa | Cold Cubed Butter | 30 Minutes | Thick, doughy, chewy | 3 to 4 Days |
| Grasshopper Sandwich | Standard Dutch Cocoa | Softened Butter & Milk | None (Drop Dough) | Soft, cake-like, creamy | 3 Days (Refrigerated) |
Professional Bakery Techniques
Brown Butter Enhancement: Simmer your unsalted butter over medium heat for 5 to 7 minutes until the milk solids turn amber brown and release a hazelnut aroma. Cool the browned butter to 110°F (43°C) before whisking in your cocoa powder. The nutty Maillard notes add depth that balances bright peppermint.
Salt Profiling for Dark Chocolate: Dark cocoa contains natural tannins that can taste bitter without adequate seasoning. Using flaky Maldon sea salt directly on top of the dough rounds before baking cuts through sweetness and highlights the mint aromatics.
Managing Cocoa Fat Bloom: Mint cookies made with chopped chocolate can develop a whitish film (fat bloom) if stored in warm, humid conditions. Keep finished cookies below 70°F (21°C) to maintain the glossy, dark surface of the chocolate chunks.
High-Altitude Adjustments: At elevations above 3,500 feet, reduce granulated sugar by 2 tablespoons per cup and increase oven temperature by 15°F (8°C). The lower atmospheric pressure accelerates moisture evaporation, so adding 1 tablespoon of extra liquid prevents cookies from drying out.
Common Mistakes and Troubleshooting
1. The “Toothpaste” Medicinal Aftertaste
Why It Happens: Using spearmint extract, imitation mint flavoring, or overdosing pure peppermint extract.
How to Fix It: Use 100% pure peppermint extract made from distilled peppermint oil and alcohol. Limit your ratio to 0.75 teaspoon per 2 cups of flour, using quality vanilla to round out the flavor profile.
2. Excessive Spreading and Greasy Puddles
Why It Happens: Dough was too warm when entering the oven, or warm melted butter broke its emulsion with the sugars.
How to Fix It: Chill portioned dough balls for at least one hour until they are firm to the touch. Ensure your baking sheets are heavy-gauge aluminum rather than thin, dark steel pans that transfer heat too quickly.
3. Chalky, Dry, and Crumbly Texture
Why It Happens: Scooping flour directly from the bag with a measuring cup packs extra starch into the dough.
How to Fix It: Weigh your flour on a digital kitchen scale (1 cup of all-purpose flour equals 120 grams). If using cups, fluff your flour with a fork, spoon it gently into the cup, and level it off with a flat knife edge.
4. Burned Bottoms with Raw Centers
Why It Happens: Baking on the bottom oven rack, using dark non-stick pans, or baking at too high a temperature.
How to Fix It: Position your oven rack in the center slot and bake on light-colored aluminum sheets lined with parchment paper. Use an independent oven thermometer to confirm that your oven temperature matches the dial setting.
Storage, Dough Freezing, and Gifting
Room Temperature Storage
Store cooled cookies in an airtight container at room temperature for up to five days. Place a single slice of plain white sandwich bread inside the container alongside the cookies. The hygroscopic sugars in the cookies draw moisture from the bread, keeping the centers soft without altering their mint flavor.
Freezing Cookie Dough Balls
Portion the dough into 2-ounce balls using your cookie scoop and place them close together on a parchment-lined tray. Freeze the dough balls for two hours until solid, then transfer them into a heavy-duty freezer zipper bag for up to three months. Bake straight from the freezer at 350°F (177°C), adding two minutes to the normal baking time.
Packaging for Edible Holiday Gifts
Pack chocolate mint cookies in decorative metal tins lined with greaseproof parchment or wax paper. Avoid storing mint cookies in the same container as non-mint varieties like vanilla sugar cookies or peanut butter cookies. Mint oils are volatile and will transfer their scent and flavor to adjacent baked goods within 24 hours.
Recommended Baking Tools
- Digital Kitchen Scale: Ensures accuracy down to single grams for flour, cocoa, and sugars.
- Heavy-Gauge Aluminum Sheet Pans: Provides even heat distribution without warping or scorching cookie bottoms.
- Spring-Loaded Dough Scoop (#20 Size): Portions 2-ounce dough balls for consistent baking times.
- Silicone Spatulas: Allows gentle folding to prevent over-developing gluten networks.
- Stainless Steel Wire Cooling Racks: Allows air circulation beneath cookies to stop baking quickly.
- Oven Thermometer: Verifies actual internal oven temperatures independently from digital controls.
Related Recipe Ideas
Authority References
Key Takeaways
- Alkalized Dutch-process cocoa powder produces an earthy, smooth base that balances peppermint.
- Pure peppermint extract should be measured with spoons rather than poured freely to avoid a medicinal taste.
- Melted butter combined with dark brown sugar yields a dense, chewy, and fudgy cookie interior.
- Chilling the dough for at least 60 minutes prevents thin spreading and develops rich chocolate notes.
- Store mint cookies in separate airtight containers to prevent mint aromas from transferring to other baked goods.
Final Thoughts
Baking exceptional chocolate mint cookies is all about balancing the right fats, alkalized cocoa, and precise extract measurements. When you control dough hydration and chilling times, you achieve a reliable balance of crisp edges, crackled tops, and fudgy centers. Try this recipe for your next holiday baking session or weekend dessert project to enjoy bakery-quality treats at home.
Frequently Asked Questions
Can I use fresh mint leaves instead of peppermint extract in cookie dough?
Fresh mint leaves release excess moisture and turn brown under high oven heat, creating an unappealing texture. If you prefer fresh mint, infuse whole bruised leaves into warm melted butter for 30 minutes, then strain and cool the butter before proceeding with the master recipe.
What is the difference between peppermint extract and mint extract?
Pure peppermint extract is made exclusively from peppermint oil, offering a clean, sharp, cooling menthol flavor that pairs with rich chocolate. Bottles labeled simply as “mint extract” often blend spearmint and peppermint oils, which can give baked goods a grassy or toothpaste-like flavor profile.
Can I substitute natural unsweetened cocoa powder for Dutch-process cocoa?
You can substitute natural cocoa, but the cookies will be lighter in color and have a more acidic, fruity flavor. If using natural cocoa, replace the 1 teaspoon of baking powder with 0.5 teaspoon of baking soda to neutralize the natural acids present in the unwashed cocoa.
Why did my chocolate mint cookies spread too thin in the oven?
Cookies spread too thin when the dough is baked warm, butter is over-melted without cooling, or flour is under-measured. Ensure you chill the dough for at least 60 minutes and use a digital kitchen scale to measure flour and cocoa powder accurately.
How do I know when chocolate cookies are done baking?
Because chocolate cookies are dark, you cannot rely on golden-brown color cues. Look for set, firm edges with visible surface cracks and slightly soft, moist centers. The cookies will continue to firm up on the hot sheet pan during their five-minute rest after removal from the oven.
Can I freeze baked chocolate mint cookies?
Yes, baked chocolate mint cookies freeze well for up to three months. Allow them to cool completely on wire racks, layer them between sheets of parchment paper in an airtight freezer container, and thaw them at room temperature for 30 minutes before serving.
What kind of chocolate works best for mint cookie inclusions?
A combination of 60% to 70% dark chocolate chunks and chopped Andes crème de menthe mints provides the best balance of textures. The dark chocolate chunks create pools of bittersweet cocoa, while the mint wafers melt into creamy, sweet green pockets.
Why did my chocolate mint cookies taste like toothpaste?
A toothpaste flavor happens when too much peppermint extract is added or when spearmint-based flavorings are used. Keep pure peppermint extract to a maximum of 0.75 teaspoon per batch, and balance the profile with a full teaspoon of pure vanilla extract.