
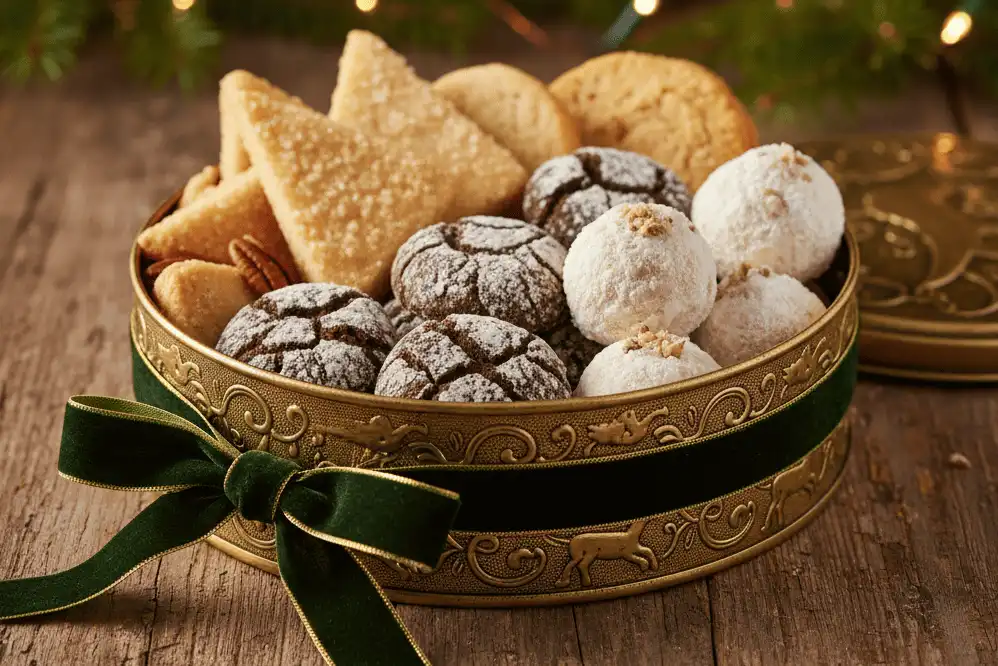
What makes a cookie ideal for gifting and shipping? The best holiday cookies for shipping feature low moisture content, high fat stability, and a dense, structural crumb. Baked goods like twice-baked biscotti, shortbread, gingerbread, and dense drop cookies survive postal transit without crumbling or spoiling.
Fragile cookies such as tuiles, thin meringues, or treats filled with fresh whipped ganache fail quickly in the mail. Successful shipping requires baking items with a natural shelf life of at least 7 to 10 days at room temperature.
Pairing these recipes with airtight barrier layers and immobilized packing materials guarantees your treats arrive looking and tasting bakery-fresh.
Introduction
Sending homemade baked goods during the holidays is one of the most personal ways to celebrate with distant friends and family. However, ordinary postal handling exposes food parcels to vibrations, drops, temperature swings, and prolonged delivery schedules.
A cookie that tastes wonderful straight from the oven can turn into a container of dry crumbs after three days in transit. Choosing recipes engineered for stability protects your time and ingredient investment.
This guide shares reliable, tested holiday cookie recipes designed specifically for holiday gift tins and parcel mail. You will learn the mechanics of moisture migration, professional packing systems, and proven shipping logistics.
The Food Science of Mail-Order Cookies
Commercial mail-order bakeries do not rely on luck when sending treats nationwide. They rely on food science, specifically controlling water activity and fat crystallization.
Water Activity and Staleness
Staleness is not simply moisture leaving a cookie. It is the redistribution of moisture between starch molecules and the surrounding air, known as retrogradation.
Cookies with high water activity lose moisture quickly to the dry cardboard of shipping boxes, making them rock-hard. Alternatively, soft cookies stored next to crisp ones will transfer water, turning crisp cookies soggy while becoming leathery themselves.
Structural Integrity and Crumb Density
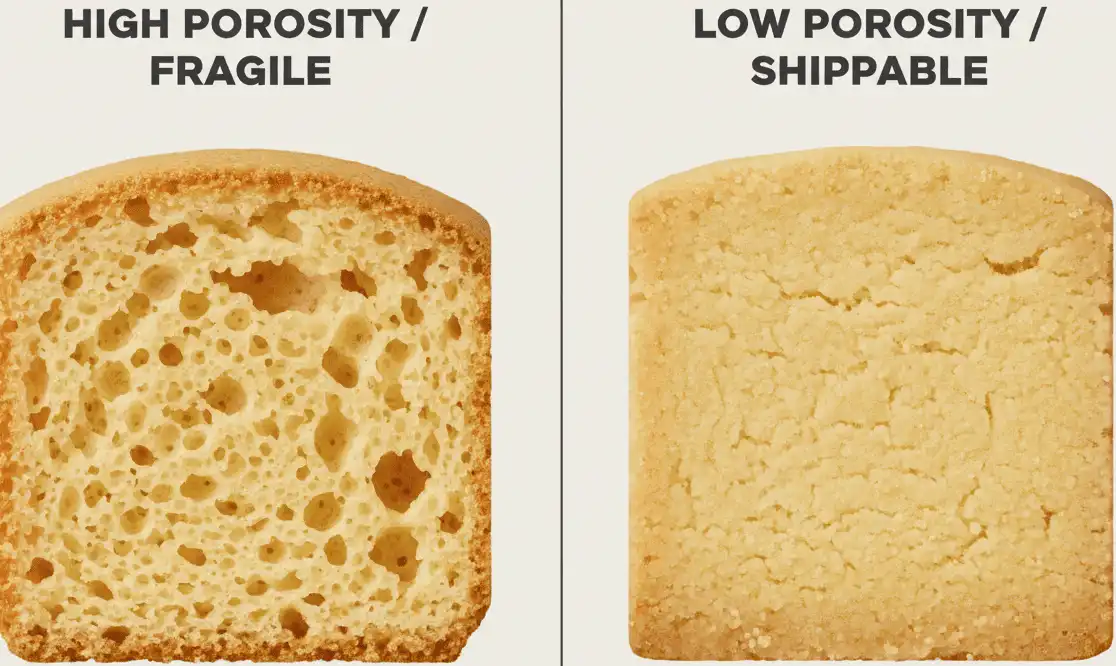
Air pockets give cake-like cookies their light bite, but those same pockets make them fragile under vertical pressure. Recipes high in creaming time incorporate micro-bubbles of air that collapse when a package drops.
Shippable cookies use minimal chemical leavening and controlled creaming. This creates a dense, interlocking matrix of flour and fat that absorbs transit shock.
Fat Selection: Butter vs. Shortening
Butter offers superior holiday flavor but melts around 90°F to 95°F, which can soften dough structure during unheated cargo holds or warm distribution hubs. Shortening has a higher melting point, but lacks real dairy flavor.
The solution is balancing clarified fats, high-butterfat European-style butter, or binding dairy fats with confectioners’ sugar and egg yolks. This keeps your cookies structurally sound across variable parcel environments.
The Best Holiday Cookie Recipes for Gifting and Shipping
Each of the following six recipes has been chosen and adjusted for structural stability, long shelf life, and festive appearance. Bake them exactly as written for reliable shipping performance.
1. Classic Scottish Butter Shortbread
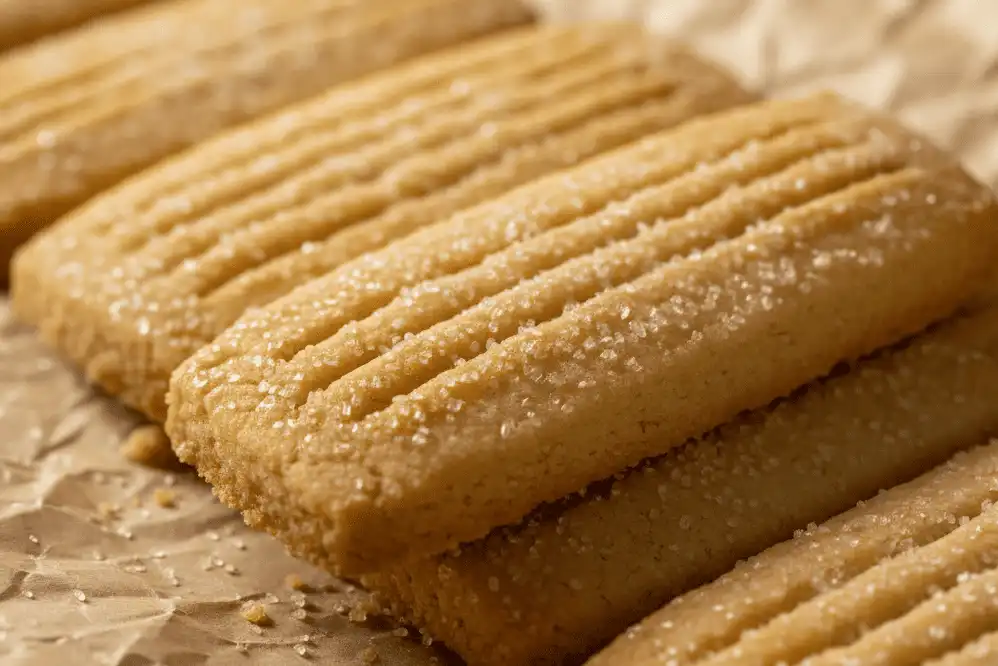
Shortbread is the benchmark of shippable holiday treats. The absence of eggs, leavening agents, and liquid ingredients leaves almost no free water to spoil or evaporate.
Shipping Performance:
- Room Temperature Shelf Life: 21 days
- Durability Rating: Very High
- Best Packaging: Metal tin lined with parchment rounds
Ingredients:
- 340g (1.5 cups) unsalted European-style butter, softened to cool room temperature (65°F)
- 130g (1 cup plus 2 tbsp) powdered sugar, sifted
- 4g (0.75 tsp) fine sea salt
- 5ml (1 tsp) pure vanilla extract
- 380g (3 cups) unbleached all-purpose flour
- 50g (0.33 cup) cornstarch or rice flour (for a crisp, clean break)
- Granulated sugar or coarse sparkling sugar for topping
Baking Instructions:
- Beat the butter, sifted powdered sugar, and salt together in a stand mixer fitted with the paddle attachment on low speed for 2 minutes. Do not whip air into the mixture; keep it thick and creamy.
- Stir in the vanilla extract until combined.
- Whisk the all-purpose flour and cornstarch together. Add to the butter mixture in two additions, mixing on lowest speed just until the dough comes together.
- Press the dough evenly into an ungreased 9×13-inch metal baking pan lined with a parchment sling. Smooth the surface flat using an offset spatula.
- Prick the dough all over with the tines of a fork in parallel rows. Chill the pan in the refrigerator for 45 minutes.
- Preheat your oven to 300°F (150°C). Bake for 55 to 60 minutes until pale golden across the surface and slightly deeper golden at the edges.
- Remove from the oven. While still warm, immediately cut the shortbread into neat rectangles (1×3 inches) using a sharp chef’s knife. Sprinkle lightly with sparkling sugar.
- Allow the shortbread to cool completely in the pan for 4 hours before handling.
Packaging Note: Shortbread pieces pack best when stacked horizontally in fluted paper cups inside a metal tin. The lack of surface moisture keeps them from sticking together.
2. Cranberry Pistachio Twice-Baked Biscotti
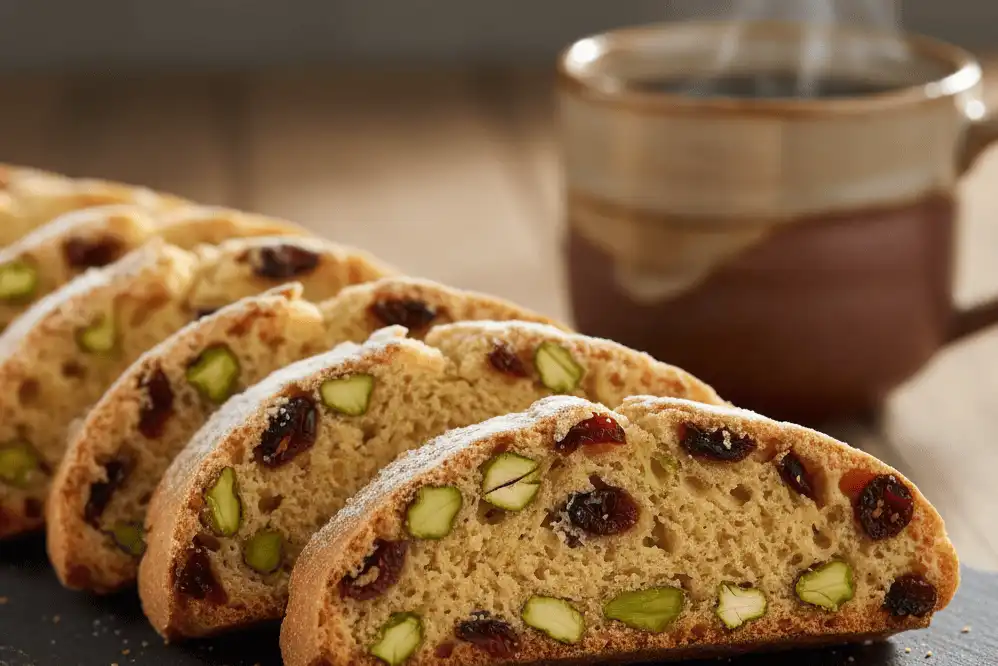
Italian biscotti are historically engineered for long sea voyages. Baking the dough twice removes moisture, creating a firm crumb that resists impact and stays fresh for weeks.
Shipping Performance:
- Room Temperature Shelf Life: 30 days
- Durability Rating: Extreme
- Best Packaging: Cellophane treat bags tied tightly and nestled in crinkle paper
Ingredients:
- 360g (2.75 cups) all-purpose flour
- 200g (1 cup) granulated sugar
- 6g (1.5 tsp) baking powder
- 3g (0.5 tsp) fine sea salt
- 3 large eggs (room temperature)
- 75g (0.33 cup) unsalted butter, melted and cooled
- 10ml (2 tsp) pure vanilla extract
- 3ml (0.5 tsp) pure almond extract
- 100g (0.75 cup) dried cranberries, chopped
- 110g (0.75 cup) shelled unsalted pistachios, whole
- Zest of 1 fresh organic orange
Baking Instructions:
- Preheat your oven to 350°F (175°C). Line a heavy rimmed baking sheet with parchment paper.
- In a large bowl, whisk the flour, sugar, baking powder, and salt together.
- In a separate bowl, whisk together the eggs, melted butter, vanilla extract, almond extract, and orange zest.
- Pour the wet ingredients into the dry ingredients. Stir with a sturdy wooden spoon until a shaggy dough forms, then fold in the dried cranberries and pistachios.
- Turn the dough onto a lightly floured surface and divide in half. Shape each half into a log approximately 12 inches long and 2.5 inches wide. Place both logs on the prepared baking sheet, leaving 4 inches between them.
- Bake for 28 to 30 minutes until the logs are firm to the touch and light golden brown.
- Remove from the oven and let cool on the pan for precisely 15 minutes. Transfer to a cutting board.
- Using a sharp serrated bread knife, slice the logs diagonally into 0.5-inch thick slices using a gentle sawing motion.
- Lay the slices cut-side down on the baking sheet. Return to the oven at 325°F (165°C) for 10 minutes. Flip each slice over and bake for an additional 8 to 10 minutes until completely dry and crisp.
- Cool thoroughly on wire racks.
Packaging Note: Biscotti can serve as protective side braces in gift boxes due to their structural rigidity.
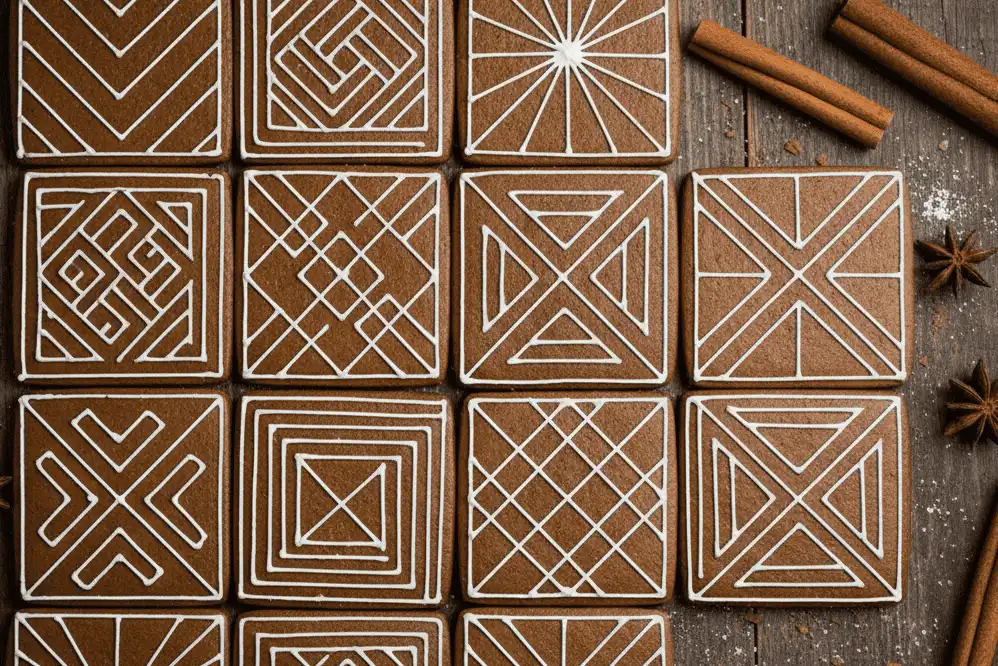
3. Sturdy Spiced Holiday Gingerbread Tiles
This gingerbread uses dark molasses and aromatic spices, with just enough fat to keep the bite pleasant while holding sharp embossed edges. Finished with dry royal icing, they will not smudge during handling.
Shipping Performance:
- Room Temperature Shelf Life: 18 days
- Durability Rating: High
- Best Packaging: Flat cardboard gift boxes with parchment separators
Ingredients:
- 420g (3.25 cups) all-purpose flour
- 12g (1.5 tbsp) ground ginger
- 8g (1 tbsp) ground cinnamon
- 2g (0.5 tsp) ground cloves
- 2g (0.5 tsp) freshly ground nutmeg
- 4g (0.75 tsp) baking soda
- 3g (0.5 tsp) fine sea salt
- 140g (10 tbsp) unsalted butter, softened
- 150g (0.75 cup) dark brown sugar, firmly packed
- 1 large egg, room temperature
- 160g (0.5 cup) unsulfured dark molasses
- 5ml (1 tsp) vanilla extract
Icing Ingredients (Royal Icing for Shipping):
- 240g (2 cups) powdered sugar, sifted
- 15g (2 tbsp) meringue powder
- 45ml (3 tbsp) warm water
Baking Instructions:
- Whisk the flour, spices, baking soda, and salt in a medium bowl until thoroughly blended.
- In a stand mixer fitted with the paddle attachment, cream the butter and dark brown sugar for 2 minutes on medium speed until smooth.
- Add the egg, molasses, and vanilla extract. Beat until smooth and fully emulsified.
- Reduce speed to low. Gradually add the dry ingredients until a firm dough forms. Divide into two flat disks, wrap in plastic wrap, and refrigerate for at least 3 hours or overnight.
- Preheat oven to 350°F (175°C). Line two baking sheets with silicone mats or parchment paper.
- Roll the dough out between two sheets of parchment paper to a uniform 0.25-inch thickness. Cut into geometric tiles or traditional shapes with clean metal cutters.
- Bake for 10 to 12 minutes. The edges should be set and the centers firm to a gentle touch. Cool completely on flat wire racks.
- Make the royal icing: Beat the powdered sugar, meringue powder, and water on medium-high speed for 5 minutes until stiff peaks form. Pipe fine decorative patterns onto cooled cookies.
- Allow royal icing to air-dry uncovered for at least 8 hours to fully harden before packing.
Packaging Note: Never use butter-based frostings on shipped cookies. Meringue-powder royal icing dries rock-hard, preventing surface smudges during transit.
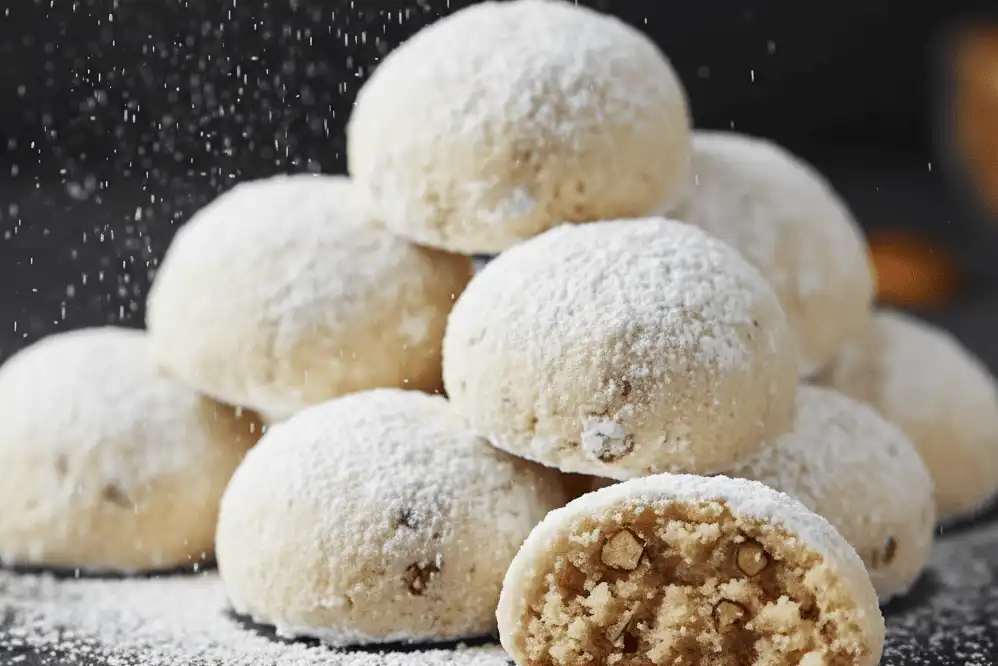
4. Spiced Pecan Snowballs (Mexican Wedding Cookies)
Snowball cookies feature a tight, spherical shape that distributes external pressure evenly across the cookie wall. The toasted nuts provide structural support, while the double-coating of powdered sugar seals out air.
Shipping Performance:
- Room Temperature Shelf Life: 14 days
- Durability Rating: Moderate to High
- Best Packaging: Compartmentalized paper boxes or snug cylindrical cardboard tubes
Ingredients:
- 225g (1 cup) unsalted butter, softened
- 60g (0.5 cup) powdered sugar (for dough)
- 5ml (1 tsp) pure vanilla extract
- 2g (0.5 tsp) ground cinnamon
- 3g (0.5 tsp) fine sea salt
- 250g (2 cups) all-purpose flour
- 150g (1.25 cups) raw pecan halves, finely toasted and pulsed until finely chopped
- 120g (1 cup) additional powdered sugar (for rolling)
Baking Instructions:
- Preheat oven to 350°F (175°C). Spread pecans on a rimmed sheet and toast for 8 minutes until fragrant. Let cool completely, then pulse in a food processor until finely chopped but not pasty.
- Cream butter and 60g of powdered sugar together on medium speed until pale and thoroughly mixed, about 2 minutes. Add vanilla, cinnamon, and salt.
- Turn the mixer to low and add the flour gradually, mixing just until incorporated. Fold in the chopped pecans.
- Chill dough for 30 minutes to firm the butter.
- Scoop portions of dough using a small cookie scoop (about 1 tablespoon or 20 grams each) and roll firmly between your palms into smooth spheres.
- Place spheres 1 inch apart on parchment-lined baking sheets. Bake at 350°F (175°C) for 14 to 16 minutes until the bottoms are pale golden. The tops should remain light.
- Cool on the baking sheet for 5 minutes. While still warm, gently roll each cookie in the extra powdered sugar.
- Transfer to wire racks to cool completely. Once completely cold, roll every cookie a second time in powdered sugar to create a durable, thick exterior coating.
Packaging Note: The second sugar roll creates an insulating barrier that protects the interior crumb from humidity changes during shipping.
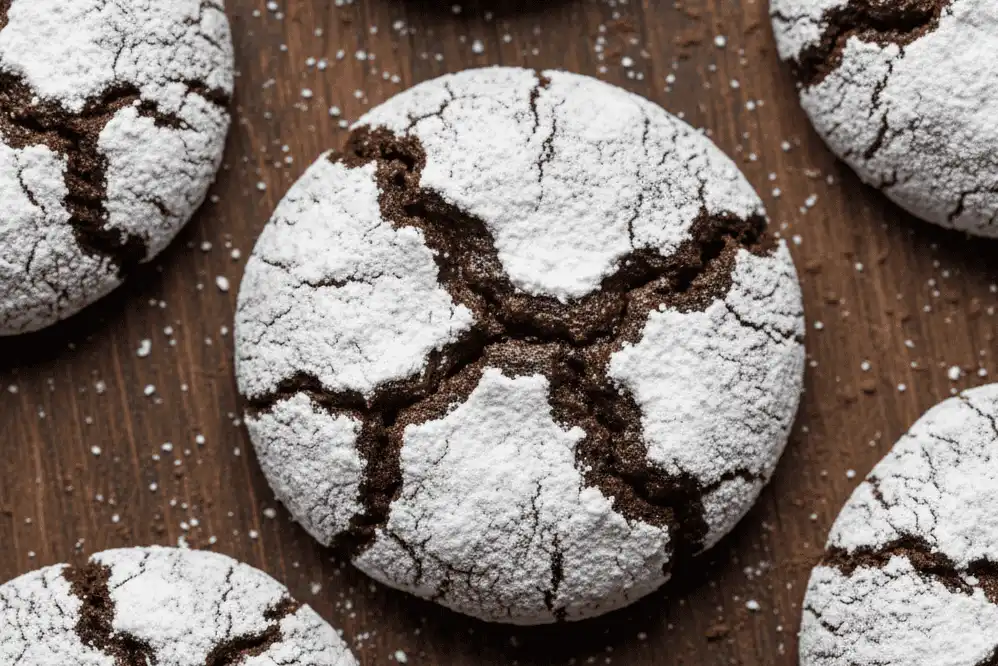
5. Fudgy Espresso Chocolate Crinkle Cookies
Many soft drop cookies turn dry and brittle when shipped, but these crinkles stay fudgy thanks to brown sugar and cocoa butter. Espresso powder deepens the chocolate flavor and extends fresh taste.
Shipping Performance:
- Room Temperature Shelf Life: 8 to 10 days
- Durability Rating: Moderate
- Best Packaging: Heat-sealed cellophane sleeves of 4 to 6 cookies
Ingredients:
- 100g (1 cup) Dutch-process cocoa powder, sifted
- 200g (1 cup) granulated sugar
- 100g (0.5 cup) light brown sugar, packed
- 120ml (0.5 cup) neutral vegetable oil (keeps crumb soft longer than butter)
- 4 large eggs, room temperature
- 10ml (2 tsp) pure vanilla extract
- 6g (1.5 tsp) espresso powder
- 250g (2 cups) all-purpose flour
- 8g (2 tsp) baking powder
- 3g (0.5 tsp) fine sea salt
- 70g (0.33 cup) granulated sugar (first roll)
- 120g (1 cup) powdered sugar (second roll)
Baking Instructions:
- In a medium bowl, whisk the cocoa powder, granulated sugar, brown sugar, and vegetable oil together. The mixture will look like wet sand.
- Beat in the eggs one at a time, whisking well after each addition. Stir in the vanilla extract and espresso powder.
- In a separate bowl, stir the flour, baking powder, and salt together. Fold into the chocolate base using a silicone spatula until a shiny, sticky dough forms.
- Cover the bowl tightly with plastic wrap and chill in the refrigerator for at least 4 hours (overnight is better). This dough must be cold to scoop properly.
- Preheat oven to 350°F (175°C). Line two sheet pans with parchment paper.
- Set out two shallow bowls: one with the 70g granulated sugar, and one with the 120g powdered sugar.
- Scoop 25g balls of dough. Roll briefly into smooth rounds, drop first into the granulated sugar to coat lightly, then coat heavily in the powdered sugar. The granulated sugar layer keeps the powdered sugar from dissolving into the dough as it bakes.
- Place 2 inches apart on pans. Bake for 10 to 12 minutes until spread, crinkled, and set at the edges. The centers should remain soft.
- Cool on the pan for 5 minutes, then cool completely on flat wire racks.
Packaging Note: Because crinkles have a higher moisture content than shortbread, pair them only with other soft cookies. Do not pack them in the same tin as crisp biscotti.
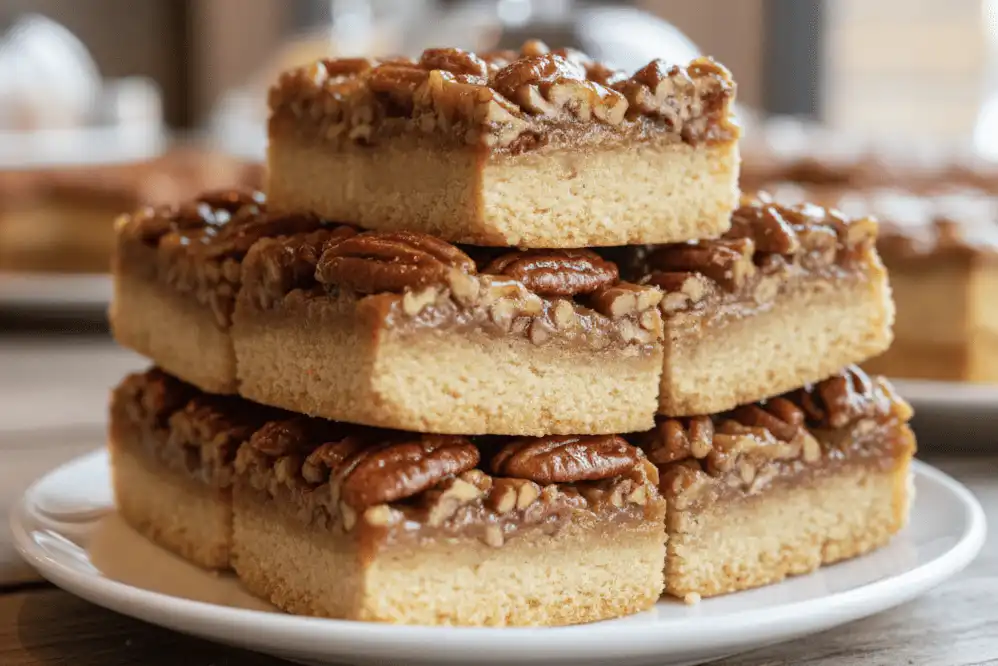
6. Brown Butter Pecan Shortbread Bars
Bar cookies ship exceptionally well because they can be cut into straight-edged rectangles that sit flush against each other in tins. This eliminates empty air pockets and prevents shifting during transport.
Shipping Performance:
- Room Temperature Shelf Life: 12 days
- Durability Rating: High
- Best Packaging: Square bakery tins with parchment paper between layers
Ingredients:
- Shortbread Base:
- 225g (1 cup) unsalted butter, browned and cooled to a soft solid
- 100g (0.5 cup) granulated sugar
- 5ml (1 tsp) vanilla extract
- 3g (0.5 tsp) fine salt
- 260g (2 cups plus 1 tbsp) all-purpose flour
- Pecan Topping:
- 85g (6 tbsp) unsalted butter
- 100g (0.5 cup) dark brown sugar
- 45ml (3 tbsp) pure maple syrup or golden syrup
- 30ml (2 tbsp) heavy cream
- 2g (0.25 tsp) coarse sea salt
- 180g (1.5 cups) chopped pecans
Baking Instructions:
- Preheat oven to 350°F (175°C). Line an 8×8-inch metal baking pan with parchment paper, leaving an overhang on two opposite sides to use as a sling.
- Make the base: Cream the cooled brown butter, granulated sugar, vanilla, and salt until smooth. Stir in the flour on low speed until a crumbly dough forms. Press firmly and evenly into the prepared pan.
- Bake the base for 18 to 20 minutes until light golden.
- While the base bakes, prepare the topping: In a small saucepan over medium heat, combine the butter, brown sugar, maple syrup, and heavy cream. Bring to a rolling boil for 1 minute. Remove from heat and fold in the chopped pecans and salt.
- Pour the hot pecan topping evenly over the warm, par-baked shortbread base.
- Return the pan to the oven and bake for an additional 18 to 20 minutes until the topping bubbles across the entire surface.
- Cool completely in the pan at room temperature for 3 hours, then chill in the refrigerator for 1 hour to set the topping firmly.
- Use the parchment sling to lift the block out onto a cutting board. Trim 0.25 inches off each edge, then cut into sixteen 1.75-inch squares using a warm, clean chef’s knife.
Packaging Note: Wrap individual bars in small squares of wax or glassine paper before boxing to prevent the caramel pecan topping from sticking to adjacent treats.
Step-by-Step Packing and Shipping Guide
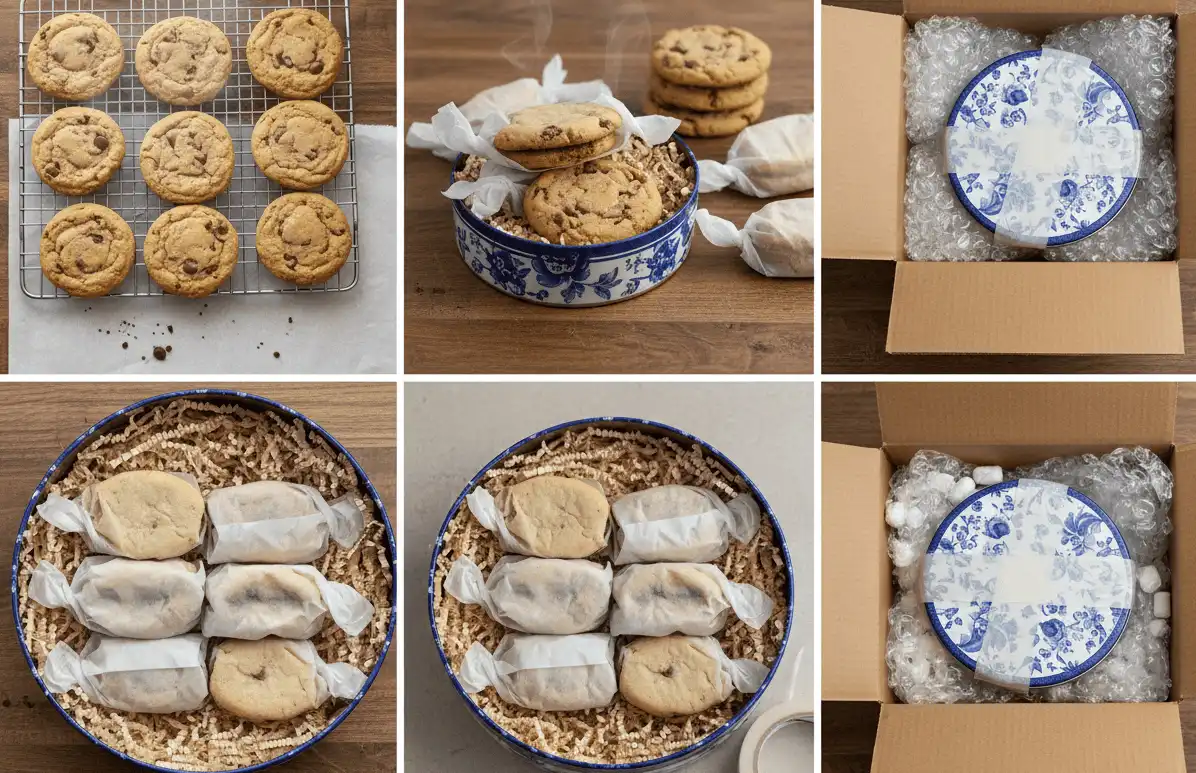
Good baking is only half the battle. Transit survival depends on how you isolate each treat from moisture loss, crushing forces, and internal package movement.
-
Step 1: Cool Thoroughly for at Least 4 to 6 Hours
What: Let every baked treat come to complete room temperature before packing.
Why: Warm cookies release residual steam. If sealed inside plastic or a tin, that trapped moisture condenses on the container walls, softening your crisp crusts and creating mold risk.
Pro Tip: Place your cookies on elevated wire cooling racks away from hot oven vents. For delicate snowballs or decorated cookies, allow a full 8 to 12 hours for glazes and fats to stabilize completely.
-
Step 2: Group Cookies by Moisture Profile
What: Separate dry, crisp cookies from soft, chewy varieties.
Why: Moisture always moves toward equilibrium. If you pack a chewy chocolate crinkle cookie alongside a crisp shortbread in the same container, the shortbread absorbs water from the crinkle. After 48 hours, the shortbread turns soggy, while the crinkle cookie dries out.
Pro Tip: If you must use a single gift tin, seal soft cookies in heat-sealed food-grade polypropylene bags before placing them in the same tin as wrapped crisp cookies.
-
Step 3: Pair and Cushion Cookies in Direct Food Packaging
What: Wrap flat cookies back-to-back in pairs using wax paper or parchment paper, then wrap with plastic wrap.
Why: Flat cookies paired flat-side to flat-side reinforce each other against bending snaps. The paper prevents surfaces from rubbing off onto one another.
Common Mistake: Do not use colored holiday tissue paper directly against cookies. Food fats bleed into consumer tissue, which can leave chemical dye residues and off-flavors on your baked goods.
-
Step 4: Pack the Inner Container with the “Zero-Movement” Rule
What: Fill every empty millimetre inside your primary container (metal tin, sturdy gift box, or wooden crate).
Why: Packages survive drops when the contents cannot move inside. If cookies can slide even a fraction of an inch, momentum will shatter the edges during transit.
Pro Tip: Fill empty space using food-grade crinkle paper, cupcake liners, clean parchment sheets, or bubble cushion pads on top before snapping the lid shut.
-
Step 5: Perform the Physical Shake Test
What: Close the tin or gift box and give it a firm, controlled shake directly next to your ear.
Why: If you feel any internal weight shift or hear a rattle, open the container back up and add more cushion padding.
Pro Tip: Tape the perimeter of metal tin lids with food-grade vinyl sealing tape. This secures the lid if dropped and creates an airtight seal against humidity swings.
-
Step 6: Box-in-Box Packing for Postal Shipment
What: Place your packed, sealed tin inside a corrugated cardboard shipping box lined with at least 2 inches of cushioning on all six sides.
Why: Outer shipping boxes take the brunt of automated conveyor drops and postal tumbling. The inner decorative tin must float inside shock-absorbing material.
Pro Tip: Use biodegradable packing peanuts or crumpled kraft paper rather than newspaper. Seal all outer box seams using the standard H-taping method with strong packing tape.
Cookie Durability and Shelf-Life Comparison
Review this quick reference guide to select the right recipes for your shipping distances and recipient timelines.
| Cookie Style | Texture Profile | Room Temp Shelf Life | Breakage Risk | Recommended Max Transit | Best Packaging Method |
|---|---|---|---|---|---|
| Twice-Baked Biscotti | Dry, very crisp | 30 days | Very Low | 7–10 days | Sealed cello bags, crinkle fill |
| Butter Shortbread | Dense, crisp, crumbly | 21 days | Low | 5–7 days | Metal tin with parchment liners |
| Spiced Gingerbread Tiles | Firm, flat, structured | 18 days | Low to Moderate | 5–7 days | Cardboard dividers, bubble wrap layer |
| Pecan Snowballs | Tender, dense crumb | 14 days | Moderate | 4–5 days | Nested cardboard tubes or divided boxes |
| Pecan Shortbread Bars | Dense shortbread, chewy top | 12 days | Low | 3–5 days | Individual wax wraps, stacked flush |
| Chocolate Crinkles | Soft, fudgy center | 8–10 days | Moderate | 2–3 days | Airtight poly bags, expedited mail |
Professional Baker Tips for Long-Distance Gifting
Take your holiday mailing process to a professional level with these testing, temperature, and scheduling techniques.
Plan Around Weekend Postal Holds
Always ship packages on a Monday or Tuesday morning. If you ship on a Thursday or Friday, your parcel will likely sit in an unheated postal warehouse over the weekend, adding 48 hours of transit time and exposing your baked goods to cold or damp environments.
Weigh Ingredients for Consistent Results
Volume measuring cups can vary flour amounts by up to 25% depending on how tightly it is packed. Excess flour creates dry, crumbly dough that cracks easily under postal handling. Using an inexpensive digital kitchen scale guarantees consistent structural density across every batch.
Add Tortillas to Soft Cookie Containers
If you are shipping soft treats like chocolate crinkles or molasses drop cookies, place a small round of plain flour tortilla between parchment sheets inside the sealed container. The cookies slowly draw moisture from the tortilla, keeping them bakery-soft for up to five days in transit without changing their holiday flavor.
Test Your Own Packaging
If this is your first holiday season shipping cookies, mail a test box to a friend or family member a few weeks early. Ask them to photograph the package unboxing and critique the texture and appearance so you can adjust your packaging before your main holiday run.
Common Shipping Mistakes to Avoid
Even seasoned home bakers can make simple packing mistakes. Avoid these common missteps to keep your gifts arriving intact.
Packing Fresh Cookies Warm
Rushing warm cookies off baking sheets directly into gift containers traps lingering heat and steam. Condensation turns crisp crusts limp and creates a breeding ground for surface mold during transit. Give cookies several hours on wire racks to cool and cure completely.
Using Delicate Frostings or Buttercream
Fresh buttercream, cream cheese frosting, and soft chocolate ganache stay soft at room temperature. They easily melt, smear, and spoil inside warm parcel hubs. Use firm royal icing made with meringue powder, or dust treats with confectioners’ sugar instead.
Leaving Empty Space in Shipping Boxes
A loose cookie inside a gift box behaves like a tiny pendulum. When delivery trucks stop and automated sorters slide parcels, loose cookies smash against each other. Every square inch of empty space needs crumpled kraft paper, crinkle shred, or bubble wrap.
Relying on Decorative Tins Alone
A decorative holiday tin is an inner packaging container, not an exterior shipping box. Metal tins pop open easily under cargo pressure and bend when dropped. Always secure tin lids with vinyl tape and pack them inside a heavy-duty corrugated shipping carton with ample outer cushioning.
Holiday Cookie Box Assembly Best Practices
Curating a thoughtful gift box means balancing flavors, colors, shapes, and textures while keeping shipping practical.
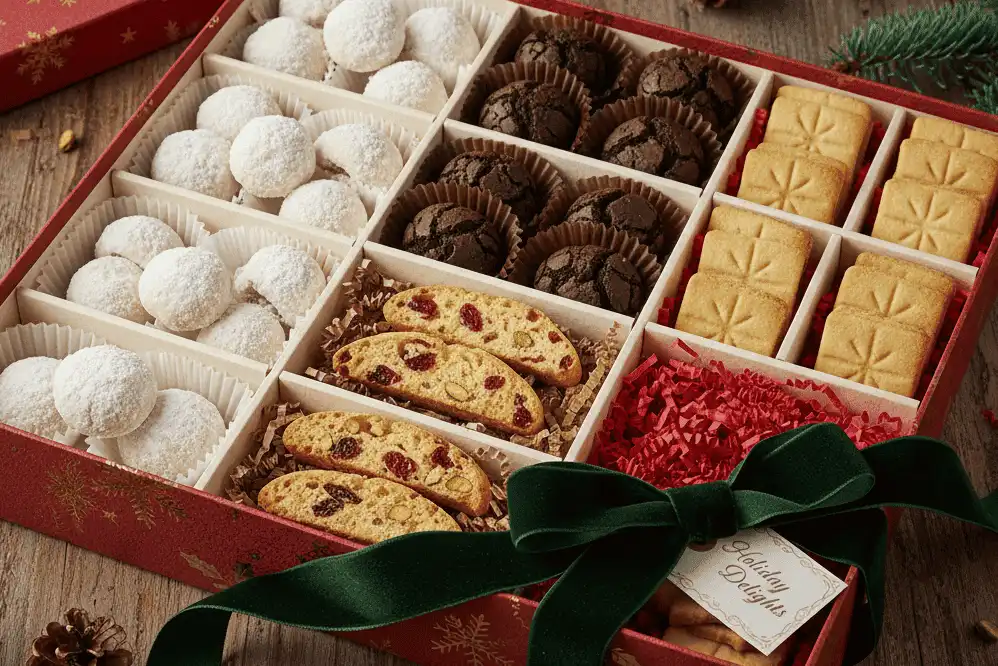
- Vary Your Visual Layout: Combine pale powdered sugar snowballs, deep chocolate crinkles, ruby-studded biscotti, and golden shortbread for visual appeal.
- Group Identical Cookies Together: Keep similar cookies nested in rows rather than scattering them randomly across the box. This clean layout protects edges and prevents flavor transfer.
- Include an Ingredient Card: Always enclose a printed menu card listing every cookie variety and any potential allergens (tree nuts, peanuts, wheat, dairy, eggs) for your recipients’ safety.
- Include Care and Storage Instructions: Mention whether specific cookies are best eaten immediately, dunked into coffee, or stored in airtight glass jars to extend freshness.
Essential Baking and Packing Resources
Having reliable tools on hand makes batch baking and gift assembly smoother and less stressful.
- Digital Kitchen Scale: Essential for accurate flour measurements and consistent cookie dough portioning.
- Heavy-Gauge Half-Sheet Pans: Thick aluminum pans prevent scorched cookie bottoms during large-scale holiday baking.
- Pre-Cut Parchment Paper Sheets: Keeps baking surfaces clean and serves as moisture barriers between cookie layers.
- Food-Grade Cellophane Bags and Heat Sealer: Creates airtight, moisture-proof barriers around individual cookie varieties.
- Seamless Metal Cookie Tins: Provides rigid, reusable protection against external impact.
- Corrugated Cardboard Shipping Boxes (200 lb. Test / 32 ECT): Provides dependable crush resistance through commercial parcel sorting systems.
Recommended Related Guides
Explore these complementary baking and seasonal guides to round out your holiday kitchen plans:
- Make-Ahead Holiday Cookie Doughs You Can Freeze for Months
- The Complete Royal Icing Masterclass: From Flooding to Shipping Stability
- Gluten-Free Holiday Cookies That Ship Without Crumbling
- How to Host a Stress-Free Holiday Cookie Exchange Party
- Homemade Holiday Food Gifts: Jams, Extracts, and Confections
Authority References
Refer to these trusted sources for food safety and holiday shipping logistics:
- USDA Food Safety and Inspection Service (FSIS): Guidance on shelf stability, ambient food safety, and mail-order food handling.
- United States Postal Service (USPS): Official domestic and international holiday shipping cutoff dates and parcel packaging guidelines.
- King Arthur Baking Company: Reference guides for ingredient weights, flour hydration factors, and baker’s percentages.
Key Takeaways
- Choose low-moisture recipes like biscotti, shortbread, and dense gingerbread to survive long postal transit.
- Never pack crisp and soft cookies together inside the same unsealed space; moisture migration softens crisp cookies and dries out soft ones.
- Allow baked goods to cool completely for at least 4 to 6 hours before packing to prevent trapped steam and condensation.
- Use the shake test: if you hear movement or feel internal contents shift, add more food-grade padding.
- Ship early in the week on a Monday or Tuesday to prevent parcels from sitting in unheated sorting hubs over the weekend.
Final Thoughts
Baking homemade holiday cookies for long-distance friends and family is a rewarding tradition. Choosing recipes with solid structure and low free moisture protects your hard work all the way to its destination.
Invest as much attention into your packing and shipping routine as you do into your dough mixing and oven timing. With quality ingredients, careful baking, and zero-movement packaging, your holiday treats will arrive just as fresh, fragrant, and intact as the day you baked them.
Frequently Asked Questions
How far in advance can I bake cookies before shipping them?
Dry, low-moisture cookies like shortbread and biscotti can be baked up to one week before mailing if kept in airtight containers at cool room temperature. For softer treats like crinkles and bars, bake them no more than 24 hours before your planned Monday or Tuesday morning postal drop-off.
Can I freeze holiday cookies before shipping them?
Freezing baked cookies before shipping is not recommended. As frozen cookies thaw inside transit packaging, they release surface condensation. This trapped moisture makes crisp cookies soggy, dissolves powdered sugar, and causes royal icing decorations to run.
Which holiday cookies should I avoid shipping?
Avoid thin lace cookies, fragile meringues, macarons, tuiles, and cookies filled with fresh custard, cream cheese, or fresh fruit jams. These varieties break easily, absorb humidity rapidly, or risk bacterial growth at ambient warehouse temperatures.
What is the most protective way to wrap cookies for shipping?
Wrap matching flat cookies back-to-back in pairs with wax paper, then wrap that pair snugly in plastic wrap. Pack pairs into an airtight metal tin padded with food-grade crinkle paper until there is zero movement. Place the tin inside a sturdy cardboard shipping box lined with two inches of outer bubble wrap.
How do I keep cookies fresh when shipping across the country?
Use food-grade heat-sealed polypropylene bags to lock in baseline moisture and keep out humid ambient air. Pair your packaging with prompt shipping, such as Priority Mail 2-to-3-day delivery, and always ship early in the week so parcels bypass weekend warehouse stops.
Can I ship cookies in a decorative tin without an outer box?
No. Decorative holiday tins are primary packaging containers that cannot handle postal sorting belts. The metal dents easily and the lids can pop off under parcel pressure. Always place your sealed tin inside a heavy-duty corrugated shipping box with ample cushioning on all sides.
What shipping carrier is best for sending holiday cookies?
Major carriers like USPS, UPS, and FedEx all provide dependable holiday delivery if you choose 2-to-3-day expedited air or ground services. Select the service that guarantees delivery by your target date, and drop off your parcel at the counter early on a Monday morning.