
Quick Answer: Choosing the Right Festive Cookie Container
A high-quality christmas cookie jar combines food-safe materials, a functional airtight seal, and a mouth opening wide enough to access baked goods without breakage. Heavy stoneware and non-porous glass offer the best moisture control, while traditional earthenware ceramic provides classic nostalgic charm.
For baked goods to remain crisp or soft as intended, prioritize containers with removable food-grade silicone gaskets. Decorative lids without gaskets allow ambient moisture to ruin delicate baked textures within forty-eight hours.
- Best for Long-Term Freshness: Heavy stoneware or glass equipped with silicone rings.
- Best for Pure Décor: Hand-painted ceramic figures, vintage earthenware, and whimsical sculptural pieces.
- Key Dimension to Check: Minimum 4.5-inch opening diameter to prevent crumbling decorated sugar cookies.
Why the Holiday Cookie Container Matters
Holiday baking represents hours of careful measurement, mixing, and decorating. Storing those baked goods in an unsuitable container leads to stale gingerbread, soggy shortbread, and ruined icing details.
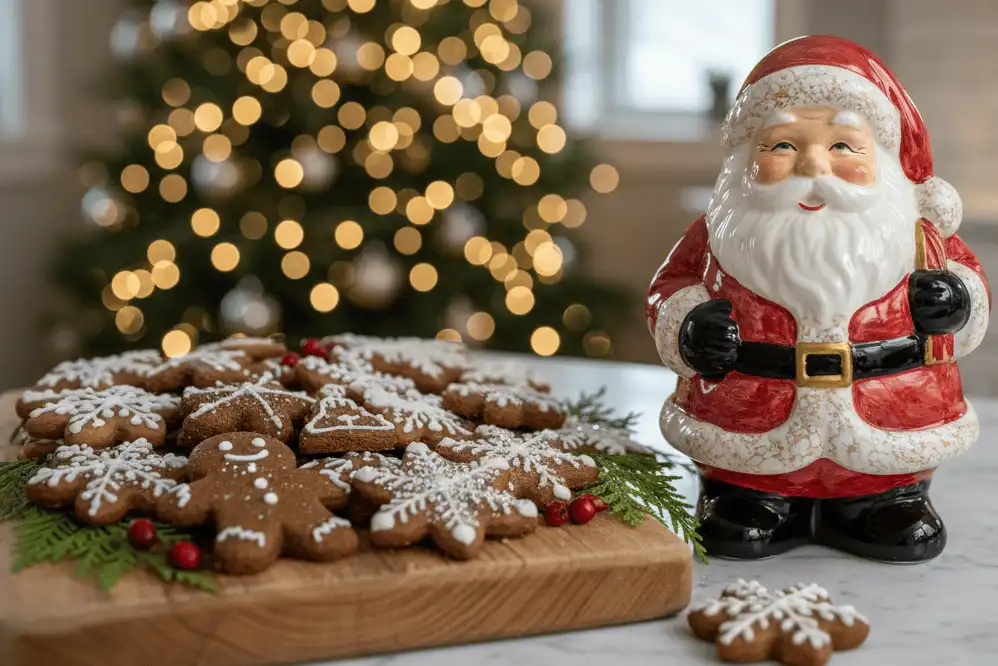
Beyond simple food preservation, these seasonal pieces anchor kitchen holiday décor. A thoughtfully chosen container creates visual warmth, serves as an interactive focal point for visiting guests, and often turns into a treasured family heirloom passed down across generations.
This comprehensive manual covers technical material performance, food-contact safety standards, vintage appraisal points, and kitchen styling strategies. Whether you are an avid baker, an interior design enthusiast, or a vintage pottery collector, you will find practical instructions tailored to your goals.
Materials Breakdown: Earthenware, Stoneware, Glass, and Metal
Understanding what your container is made of determines how well it protects your baked treats and how long the piece will survive annual handling. Different ceramic and non-ceramic compositions perform distinct functional roles in the kitchen.
Earthenware and Dolomite Ceramics
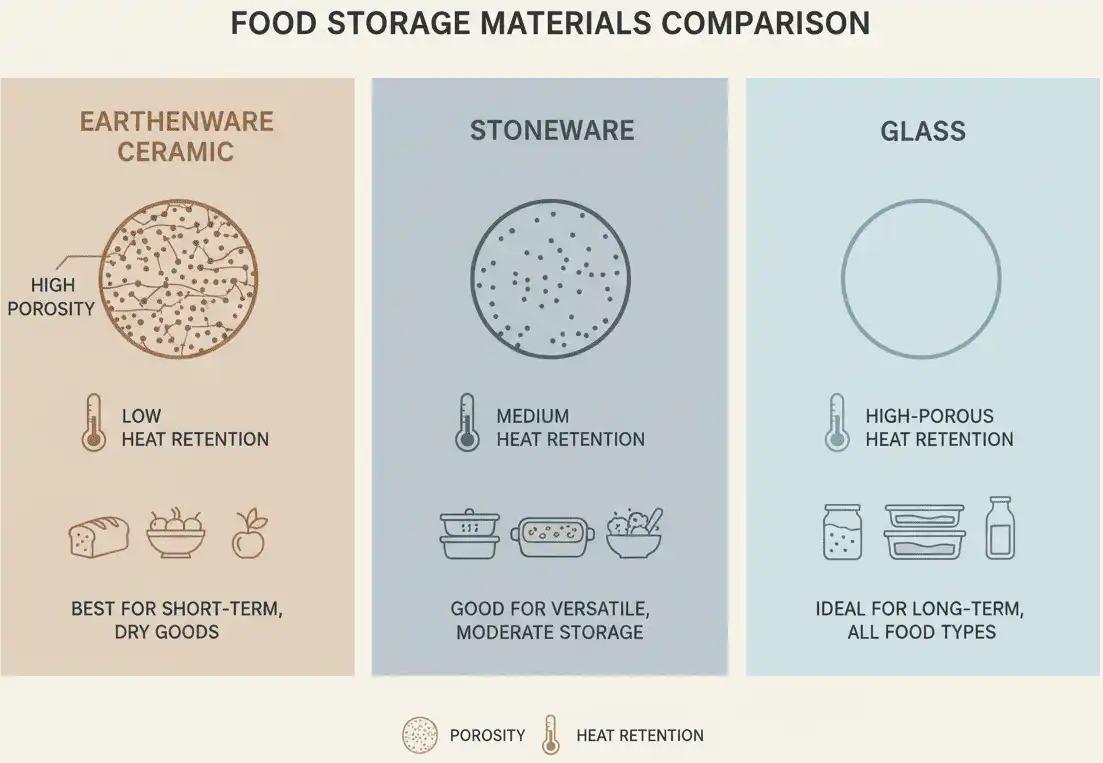
Most mass-market sculpted holiday pieces consist of earthenware or dolomite ceramic. These clays fire at lower temperatures (around 1,800°F to 2,100°F), leaving a relatively porous clay body underneath the decorative glaze.
Manufacturers favor earthenware because it accepts bright, vibrant colored glazes and intricate molds easily. However, unglazed rims absorb ambient kitchen moisture, and thin protruding elements like Santa hands or reindeer antlers chip easily under heavy daily use.
Dense High-Fired Stoneware
Stoneware fires at temperatures exceeding 2,200°F, creating a dense, non-porous structure before glazing occurs. This material resists chipping, provides substantial weight, and holds up to decades of regular use.
The thick walls of stoneware provide excellent thermal insulation, protecting buttery treats from kitchen temperature swings caused by running ovens. While stoneware designs feature softer, more rounded sculpting details than earthenware, their structural longevity is vastly superior.
Flint and Borosilicate Glass
Clear and pressed patterned glass containers offer zero porosity and complete chemical inertness. They never absorb butter fats, spice aromas, or lingering food odors from previous holiday seasons.
Glass allows you to showcase festive layered gingerbread, colorful French macarons, or dipped biscotti directly on the counter. The trade-off is light exposure, which can accelerate the oxidation of fats in delicate butter cookies if placed in direct sunlight.
Tinplate and Coated Steel
Traditional holiday biscuit tins rely on thin steel sheets coated with a protective layer of tin or food-grade lacquer. They are lightweight, shatterproof, and cost-effective options for holiday gifting and transport.
Tin containers lack silicone gaskets and rely on friction-fit lids that are rarely airtight. Never soak tin containers in water, as micro-scratches in the protective coating will quickly rust along the seams.
Airtight Seals and the Science of Holiday Cookie Freshness
Cookie spoilage is rarely about bacterial growth; it is almost entirely a matter of moisture transfer. Atmospheric humidity dictates whether your hard cookies turn soggy or your soft cookies turn rock hard.
Starch Retrogradation and Equilibrium
Baked goods naturally seek moisture equilibrium with the air surrounding them. In dry winter indoor environments, moist cookies like snickerdoodles lose water to the air, causing starch crystallization and rapid hardening.
Conversely, crisp treats like gingerbread snaps or butter wafers pull moisture out of humid indoor air, dissolving their delicate sugar-starch matrix. A tightly sealed container stops this environmental exchange entirely by trapping a microclimate with constant relative humidity.
Gasket Types: Silicone vs. Rubber vs. Friction Fit
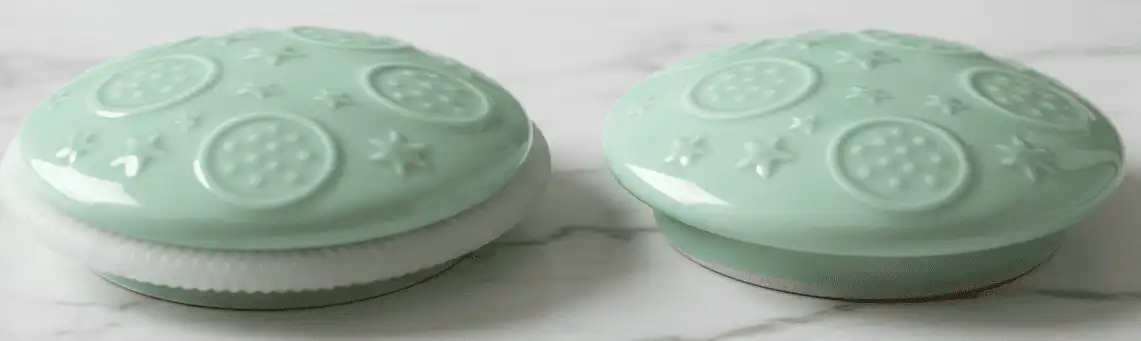
Modern functional pieces utilize food-grade silicone gaskets along the lid rim. Silicone remains flexible in cold temperatures, resists degradation from butter fats, and creates a hermetic seal against smooth ceramic surfaces.
Older vintage models often used vulcanized natural rubber rings, which dry out, turn brittle, and crack over time. If a vintage lid lacks a gasket entirely, the loose ceramic-on-ceramic contact permits constant airflow, drying out your baked creations within two days.
Popular Holiday Themes and Design Aesthetics
Selecting a design that complements your interior style ensures your kitchen counter looks curated rather than cluttered. Seasonal motifs range from playful mid-century characters to understated Scandinavian modern forms.
Vintage Nostalgic Figures
Classic designs feature rosy-cheeked Santas, retro snowmen with striped scarves, and animated reindeer figures. These pieces evoke mid-twentieth-century design conventions with soft pastel accents, airbrushed pink cheeks, and high-gloss glazes.
They work exceptionally well in vintage-inspired spaces, cottage kitchens, and traditional festive homes. Their sculptural details draw immediate attention, making them great standalone conversation pieces.
Architectural Gingerbread Houses
Architectural ceramic buildings depict snow-covered cottage roofs, frosting-lined window frames, and candy-cane trim. The lid frequently lifts off as the roofline or chimney stack.
These pieces often feature wide rectangular openings, which makes loading and removing oversized decorated cookies much easier. Their textured, matte-glazed surfaces hide fingerprints and light handling marks effectively.
Nordic and Minimalist Ceramics
Modern holiday containers lean into matte white stoneware, ribbed ceramic textures, and subtle debossed pinecone or tree patterns. Many incorporate natural beechwood or acacia lids fitted with silicone seals.
These vessels blend seamlessly into contemporary, Japandi, and modern farmhouse kitchens. Their muted color schemes allow them to remain displayed from early November straight through late January without feeling outdated.
The Collector’s Guide: Identifying Authentic Vintage Pieces
Collecting antique and mid-century holiday ceramic containers is a dedicated hobby with an active secondary market. Knowing how to evaluate condition and identify maker marks protects you from overpaying for modern reproductions.
Legendary American and European Potteries
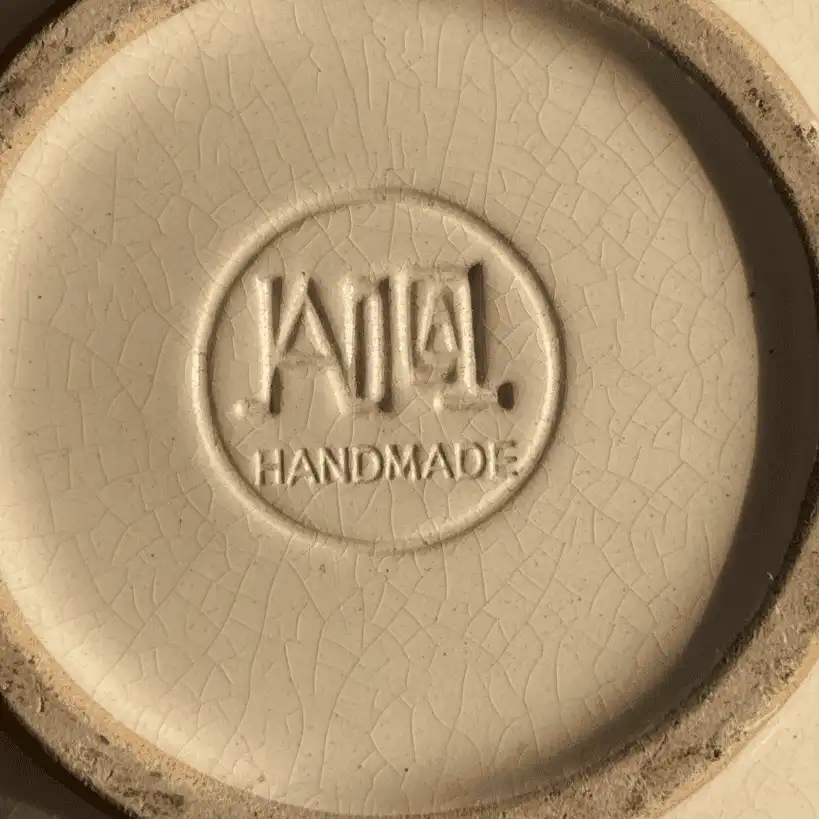
Mid-century pieces produced by McCoy, American Bisque, Shawnee, and Holt-Howard remain highly sought after by collectors. McCoy jars typically display an incised “McCoy USA” mark on the bottom foot ring, although mold wear in later runs sometimes obscured the lettering.
American Bisque pieces are easily recognized by their unique wedge-shaped lid stops and distinctive raised base feet. Holt-Howard pieces from the late 1950s and 1960s usually carry stamped black foil labels or red copyright stamps directly on the cold glaze.
Evaluating Crazing, Hairlines, and Cold Paint Loss
Crazing appears as a network of fine web-like fractures inside the surface glaze, caused by differing expansion rates between clay and glaze during cooling. While common on older earthenware, heavy interior crazing creates microscopic crevices that trap food oils and harbor bacteria.
Cold paint refers to decorative pigments applied over the glaze after firing, a technique frequently used for facial features and small details. Cold paint does not bond permanently with the ceramic, meaning harsh washing or scrubbing will quickly strip away the design.
Food Safety, Glaze Testing, and Lead Hazards
Using older vintage containers directly for food storage introduces significant health risks if the glaze formulation contains heavy metals. Before placing edible items inside any vintage piece, evaluate its chemical safety.
Lead and Cadmium in Antique Glazes
Prior to the establishment of modern consumer product safety regulations in the 1970s, ceramic glazes frequently used lead compounds to achieve low melting points and smooth finishes. Cadmium was widely used to produce vivid reds, oranges, and deep yellows on holiday motifs.
These heavy metals do not stay locked in unstable glazes permanently. When fatty acids from butter or acidic ingredients from fruit-filled cookies contact an unstable glaze, toxic elements can leach directly into your baked goods.
How to Screen Vintage Containers
Inexpensive chemical swab tests (such as sodium rhodizonate swabs) provide rapid colorimetric screening for surface-available lead. Rub the activated swab against unglazed foot rings, interior glaze walls, and chipped areas.
If a vintage piece tests positive or shows extensive interior crazing, relegate it strictly to decorative display. You can still store food inside by inserting a modern glass insert or sealing cookies inside food-grade plastic bags before placing them in the jar.
How to Choose the Ideal Container for Your Needs
Avoid buying on visual appearance alone. A container that is awkward to clean or cracks your iced cookies when you reach inside quickly becomes a frustration.
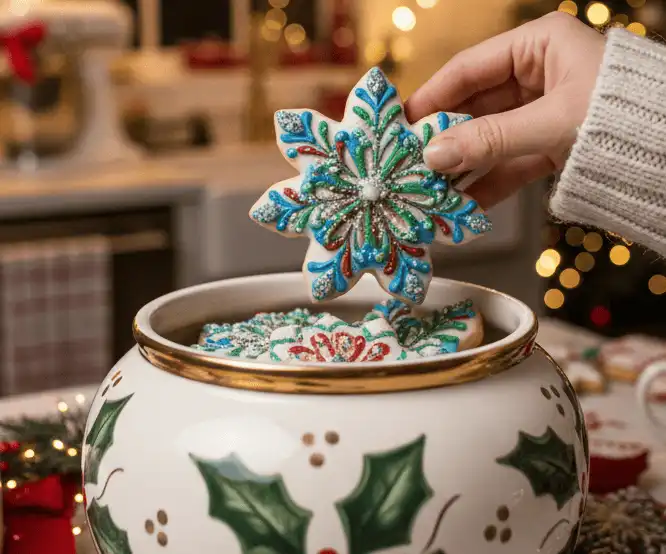
Mouth Diameter and Physical Dimensions
Measure the interior mouth opening before purchasing. A diameter under 4 inches makes reaching to the bottom difficult for adult hands and forces you to tilt large cutout cookies sideways, breaking off royal icing details.
Look for openings measuring between 4.5 and 5.5 inches across. For family households that bake multiple batches, select an interior capacity of at least 3.5 to 4.5 quarts to hold two to three dozen standard drop cookies comfortably.
Weight Distribution and Lid Ergonomics
Evaluate the lid handle or finial carefully. Lids shaped like smooth Santa hats, slick glazed snowballs, or tiny decorative chimneys can be slippery to grasp with butter-coated hands.
A broad, secure knob or an indentation that provides positive finger leverage prevents catastrophic lid drops onto hard quartz countertops. The base should feature a flat, ground foot ring that sits level without rocking or sliding.
Step-by-Step Guide to Packing and Storing Holiday Cookies
Follow this precise loading protocol to ensure your holiday baked goods stay as fresh, intact, and flavorful on day seven as they were on baking day.
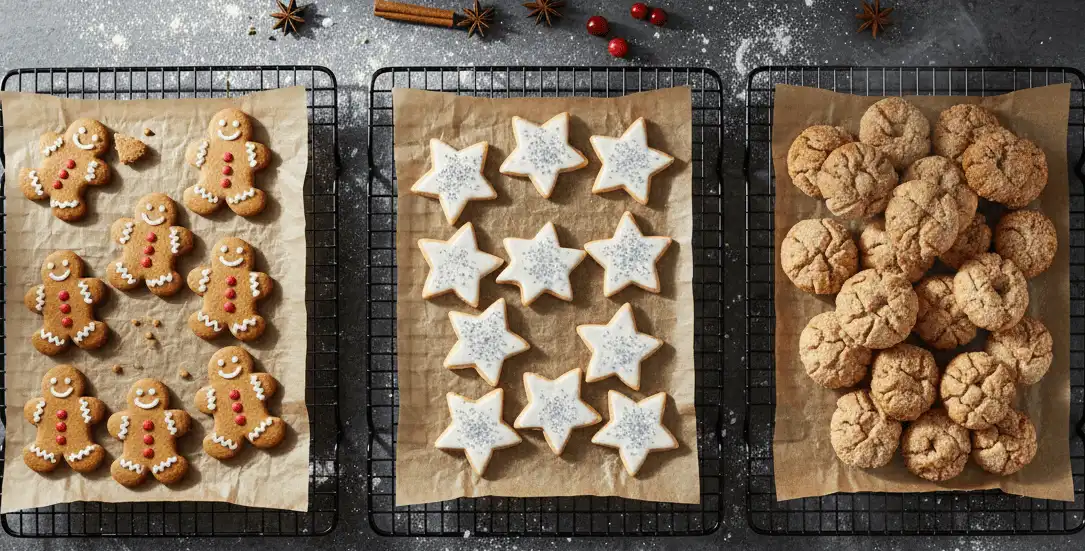
The Five-Step Freshness Protocol
Step 1: Cool Baked Goods to Room Temperature
Never place cookies inside a closed container while they retain even slight warmth. Residual heat generates interior condensation, which drips down the ceramic walls and turns crisp bottoms into a mushy slurry within hours. Allow baked goods to rest on open wire cooling racks for at least ninety minutes.
Step 2: Segregate Cookie Types by Moisture Content
Never mix crisp cookies (like gingersnaps or thin butter wafers) in the same jar with soft, chewy cookies (like molasses drops or frosted sugar rounds). Moisture naturally migrates from high-water treats to dry ones, leaving your soft cookies dry and your crisp ones limp. Use separate jars for distinct texture profiles.
Step 3: Cut Parchment Paper Buffer Discs
Trace the base of your container onto unbleached silicone-treated parchment paper and cut out several rounds. Place one disc at the bottom of the vessel to buffer cookies from the unglazed interior base, and place additional discs between every two layers of cookies. This stops royal icing from scratching and prevents delicate cookies from sticking together under their own weight.
Step 4: Load Heavy Cookies First and Fill Gaps
Arrange the densest, sturdiest cookies across the bottom layer. Place delicate lace cookies, dipped meringues, and piped shortbread on the top tiers. Avoid stacking items more than four to five layers deep in deep containers to prevent crushing the bottom layer.
Step 5: Inspect and Seat the Silicone Gasket
Wipe the ceramic rim with a dry cloth to clear away loose powdered sugar, cookie crumbs, or stray sprinkles. Gently press the lid down with even, two-handed pressure until the silicone gasket seats flatly against the throat of the vessel. Avoid twisting the lid, which can roll or pinch the silicone ring out of alignment.
Comprehensive Material Comparison Table
Review the operational characteristics of each primary construction material to select the right option for your baking and display preferences.
| Material | Seal Efficiency | Odor Resistance | Fragility Rating | Cleaning Method | Best Cookie Match |
|---|---|---|---|---|---|
| Earthenware Ceramic | Low to Moderate | Moderate (Porous base) | High (Chips easily) | Hand Wash Only | Individually wrapped treats |
| High-Fired Stoneware | High (When gasketed) | Excellent (Vitrified) | Low to Medium | Base Dishwasher Safe | Chewy drop cookies, snickerdoodles |
| Borosilicate / Flint Glass | Maximum Hermetic | Total (Non-porous) | Medium (Shatter risk) | Fully Dishwasher Safe | Crisp biscotti, decorated cutouts |
| Tinplate / Steel | Low (Friction fit) | Good (Lacquer coated) | Very Low (Dents only) | Damp Wipe Only | Shortbread, gingerbread cookies |
Styling and Display Ideas for Holiday Kitchens
Integrating your holiday containers into your broader decorating scheme elevates the entire kitchen. Thoughtful arrangement keeps counters functional while highlighting festive accents.
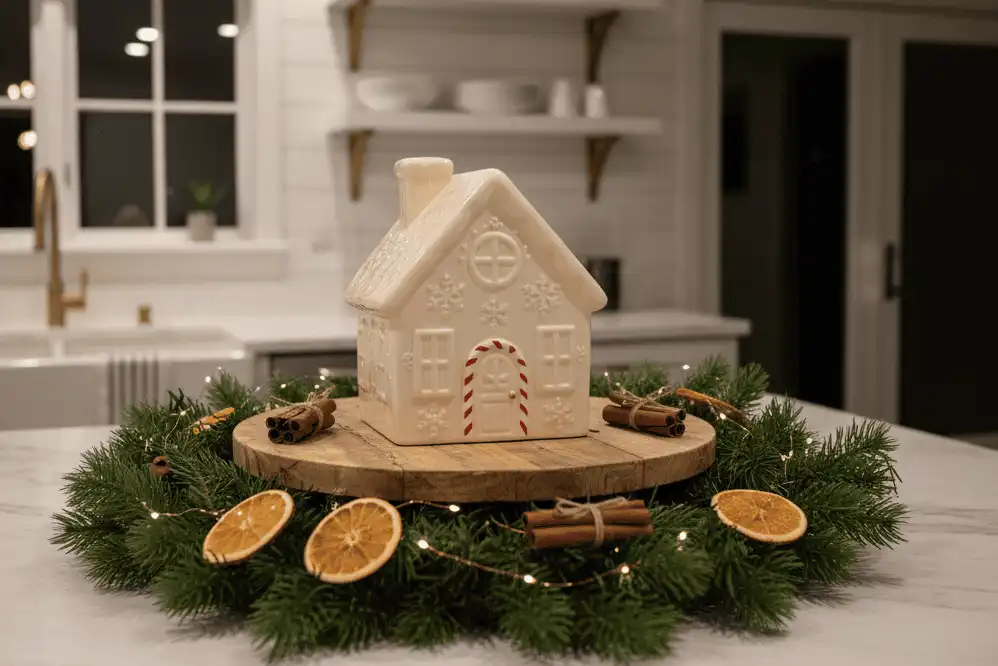
Creating Kitchen Island Vignettes
Anchor large sculptural pieces on a round wooden cutting board or footed marble riser. This elevates the container above working counter space and creates a defined decorative zone.
Surround the base with natural cedar sprigs, a few cinnamon sticks, and battery-operated micro fairy lights. The natural wood texture grounds the glossy ceramic glaze, keeping the presentation elegant.
The Dedicated Holiday Dessert Station
Pair your container alongside an electric kettle, glass jars of hot cocoa powder, and rows of festive mugs on a kitchen sideboard. This creates an inviting self-serve station for family and holiday guests.
Keep a small pair of stainless steel tongs or a clean linen napkin next to the jar. This keeps the presentation sanitary and prevents guests from digging through layers with bare hands.
Cleaning, Care, and Off-Season Storage
Improper cleaning and off-season storage damage more holiday ceramics than daily kitchen use. Follow these preservation rules to protect delicate glazes and structural elements.
Washing Painted and Glazed Surfaces
Never put hand-painted ceramics or cold-painted vintage items into an automatic dishwasher. High water temperatures, harsh alkaline detergent powders, and intense water jets will pit glazes and strip away paint details.
Wash the vessel by hand using lukewarm water, a mild pH-neutral liquid dish soap, and a soft microfiber sponge. If butter oils leave a stubborn rancid scent inside the bottom, fill the vessel with warm water and two tablespoons of baking soda for two hours, then rinse thoroughly.
Packing Away for Eleven Months of Storage
Remove the silicone gasket from the lid before long-term storage to prevent the ring from flattening or adhering to the ceramic rim. Wash and dry the gasket completely, then store it loosely inside the jar base.
Wrap the lid and base separately in acid-free unprinted packing tissue paper, followed by a double layer of bubble wrap secured with painter tape. Store the wrapped pieces inside a heavy-gauge corrugated cardboard box or a hard plastic tote, keeping them away from uninsulated, freezing attic spaces.
Common Mistakes and How to Avoid Them
Steer clear of these frequent errors that lead to stale baked goods, cracked lids, and damaged finishes.
- Putting Warm Cookies Directly Inside: This generates interior steam, ruining cookie texture and accelerating mold growth. Always cool baked goods for at least ninety minutes on wire racks before storage.
- Storing Mint and Spiced Cookies Together: Peppermint candy cane cookies and aromatic clove gingerbread will share their essential oils with plain butter shortbread stored in the same space. Keep strongly flavored items in separate containers.
- Lifting the Vessel by the Lid Finial: Handles shaped like Santa hats, chimneys, or trees are rarely structural. Lifting a filled, heavy container by the lid will break the ceramic or drop the base. Always support the piece from the base using both hands.
- Using Scented Disinfectant Wipes: Bleach wipes and synthetic citrus sprays leave chemical residues on unglazed foot rings and porous earthenware. Stick strictly to mild dish soap and warm water.
Expert Tips and Edge-Case Scenarios
These advanced preservation techniques resolve challenging humidity situations and unusual baking requirements.
Handling High-Humidity Winter Climates
In humid coastal regions, indoor heating systems cannot always counteract ambient moisture entering the kitchen. If your crisp sugar cookies or gingersnaps soften within twenty-four hours, place a food-safe silica gel desiccant pack underneath the bottom parchment paper disc.
Food-safe desiccant packets absorb water vapor without imparting odors or chemicals to your baked items. Replace or recharge the desiccant packet every four to five days during extended holiday events.
Reviving Hard Cookies Safely
The traditional home baker trick of dropping an apple slice into a dry container works, but it introduces real risks. Apples rot quickly, transfer fruit aromas, and can cause localized mold spots where they contact cookies.
Use half of a plain white flour tortilla instead. Place it on top of a parchment divider over dry cookies for twelve hours; the baked goods will absorb its moisture without taking on fruit flavors or sour notes.
Essential Best Practices Checklist
Keep this operational checklist handy whenever you unpack, fill, or maintain your holiday serving pieces.
- Test unfamiliar vintage containers with a chemical lead swab before placing unwrapped food directly inside.
- Inspect silicone gaskets annually for hardening, mildew spots, or loss of elasticity.
- Allow all baked cookies to cool completely to room temperature before packing.
- Separate layers of decorated or royal-iced cookies with parchment paper discs.
- Store crisp and chewy cookies in separate vessels to avoid unwanted moisture equalization.
- Hand wash decorated ceramics using mild soap and non-abrasive microfiber cloths.
- Remove silicone seals and wrap pieces separately in acid-free paper during off-season storage.
Recommended Tools and Upkeep Resources
Having the right tools simplifies preservation, cleaning, and day-to-day handling throughout the holiday season.
- Food-Grade Replacement Gaskets: Universal silicone sealing rings in four-inch, five-inch, and six-inch diameters to restore airtight seals on older lids.
- Lead Check Rapid Swabs: Chemical indicator swabs for screening surface glazes on estate sale finds.
- Pre-Cut Round Parchment Sheets: Five-inch and six-inch unbleached baking parchment rounds for lining interior layers.
- Food-Safe Silica Packets: FDA-compliant desiccant packets to protect gingerbread and shortbread in humid rooms.
- Acid-Free Archival Tissue Paper: Neutral packing paper that protects hand-painted glazes from yellowing, scuffing, and sticking in storage.
Related Guides and Further Reading
Expand your holiday baking and entertaining knowledge with our related kitchen guides:
- The Best Holiday Cookie Recipes for Gifting and Shipping
- Mastering Royal Icing: Tips for Firm, Long-Lasting Finishes
- Festive Kitchen Styling: Decorating Functional Counter Spaces
- Vintage Kitchenware Restoration: Cleaning Crazed Pottery and Ironstone
- Creative Edible Gift Ideas and Sustainable Wrapping Strategies
Official Food Safety and Collector References
Consult these established resources for deeper research into antique ceramics and food-contact material guidelines:
- U.S. Food and Drug Administration (FDA): Center for Food Safety and Applied Nutrition guidelines on lead and cadmium glaze testing for food-contact dishware.
- Smithsonian Institution Architectural Ceramics Resources: Historical archives covering twentieth-century American commercial pottery manufacturers and production techniques.
- National Center for Home Food Preservation: Guidelines on moisture activity, storage temperatures, and preventing mold growth in home-baked confections.
Summary of Key Insights
Protecting your holiday baked goods requires balancing visual appeal with physical preservation requirements. Prioritize dense stoneware or inert glass if your primary goal is keeping cookies fresh for more than a couple of days.
Always inspect the sealing mechanism, verifying that the lid features a flexible silicone gasket rather than a loose ceramic lip. Screen older vintage pieces for lead glazes, hand wash painted designs carefully, and pack components in acid-free materials during the off season to keep them looking pristine for years to come.
Wrapping Up Your Holiday Display
A classic cookie container is more than practical kitchen storage; it is a seasonal tradition that brings warmth and nostalgia into the heart of your home. Whether you are displaying an authentic mid-century antique or a brand-new minimalist stoneware piece, pairing thoughtful selection with proper storage methods keeps your treats delicious and your counter festive all season long.
Prepare your containers early, refresh worn gaskets before your first big baking weekend, and enjoy sharing delicious holiday treats with family and friends.
Frequently Asked Questions
How long do homemade cookies stay fresh in a ceramic jar?
In a container with an airtight silicone seal, drop cookies and shortbread remain fresh for five to seven days. Containers with unsealed, loose-fitting lids expose baked goods to ambient humidity, causing cookies to go stale or dry out within two to three days.
Can I put my holiday cookie jar in the dishwasher?
Hand washing is recommended for all decorative and vintage holiday pieces. Dishwasher heat and harsh detergents cause surface crazing, strip delicate cold paint, and erode silicone gaskets. Only wash modern unpainted glass or plain vitrified stoneware bases in a dishwasher.
How do I make a vintage decorative jar airtight?
You can retrofit an unsealed lid by installing a stretchable, food-grade silicone replacement ring around the lid flange. Alternatively, keep cookies inside a sealed zip-top bag or a modern food-grade plastic container placed directly inside the decorative vessel.
Are antique Christmas cookie jars safe for storing unwrapped food?
Many pieces manufactured before the 1970s used glazes containing lead or cadmium, which can leach into buttery foods. If a vintage piece shows crazing or tests positive with a chemical lead swab, use it only for display or for pre-packaged, wrapped treats.
Why do my crisp cookies turn soft after a day in the jar?
Crisp cookies turn soft when they absorb moisture, usually because they were packed with soft cookies or stored in an unsealed container in a humid room. Always store crisp and soft cookies separately, and seal the lid tightly with a silicone gasket.
How can I fix a cracked or chipped ceramic lid?
Repair exterior hairline cracks using a two-part food-safe epoxy formulated for ceramics. For valuable vintage collectibles, avoid standard superglues, which yellow over time and complicate professional archival restoration.
What size container is best for holiday entertaining?
A vessel with an interior volume of 3.5 to 4.5 quarts offers the best versatility. This capacity holds two to three dozen standard holiday cutout cookies while maintaining a countertop footprint that fits comfortably under standard upper cabinets.
How should I pack a ceramic jar when giving it as a gift?
Line the interior with parchment paper and stack sturdy cookies with parchment discs between layers. Wrap the entire exterior in bubble wrap, place it in a sturdy gift box with at least two inches of packing material on all sides, and mark the package as fragile.