
The Formula for Chocolate Chip Cookies with Oatmeal and Flour
The best chocolate chip cookies with oatmeal and flour balance equal weights of all-purpose flour and rolled oats, or replace up to 30 percent of wheat flour with ground oat flour. This precise combination delivers crispy, caramelized edges alongside dense, chewy centers. Wheat flour contributes gluten for structure, while oats introduce moisture-holding soluble fibers that stop cookies from drying out.
To maximize chewiness, pair this blend with a two-to-one ratio of dark brown sugar to white granulated sugar. Cream room-temperature butter with your sugars for three minutes, incorporate the dry base gently, and chill the dough for at least 45 minutes. Bake at 350°F (177°C) for 10 to 12 minutes until the edges set into a deep amber ring while the center remains pale and soft.
- Structure Base: 1 part all-purpose flour to 1 part old-fashioned rolled oats (by weight).
- Fat-to-Sugar Balance: 1 part unsalted butter to 1.5 parts total sugar.
- Moisture Driver: High brown-sugar concentration for natural hygroscopic moisture retention.
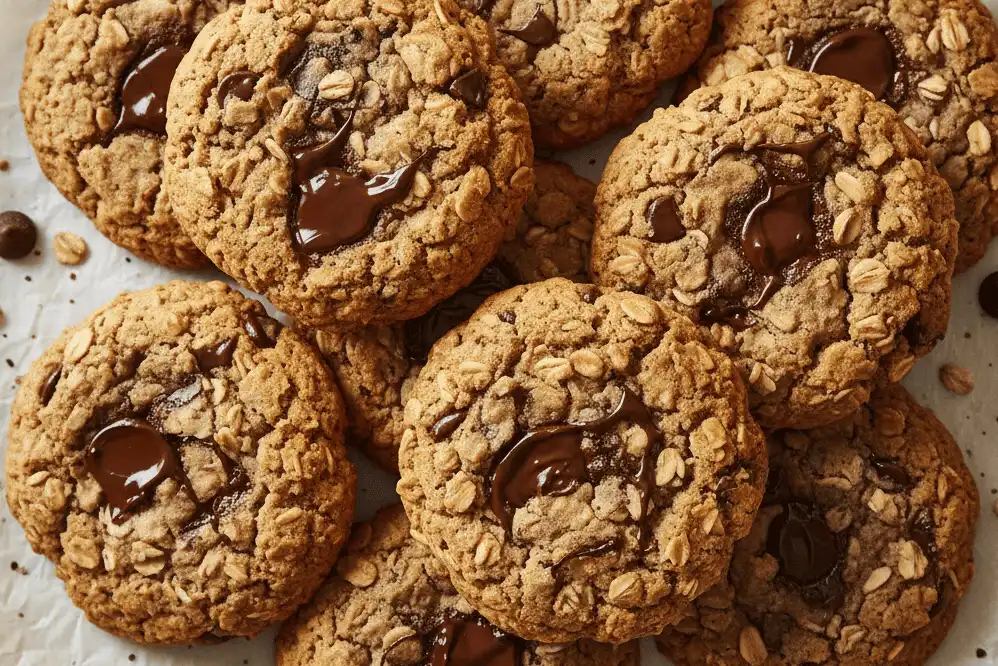
Baking homemade cookies represents a balance between culinary comfort and food chemistry. Combining traditional flour with oats transforms an everyday chocolate chip drop cookie into a deeply textured, flavorful dessert. This guide breaks down the physical properties of these grains so you can produce flawless cookies every time.
Beginner bakers often struggle with cookies that turn out dry, spread into thin puddles, or bake into hard pucks. By understanding how oat starch and wheat proteins interact with butter and sugar, you gain complete control over your bake. Whether you want a wholesome snack for your family or a bakery-style treat, this master guide covers every calculation, method, and troubleshooting technique you need.
The Science of Oatmeal and Flour in Cookie Dough
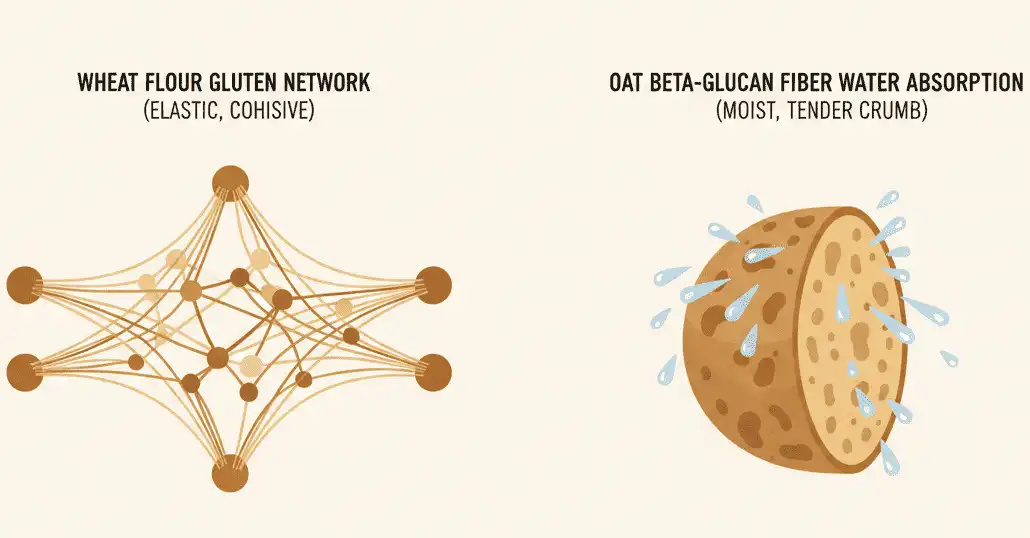
Every cookie dough relies on a structural network to trap melting fats and expanding gases during baking. When you use all-purpose wheat flour, water binds with glutenin and gliadin proteins to build a flexible gluten matrix. This gluten provides chew and prevents the cookie from disintegrating when picked up.
Oats alter this dynamic completely. Oats do not develop an elastic gluten network because their primary storage protein is avenin, which lacks the cohesive properties of wheat gluten. However, oats contain high levels of beta-glucan, a soluble dietary fiber that absorbs immense amounts of liquid.
When you combine all-purpose flour with oatmeal, the oats draw free water away from the wheat proteins. This limits excessive gluten formation and keeps the center of the cookie tender. Meanwhile, the gelatinizing starches in the oats swell as the cookie heats, producing a thick, satisfying crumb that retains moisture for days.
Core Ingredients and Quality Selection
Consistent baking begins with selecting stable ingredients. Subbing one type of fat or sugar for another directly alters spread rates, caramelization, and dough hydration. The following components form the backbone of this master recipe.
Flour Types: All-Purpose vs. Bread Flour vs. Whole Wheat
Standard unbleached all-purpose flour with an 11% to 11.5% protein content is the baseline standard for home baking. It offers enough structure to support heavy chocolate chunks without making the crumb tough. If you prefer an exceptionally chewy edge, swap 25% of the all-purpose flour for high-protein bread flour.
Whole wheat flour introduces earthy, nutty notes that complement oats naturally. However, whole wheat bran acts like tiny razor blades that cut gluten strands, yielding a denser result. When incorporating whole wheat, limit it to one-third of your total flour weight and add one extra tablespoon of milk to balance absorption.
Oat Selections: Old-Fashioned Rolled, Quick, and Steel-Cut
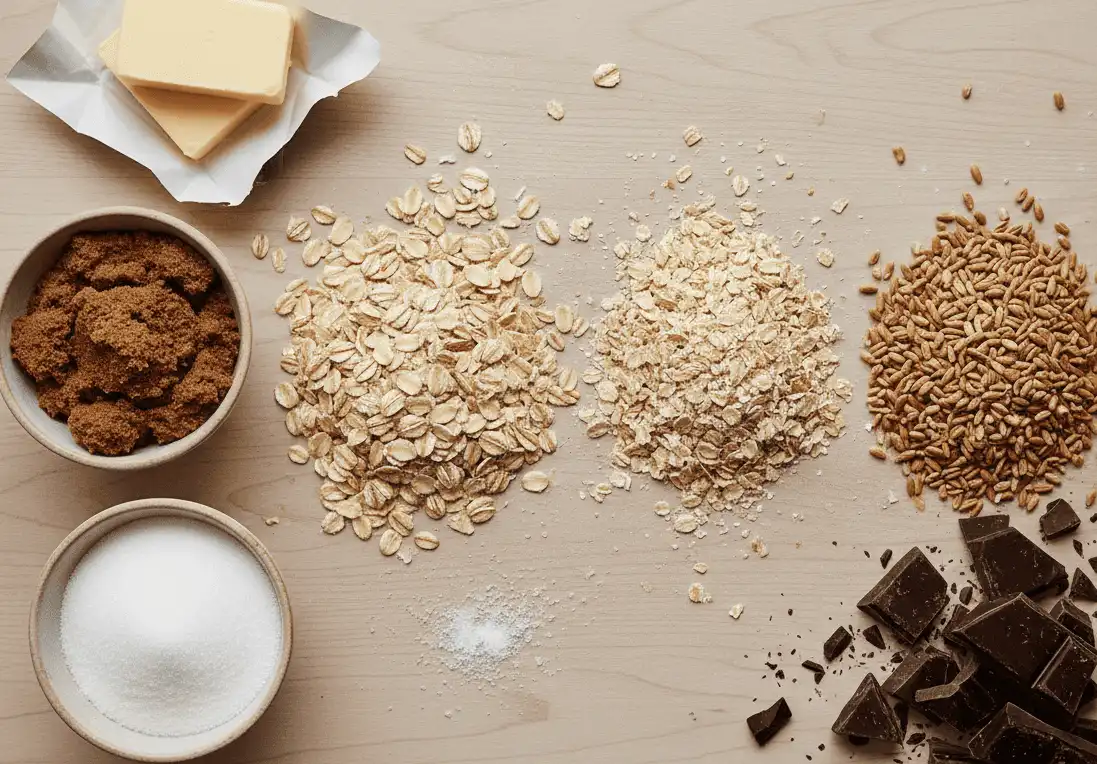
Old-fashioned rolled oats are steamed and rolled whole flat, which allows them to retain distinct structural integrity. They create substantial chew and rustic texture pockets inside the cookie. Quick oats are rolled thinner and chopped into pieces, meaning they absorb moisture quickly and produce a more uniform, cake-like dough.
Never use raw steel-cut oats in standard cookie dough. Steel-cut groats are coarse and unsteamed, so they cannot hydrate during a quick 10-minute bake. Using them leads to rock-hard, tooth-breaking bits throughout your finished cookies.
Fats: Butter Composition and Temperature
Butter brings flavor and regulates how fast the cookie spreads across the hot baking sheet. Standard American butter contains roughly 80% butterfat and 16% to 18% water, whereas European-style butter contains 82% to 84% fat. Using higher-fat European butter yields a richer mouthfeel and slightly crisper outer rim.
Room-temperature butter should sit at approximately 65°F (18°C). At this temperature, the butter yields slightly to a finger press without melting into liquid grease. Creaming butter at this temperature creates micro-pockets of air that help leaven the cookie naturally.
Sugars: Moisture Retention via Molasses
Granulated white cane sugar promotes spreading and caramelizes at high heat to generate a crispy perimeter. Brown sugar contains molasses, which is naturally hygroscopic, meaning it aggressively draws and holds ambient moisture. A higher proportion of brown sugar guarantees a bendable, chewy center.
Chocolate Varieties: Feves, Chunks, and Chips
Commercial chocolate chips contain added emulsifiers like soy lecithin to help them hold their teardrop shape in high heat. While convenient, they do not melt into luscious pools. Chopping high-end baking bars or using flat chocolate feves creates layered pockets of melted chocolate that intertwine with the oat flakes.
Rolled Oats vs. Ground Oat Flour: Structural Differences
Bakers often ask whether to use whole rolled oats or process them into fine oat flour. Both options work, but they function as different baking ingredients. Understanding their behavior helps you tailor the final texture to your personal preference.
Whole rolled oats act as an inclusion, similar to nuts or chocolate chunks. They absorb moisture gradually during the bake while maintaining their visual and physical identity. This results in the traditional rippled surface and hearty chew associated with classic bakery oatmeal cookies.
Oat flour acts as a functional dry powder that blends directly with your wheat flour. Because it is finely milled, its starch and fiber hydrate instantly upon contact with liquid ingredients. Substituting 20% to 30% of your wheat flour with oat flour creates a tender, melt-in-your-mouth cookie with a rich, roasted-grain undertone.
How to Mill Oat Flour at Home
You do not need to purchase expensive commercial oat flour at the grocery store. Pour rolled oats into a high-speed blender or dry food processor and pulse on high for 45 to 60 seconds. Sift the resulting powder through a fine-mesh sieve to remove any unground flakes before weighing it for your recipe.
Formula Ratios: Dialing In Chewiness, Softness, and Crispness
Professional bakers rely on weight ratios rather than volume measurements like cups. Flour compacts easily into measuring cups, introducing variations up to 25% that ruin cookie texture. By altering the proportions of your flour, oats, and sugars, you can target specific textural outcomes.
For an ultra-chewy texture, use a 1:1 weight ratio of all-purpose flour to rolled oats, combined with 70% dark brown sugar and 30% white sugar. The oats trap moisture inside the center while the brown sugar keeps the crumb soft. This ratio prevents the cookie from flattening excessively on the baking sheet.
For a softer, bakery-style cakey texture, shift to 65% all-purpose flour and 35% fine oat flour. Increase the egg content by adding one extra egg yolk, which adds fat and lecithin without excess water. This creates an airy, tender bite that remains soft for days.
For crisp, buttery cookies with golden edges, reduce the rolled oats to 30% of the total dry weight and use equal parts white and brown sugar. The increased proportion of all-purpose flour encourages even spreading, while the higher white sugar content helps the edges crisp up during the final minutes of baking.
Step-by-Step Master Baking Guide
This master formula produces sixteen large, bakery-style chocolate chip cookies using both all-purpose flour and oatmeal. For best results, use a digital kitchen scale set to grams.
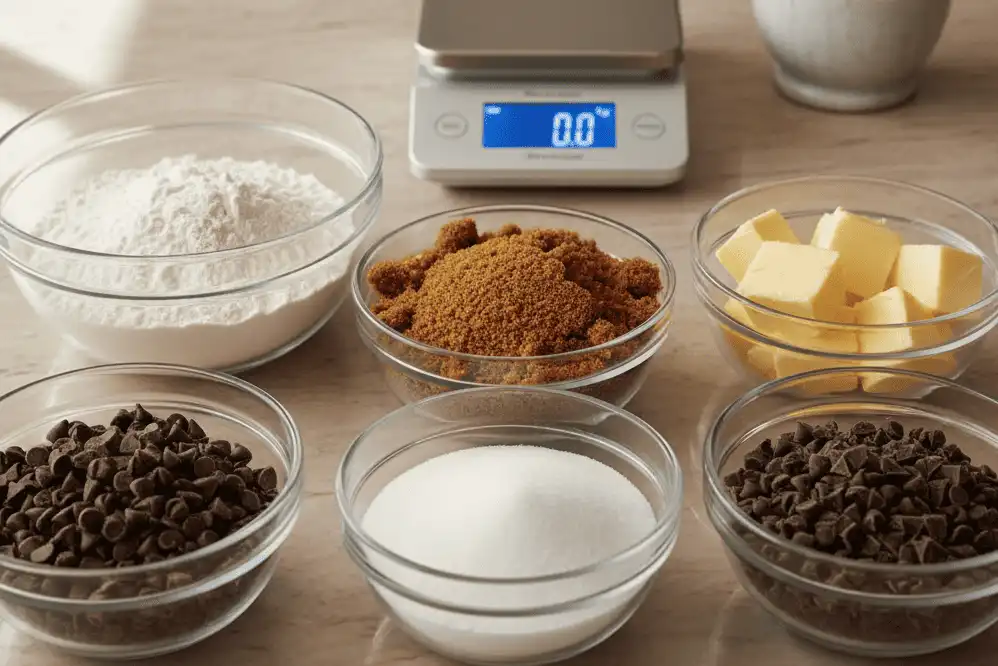
Ingredients List (Metric and Standard)
- All-Purpose Flour: 180 grams (1 ½ cups, spooned and leveled)
- Old-Fashioned Rolled Oats: 150 grams (1 ¾ cups)
- Unsalted Butter: 170 grams (¾ cup / 1 ½ sticks), softened to 65°F
- Dark Brown Sugar: 165 grams (¾ cup, packed)
- Granulated White Sugar: 70 grams (⅓ cup)
- Large Egg: 1 whole (50 grams out of shell), room temperature
- Large Egg Yolk: 1 yolk (18 grams), room temperature
- Pure Vanilla Extract: 8 grams (2 teaspoons)
- Baking Soda: 4 grams (¾ teaspoon)
- Fine Sea Salt: 4 grams (¾ teaspoon)
- Semi-Sweet or Bittersweet Chocolate (60%): 225 grams (8 ounces), roughly chopped
- Flaky Maldon Sea Salt: Optional, for finishing garnish
Step 1: Ingredient Preparation and Mise en Place
What: Measure every component by weight into clean bowls before turning on your mixer.
Why: Accurate baking requires precision, and pausing mid-recipe to measure ingredients can lead to over-mixed dough.
How: Use a digital kitchen scale. Ensure your butter sits out for 60 minutes beforehand so it reaches 65°F (18°C). Place eggs in a cup of warm water for 10 minutes if pulling straight from the refrigerator.
Common Mistake: Melting cold butter in the microwave. Liquefied butter destroys the aeration process, leading to greasy, flat cookies.
Pro Tip: Toast your rolled oats on a dry baking pan at 325°F (163°C) for 8 minutes before starting. Allow them to cool completely. This caramelizes the oat starches and deepens their nutty flavor.
Step 2: Sifting the Dry Base
What: Whisk together the all-purpose flour, baking soda, and fine sea salt in a medium mixing bowl.
Why: Whisking aerates the dry ingredients and disperses the baking soda evenly, preventing pockets of metallic flavor.
How: Whisk vigorously for 30 seconds. Set this bowl aside, keeping your oats separate for now.
Common Mistake: Adding the oats to this initial sifted mix. Oats are too heavy and make even distribution difficult to see.
Pro Tip: Weigh the flour after sifting if your kitchen is unusually humid, as exposed flour absorbs atmospheric water vapor.
Step 3: Creaming Fat and Sugars
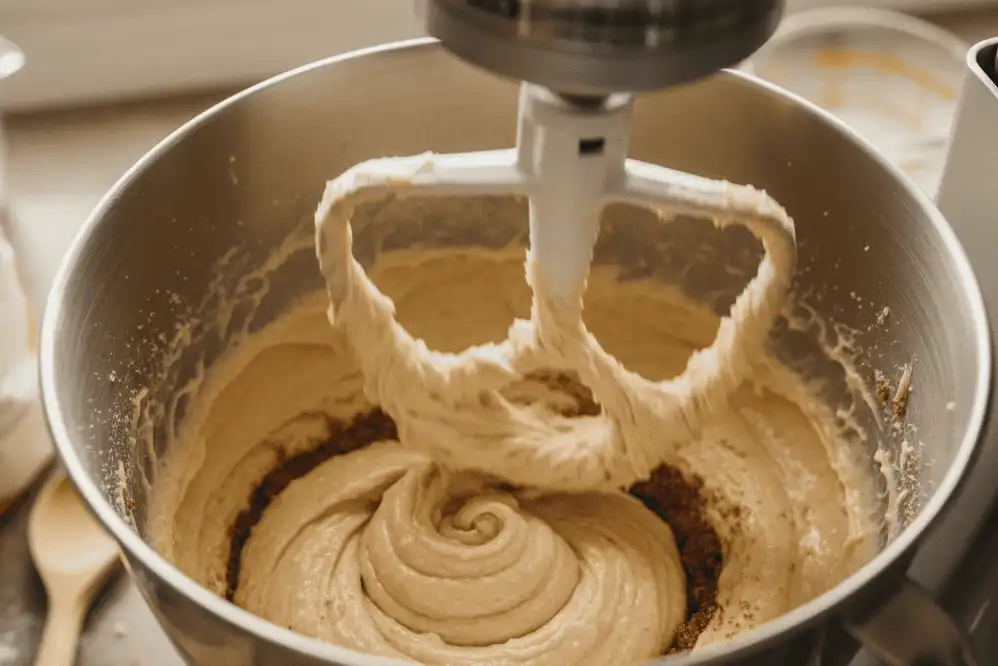
What: Beat softened butter, dark brown sugar, and granulated sugar together until smooth and pale.
Why: Granulated sugar crystals tear micro-voids into the fat, creating an emulsion that holds moisture and gas.
How: Fit a stand mixer with the paddle attachment. Mix on medium speed (speed 4 on a KitchenAid) for exactly 2.5 to 3 minutes. Scrape down the sides and bottom of the bowl halfway through with a silicone spatula.
Common Mistake: Over-creaming for 6 to 8 minutes. Incorporating too much air causes cookies to puff up like muffins in the oven and then collapse into wrinkled sheets.
Pro Tip: The mixture should resemble wet, sandy paste that lightens in color, rather than an airy white cake frosting.
Step 4: Emulsifying the Liquids
What: Incorporate the whole egg, egg yolk, and pure vanilla extract into the creamed butter base.
Why: Egg yolk provides natural lecithin, a powerful emulsifier that binds water to fat into a stable suspension.
How: Add the whole egg, extra yolk, and vanilla extract. Beat on medium-low speed for 60 seconds until the mixture looks glossy, cohesive, and slightly thickened.
Common Mistake: Using cold eggs straight from the fridge. Cold liquids curdle the creamed butter, breaking the emulsion and producing uneven dough.
Pro Tip: Adding an extra yolk without its white introduces richness and chew without adding excess water that thins the batter.
Step 5: Incorporating Dry Ingredients and Mix-Ins
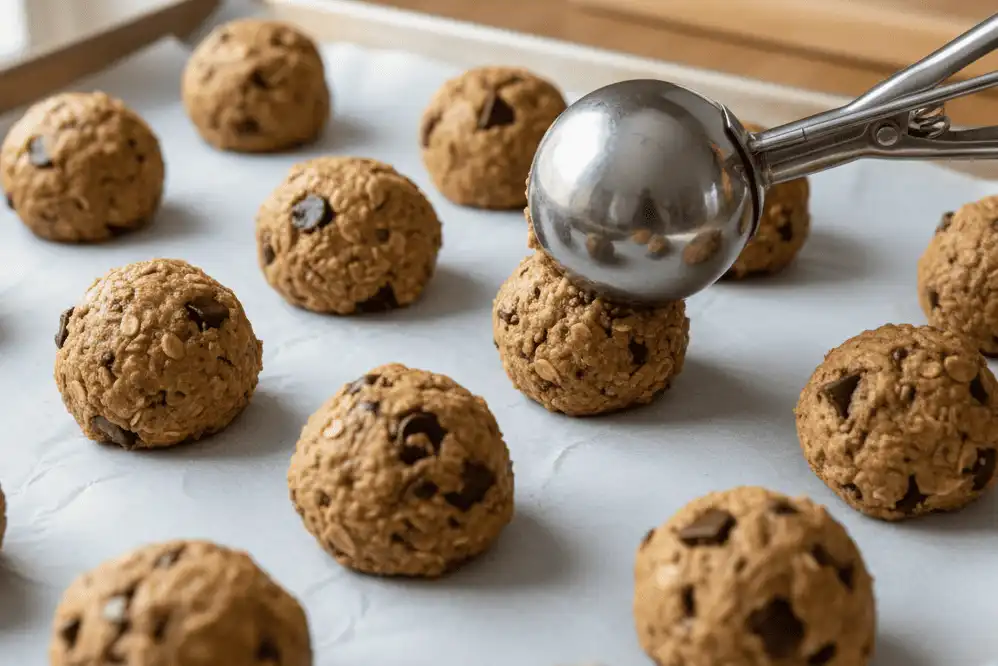
What: Blend the flour mixture, rolled oats, and chopped chocolate into the wet base.
Why: Minimal mixing at this stage prevents excess gluten development, keeping the finished cookie tender.
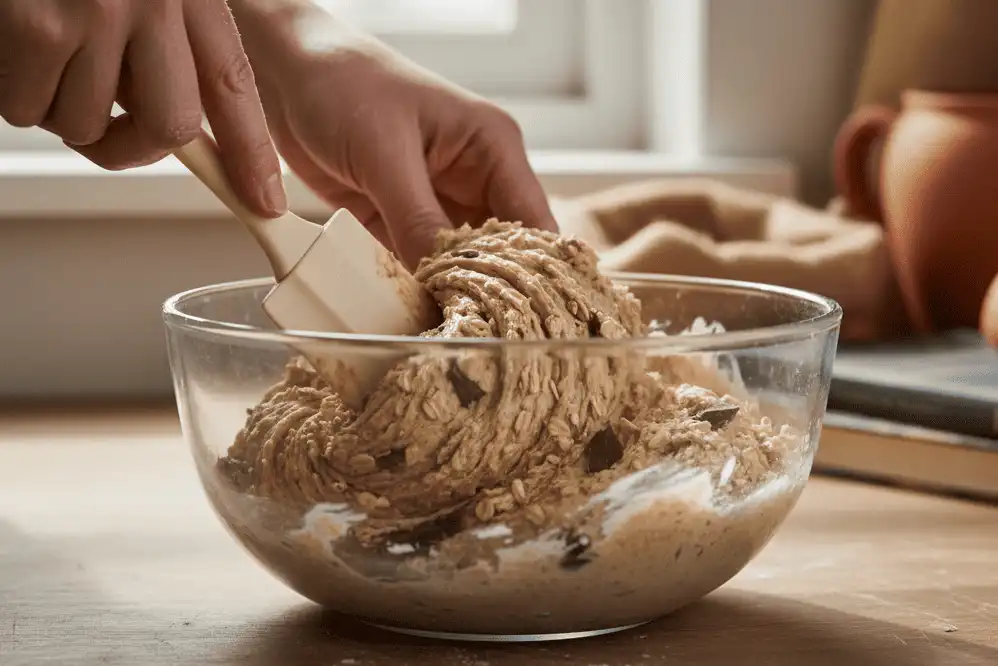
How: Add the sifted flour mixture. Pulse the mixer on lowest speed for 10 seconds until flour pockets barely disappear. Pour in the rolled oats and chopped chocolate, then fold gently with a spatula by hand until evenly combined.
Common Mistake: Running the stand mixer on high speed after adding the flour. Overworking the dough creates a tough, bread-like texture.
Pro Tip: Reserve 2 tablespoons of chopped chocolate chunks to press onto the tops of the dough balls right before baking.
Step 6: The Dough Hydration Resting Phase
What: Cover the dough and refrigerate it for at least 45 minutes, or up to 24 hours.
Why: Chilling allows the oat fiber and flour starches to fully hydrate with the available water from the butter and eggs. It also solidifies the fat so the cookies spread evenly rather than melting instantly.
How: Press a sheet of plastic wrap directly onto the surface of the dough to prevent an exterior skin from forming. Chill in a standard refrigerator at 38°F (3°C).
Common Mistake: Skipping the rest step to bake immediately. Unchilled dough spreads thin, resulting in greasy edges and dry, overbaked centers.
Pro Tip: A 24-hour chill allows enzymes to break complex starches down into simple sugars, resulting in richer toffee and caramel flavors.
Step 7: Portioning and Shaping
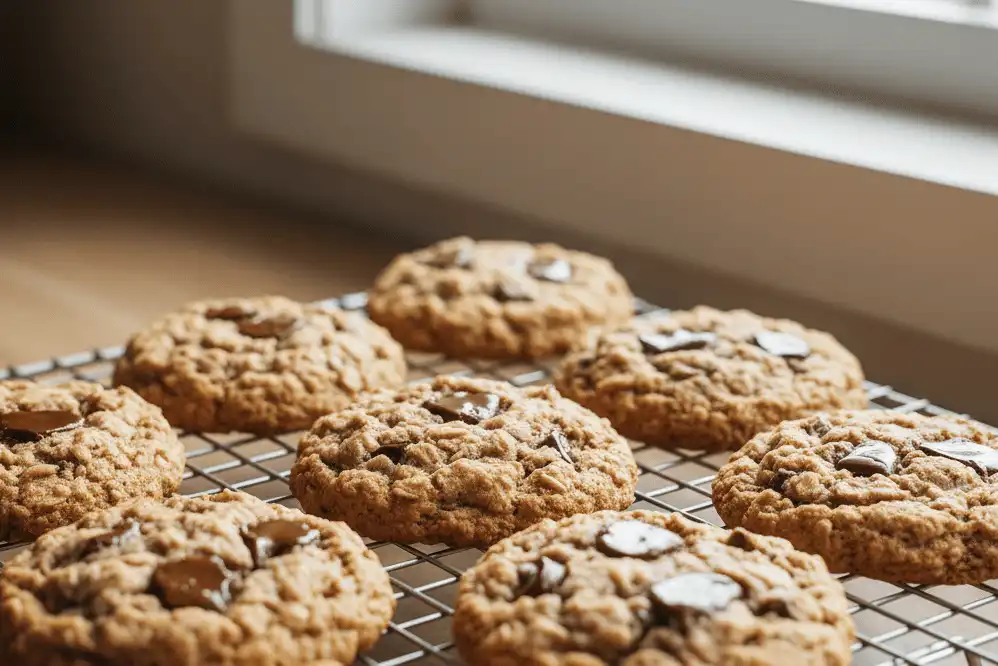
What: Divide dough into uniform rounds weighing roughly 60 grams each (about 2 generous tablespoons).
Why: Consistent sizing guarantees that every cookie across the baking sheet bakes at the exact same rate.
How: Use a #24 spring-loaded cookie scoop. Release the dough onto a parchment-lined baking sheet, leaving 2.5 inches (6 centimeters) of space between each dough mound. Press reserved chocolate chunks into the top of each ball.
Common Mistake: Rolling the dough into smooth, dense spheres between your palms. This compacts the dough too much; a rough, textured top bakes into prettier craggy ridges.
Pro Tip: Stagger the dough balls in an alternating grid pattern to optimize hot airflow across the pan.
Step 8: Baking Precision and Thermal Zones
What: Bake in a preheated oven at 350°F (177°C) for 10 to 12 minutes.
Why: This temperature allows the outer edges to caramelize via the Maillard reaction while leaving the center soft and chewy.
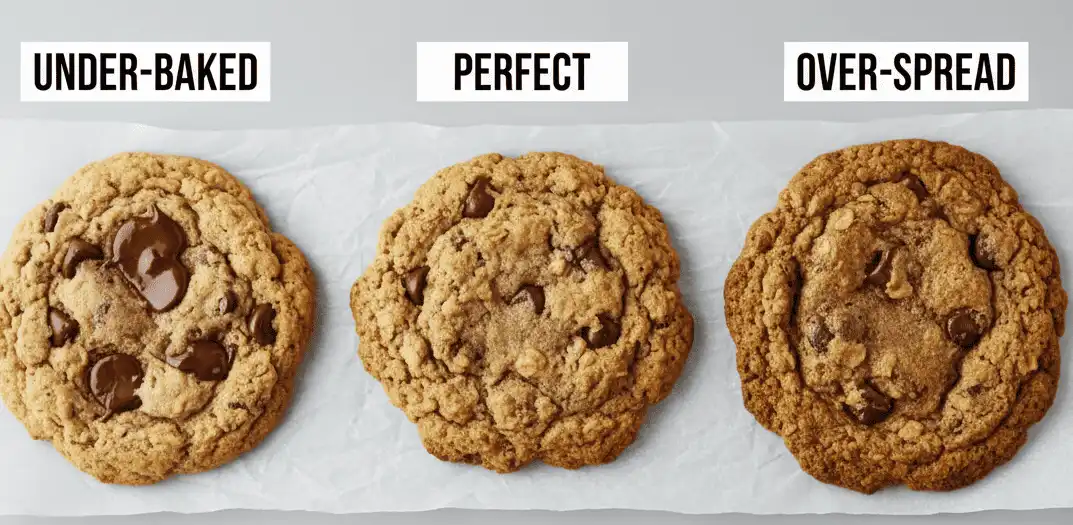
How: Position your oven rack in the center slot. Bake one sheet at a time for even heat distribution. Remove the pan when the edges turn golden brown and dry, but the inner center remains pale and slightly soft.
Common Mistake: Waiting until the center looks completely dry and firm before removing the pan. Cookies continue baking on the hot pan after leaving the oven.
Pro Tip: Use an independent oven thermometer hung on the center rack. Most home oven thermostats are off by 15°F to 25°F.
Step 9: Pan Cooling and Structural Setting
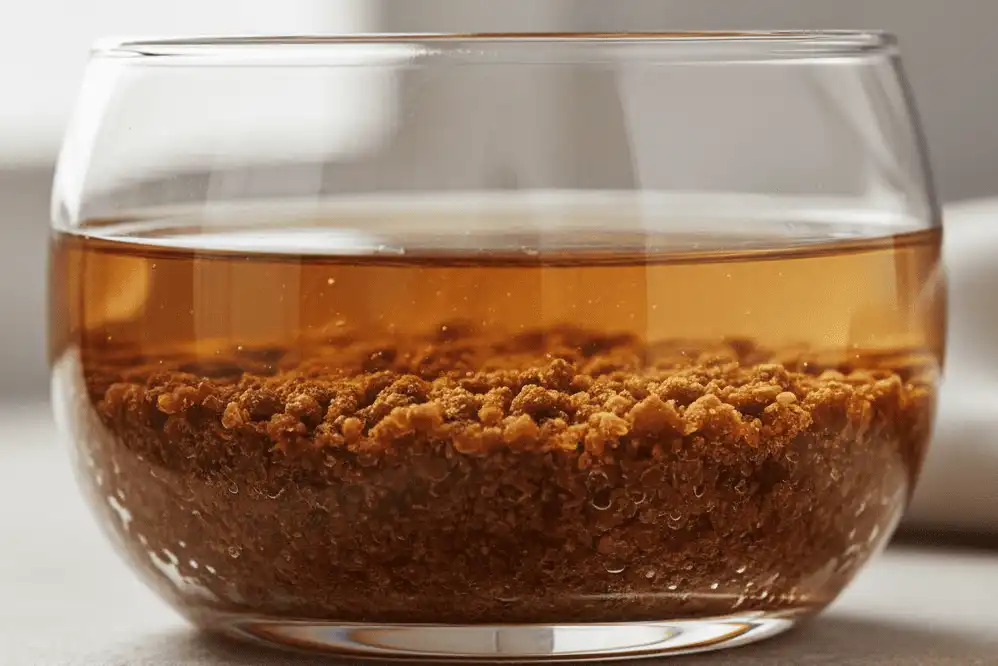
What: Let cookies rest on the hot metal sheet for 5 minutes, then move them to a wire rack.
Why: Residual heat from the heavy pan sets the delicate bottom crumb without scorching the butter.
How: Set the baking sheet on a heatproof counter. If your cookies spread slightly unevenly, immediately place a round cookie cutter larger than the cookie over each one and swirl it in circles to shape them into perfect rounds. Sprinkle with flaky sea salt.
Common Mistake: Moving cookies to a cooling wire rack immediately with a spatula. Hot cookies lack structural integrity and will tear in half.
Pro Tip: Allow cookies to cool for 20 minutes before serving. This rest lets the starches settle into their signature chewy texture.
Texture Comparison Table by Flour-to-Oat Ratios
Adjusting the balance of flour and oats shifts your cookie’s spread, chew, and crumb structure. The table below outlines how specific ratios perform in the oven.
| Ratio Formula | Chew Level | Spread Rate | Moisture Retention | Dominant Flavor Profile | Ideal Use Case |
|---|---|---|---|---|---|
| 1:1 All-Purpose to Rolled Oats | High (Maximum) | Moderate | Excellent (4-5 Days) | Balanced buttery, toasted oat, brown sugar | Classic bakery-style chewy cookies |
| 70% AP Flour / 30% Oat Flour | Medium-Soft | Low to Moderate | Very Good (3-4 Days) | Mellow, nutty, smooth sweet finish | Tender, melt-in-your-mouth drop cookies |
| 100% Oat Flour (No Wheat) | Low (Short, crumbly) | Very Low | Fair (Dries in 2 Days) | Earthy, dense, pronounced grain notes | Gluten-free dietary baking |
| 50% Bread Flour / 50% Rolled Oats | Very High | Low | Exceptional (5+ Days) | Deep molasses, robust, hearty crumb | Extra-thick, substantial cookies |
| 80% AP Flour / 20% Quick Oats | Medium | High (Spreads wide) | Moderate (2-3 Days) | Classic sweet vanilla and chocolate forward | Thin, crispy-edged lunchbox cookies |
Professional Baker Tips and Edge-Case Adjustments
Professional bakers use specific baking techniques to turn standard ingredients into exceptional cookies. Applying the following principles gives your cookies consistent bakery-quality results.
The Pan-Banging Ripple Technique
To create ripples and crisp edges, use the pan-banging method popularized by baker Sarah Kieffer. At minute 9 of baking, when the cookie has puffed up, lift the baking sheet 4 inches off the oven rack and drop it firmly back onto the wire slats. Repeat this two or three times over the final 3 minutes of baking.
This impact forces the center of the cookie to collapse instantly, pushing the liquid dough outward toward the hot perimeter. This creates concentric rings of rippled, crispy pastry along the outer rim while keeping the center fudgy and moist.
The Brown Butter Conversion Method
To upgrade your flavor profile, brown your unsalted butter over medium-low heat before creaming. Browning toasts the milk solids via the Maillard reaction, yielding nutty notes that complement hearty oats. However, browning evaporates about 18% to 20% of the butter’s natural water content.
If you brown 170 grams of butter, you will end up with roughly 136 grams of usable fat. You must add one tablespoon (15 ml) of cold milk or water back into the cooled brown butter to restore that lost moisture. Without this liquid, your flour and oat starches will not hydrate properly, leaving your cookies dry and crumbly.
High-Altitude Adjustments (Above 3,500 Feet)
At higher altitudes, atmospheric pressure drops, causing liquids to evaporate faster and leavening gases like carbon dioxide to expand more aggressively. Without adjustments, cookies often over-expand and collapse into an oily puddle. Follow these specific modifications when baking at elevation:
- Oven Temperature: Increase the bake temperature to 375°F (190°C) to set the cookie walls faster.
- Baking Soda: Reduce the baking soda by 25% (use ½ teaspoon instead of ¾ teaspoon) to prevent over-expansion.
- Liquid: Add 1 to 2 extra tablespoons of whole milk to balance rapid moisture evaporation.
- Sugar: Reduce brown and white sugars by 1 tablespoon each to strengthen the dough structure.
Common Mistakes and Troubleshooting Fixes
Even seasoned home bakers encounter unexpected results when changing flour types or oat varieties. Use this guide to quickly troubleshoot and fix common baking issues.
Problem: Cookies Spread Out Too Thin and Run Together
Root Cause: The butter was too warm or melted during creaming, the dough skipped the chill rest, or the flour was under-measured due to using volume cups instead of weight scales.
The Correction: Chill your portioned dough balls in the freezer for 15 minutes before baking. Ensure you cream your butter at 65°F (18°C) rather than microwaving it into a liquid.
Problem: Cookies Stay in Dense Balls Without Spreading
Root Cause: Too much flour or oats were packed into the measuring cup, or your oven is running too cool.
The Correction: Use a digital kitchen scale to measure all dry ingredients. If you must use measuring cups, fluff the flour with a fork, spoon it gently into the cup, and sweep it level with a flat butter knife. Do not tap or pack the cup.
Problem: Dry, Crumbly, or Gritty Mouthfeel
Root Cause: You used raw quick-cooking oats or steel-cut oats that failed to absorb moisture, or the dough was baked past its optimal window.
The Correction: Stick with old-fashioned rolled oats and make sure to chill the dough for at least 45 minutes. This resting phase gives the coarse oat hulls enough time to absorb water from the eggs and butter fat before meeting the oven heat.
Problem: Overly Dark or Burnt Bottoms
Root Cause: Dark, thin non-stick baking pans absorb radiant oven heat too aggressively, scorching the sugars on the bottom before the center can bake.
The Correction: Bake on heavy, commercial-grade, light-colored aluminum half-sheet pans lined with unbleached parchment paper. Avoid baking directly on dark, Teflon-coated metal.
Kitchen Best Practices and Storage Protocols
Baking exceptional cookies requires good kitchen habits alongside quality ingredients. Following these storage and freezing practices keeps your cookies tasting freshly baked for weeks.
Room Temperature Storage (The Moisture Transfer Trick)
Store fully cooled cookies in an airtight glass container or heavy-duty food storage box at room temperature. Do not mix them with crunchy cookies like biscotti, as the moisture from the oats will soften the crisper treats.
Place a single half-slice of fresh white sandwich bread inside the container alongside the cookies. The hygroscopic sugars and starches in the cookies will pull ambient moisture from the bread. The bread will dry out over 48 hours, while your cookies remain soft, chewy, and tender.
Freezing Raw Dough for On-Demand Baking
Scoop the mixed dough into uniform 60-gram balls onto a parchment-lined baking sheet, placing them close together without touching. Freeze for two hours until completely solid, then transfer the frozen dough pucks into a heavy-duty freezer zip-top bag labeled with the date.
Frozen dough pucks keep well for up to three months. When you are ready for warm cookies, bake them straight from frozen at 330°F (165°C) for 13 to 15 minutes. Lowering the oven temperature by 20 degrees gives the frozen core time to thaw and bake evenly without burning the outer edges.
Essential Tools for Baking Consistency
Quality tools ensure precision, ease, and consistency in every batch of cookies you bake.
- Digital Kitchen Scale: A scale reading in one-gram increments eliminates measuring errors and is essential for reliable results.
- Commercial Heavy-Gauge Half-Sheet Pans: Light aluminum pans distribute heat evenly, preventing burned cookie bottoms.
- Unbleached Parchment Paper Sheets: Parchment prevents cookies from sticking and insulates the delicate dough from direct pan heat.
- Mechanical Cookie Scoop (Size #24): A spring-loaded scoop yields uniform dough portions so every cookie bakes at the exact same rate.
- Independent Oven Thermometer: A hanging thermometer helps you monitor and adjust for temperature swings inside your oven.
- Wide Wire Cooling Rack: Wire racks elevate hot cookies to allow air circulation underneath, preventing trapped steam from making the bottoms soggy.
Suggested Related Articles
If you enjoyed making these cookies, check out these related guides on flour selection, cookie chemistry, and dessert baking:
- How to Make and Bake with Homemade Oat Flour: A Complete Guide
- The Science of Brown Butter: Browning Fat for Bakery-Style Desserts
- Gluten-Free Baking Masterclass: Substituting Wheat Flour with Whole Grains
- Traditional Chewy Oatmeal Raisin Cookies with Spiced Cinnamon
- Brown Sugar vs. White Sugar in Cookies: Texture and Spread Chemistry
- The High-Altitude Baker’s Manual: Reliable Dough and Batter Adjustments
Authority References and Scientific Resources
For more information on food chemistry, grain standards, and ingredient science, consult these trusted baking resources:
- USDA FoodData Central: Nutritional composition and moisture metrics for whole oats and enriched wheat flours.
- King Arthur Baking Company Ingredient Guides: Protein percentage standards for all-purpose, pastry, and bread flours.
- Exploratorium Science of Cooking: Educational breakdowns of gluten development, sugar caramelization, and the Maillard reaction.
- AACC International (Cereals & Grains Association): Cereal grain chemistry, starch gelatinization curves, and beta-glucan properties.
Key Baking Takeaways
- Balance Your Ratios: A 1:1 weight ratio of all-purpose flour to rolled oats produces a classic bakery-style chewy center with crisp edges.
- Weigh Everything: Measuring flour and oats by weight prevents the density issues that commonly occur with measuring cups.
- Use Old-Fashioned Oats: Rolled oats hold their structural integrity during the bake; avoid using raw steel-cut oats.
- Control Butter Temperature: Keep your butter at 65°F (18°C) to create the right air pockets during creaming without causing excess spreading.
- Chill the Dough: Resting dough in the refrigerator for at least 45 minutes hydrates the dry starches and firms up the fats for an even bake.
- Watch the Bake Time: Pull the baking sheet when the edges are set and amber, even if the center still appears soft and pale.
Closing Baking Advice
Baking memorable chocolate chip cookies with oatmeal and flour comes down to understanding how your ingredients interact. By respecting hydration needs, measuring by weight, and controlling your oven temperature, you can easily produce bakery-quality cookies right at home.
Set up your ingredients, preheat your oven, and enjoy the process. Once you taste these warm, chewy cookies fresh from the baking sheet, this reliable master recipe will quickly become a favorite in your baking rotation.
Frequently Asked Questions
Can I substitute quick oats for old-fashioned rolled oats?
Yes, you can substitute quick oats for old-fashioned rolled oats at an exact 1:1 ratio by weight. However, quick oats are cut into smaller flakes, meaning they absorb moisture faster than rolled oats. This slightly reduces cookie spread and yields a more uniform, cake-like texture rather than the distinct, hearty chew that whole rolled oats provide.
Why are my oatmeal chocolate chip cookies dry and hard?
Cookies turn out dry and hard when dough has too much flour, lacks sufficient fat, or bakes too long. Oats naturally absorb moisture, so over-measuring dry ingredients using volume cups can quickly dry out your dough. Always measure flour and oats with a digital scale, and pull cookies from the oven while the centers are still soft.
Can I use 100% oat flour instead of all-purpose flour?
You can use 100% oat flour, but the cookie’s texture will change significantly. Oat flour lacks glutenin and gliadin, the proteins that create wheat gluten. Without gluten, cookies will not develop elasticity or traditional chew, turning out crumbly and tender like shortbread. For classic chewiness, keep at least 50% of the dry base as all-purpose or bread flour.
How long should I chill oatmeal cookie dough before baking?
Chill your cookie dough for at least 45 minutes, or up to 24 hours in the refrigerator. Chilling solidifies the butter, which prevents cookies from spreading into thin puddles in the oven. It also gives the coarse oat hulls time to hydrate with the liquids in the dough, improving flavor development and chewiness.
Can I use melted butter instead of softened butter?
Using melted butter changes the overall texture of your cookies. Creaming softened butter with sugar traps micro-air bubbles that gently leaven the dough. Melted butter cannot hold these air pockets, yielding a denser, chewier cookie with a shinier top. If using melted butter, chill the mixed dough for an extra 30 minutes to prevent excess spreading.
Why did my cookies spread into a single flat sheet?
Excessive spreading happens when butter is too warm during mixing, the dough skips chilling, or the baking sheet is greasy. Measuring flour with measuring cups often leads to under-measuring, leaving too much fat relative to dry starches. Make sure to chill the dough, bake on parchment paper, and weigh your flour with a kitchen scale.
How do I keep my baked cookies soft for several days?
Store fully cooled cookies in an airtight container at room temperature alongside a half-slice of plain sandwich bread. The hygroscopic sugars in the cookies will pull moisture from the bread, keeping them soft and chewy for up to five days. Never store baked cookies in the refrigerator, as cool temperatures speed up starch retrogradation and staling.
Can I freeze the raw dough balls to bake later?
Yes, raw dough balls freeze exceptionally well for up to three months. Portion the dough onto a baking sheet, freeze for two hours until firm, and store in a sealed freezer bag. Bake directly from frozen at 330°F (165°C) for 13 to 15 minutes, adding about two minutes to the standard bake time.