
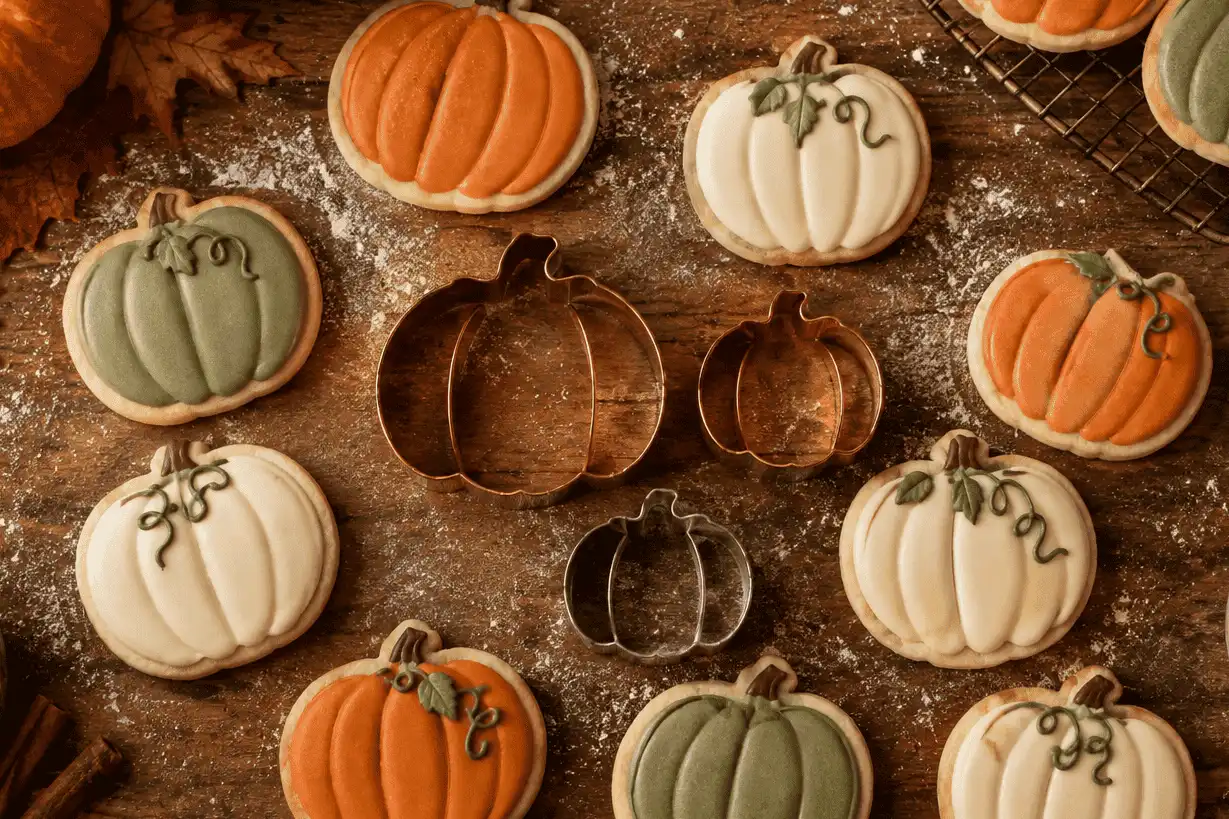
Pumpkin cookie cutters are more versatile than they look. A single pumpkin cookie cutter can help you make festive sugar cookies, pie crust decorations, fondant toppers, sandwich shapes, craft projects, and seasonal party details that feel thoughtful without being complicated. This guide walks through practical baking ideas, decorating techniques, and creative non-cookie uses so you can get more value from your favorite autumn cookie cutter.
What can you make with a pumpkin cookie cutter?
You can use a pumpkin cookie cutter for far more than basic Halloween cookies. It works as a shaping tool for dough, pastry, cheese, fruit, sandwiches, fondant, clay, paper, and even soft craft materials. If you own a cookie cutter set with several sizes, you can layer shapes, create matching party foods, or build a full autumn dessert spread with one simple theme.
The pumpkin shape is especially useful because it fits both cozy fall baking and playful Halloween decorating. Keep the design rustic with cinnamon sugar and warm icing. Or turn it into a bold halloween cookie cutter project with orange glaze, black details, and spooky faces.
A pumpkin cutter also gives homemade treats a polished look. Even simple dough looks intentional when the edges are clean and the shape is recognizable. That makes it ideal for beginner bakers, family baking days, classroom treats, harvest parties, and edible gifts.
Choosing the right cutter for your project
Not every cutter works equally well for every idea. Before you start, match the cutter to the material you plan to cut. Thin metal cutters create crisp edges in cookie dough and pie crust. Sturdy plastic cutters are comfortable for kids and soft foods. Decorative cookie molds or cutters with interior details can press lines into dough, fondant, or craft clay.
Look for these features when choosing a pumpkin cookie cutter:
- Sharp, clean edges: Best for sugar cookies, shortbread, pie dough, and fondant.
- Comfortable grip: Helpful when cutting many cookies or baking with children.
- Multiple sizes: A cookie cutter set gives you mini toppers, standard cookies, and larger statement pieces.
- Food-safe material: Essential if the cutter will touch dough, fruit, cheese, or sandwiches.
- Simple shape: Easier to decorate and less likely to break after baking.
- Detailed design: Great for imprinting ridges, leaves, stems, and jack-o’-lantern faces.
If you bake often, keep one cutter for food and another for crafts. This keeps baking tools clean and prevents craft residue from touching anything edible.
Essential tools and ingredients for pumpkin-shaped cookies
A reliable recipe starts with the right dough and a few helpful tools. Cutout cookies need a dough that holds its shape. Too much spread can blur the pumpkin edges, so chilled dough and accurate measuring matter.
Recommended baking tools
These tools make the process easier and help create cleaner results:
- Pumpkin cookie cutter: Use one medium cutter for classic cookies, or a cookie cutter set for varied sizes.
- Kitchen scale: Recommended for accurate flour and sugar measurements.
- Electric mixer: Helps cream butter and sugar evenly for a smooth dough.
- Silicone spatula: Useful for scraping the bowl without overmixing.
- Rolling pin with thickness guides: Keeps cookies even so they bake at the same rate.
- Parchment paper or silicone baking mats: Prevent sticking and make cleanup easier.
- Flat baking sheets: Better than warped pans because they bake more evenly.
- Cooling rack: Keeps cookies crisp at the edges.
- Piping bags and small tips: Ideal for vines, ridges, faces, and outlines.
- Gel food coloring: Gives icing bold autumn color without making it runny.
Simple cutout cookie ingredients
Use this as a flexible base for pumpkin-shaped cookies:
- 2 ¾ cups all-purpose flour
- 1 teaspoon baking powder
- ½ teaspoon fine salt
- 1 cup unsalted butter, softened
- 1 cup granulated sugar
- 1 large egg
- 2 teaspoons vanilla extract
- ½ teaspoon cinnamon, optional
- ¼ teaspoon nutmeg, optional
For decorating, prepare:
- Royal icing or a simple powdered sugar glaze
- Orange, green, brown, white, and black gel coloring
- Sprinkles, sanding sugar, or edible glitter
- Melted chocolate, optional
- Cinnamon sugar, optional
How do you bake pumpkin cutout cookies that keep their shape?
The key is to use a sturdy dough, chill it before cutting, and bake the cookies on a cool, lined baking sheet. A pumpkin shape has curves, a stem, and sometimes narrow grooves, so the dough needs to be firm enough to cut cleanly. Rushing the chill time is the most common reason cutout cookies spread or lose definition.
Step-by-step baking instructions
- Measure the dry ingredients. Add the flour, baking powder, salt, cinnamon, and nutmeg to a bowl. Whisk until evenly combined. For best results, use a kitchen scale so the dough does not become too dry or too soft.
- Cream the butter and sugar. Place softened butter and granulated sugar in a mixing bowl. Beat with an electric mixer on medium speed until the mixture looks pale and fluffy. This usually takes a few minutes and helps create a tender cookie.
- Add the egg and vanilla. Mix in the egg and vanilla extract until smooth. Scrape the sides of the bowl with a silicone spatula so no butter pockets remain.
- Mix in the dry ingredients. Add the flour mixture in two additions. Mix on low speed just until the dough comes together. Do not overmix, or the cookies may become tough.
- Divide and flatten the dough. Split the dough into two discs. Wrap each disc in plastic wrap or reusable food wrap. Flattening the dough now makes it easier to roll later.
- Chill the dough. Refrigerate for at least 1 hour, or until firm. If the dough feels sticky after chilling, dust your work surface lightly with flour.
- Prepare the baking sheets. Line flat baking sheets with parchment paper or silicone baking mats. Avoid placing cut cookies on a warm pan because the butter can soften before baking.
- Roll the dough evenly. Roll one disc at a time to about ¼ inch thick. Thickness guides on a rolling pin are helpful because uneven cookies bake unevenly.
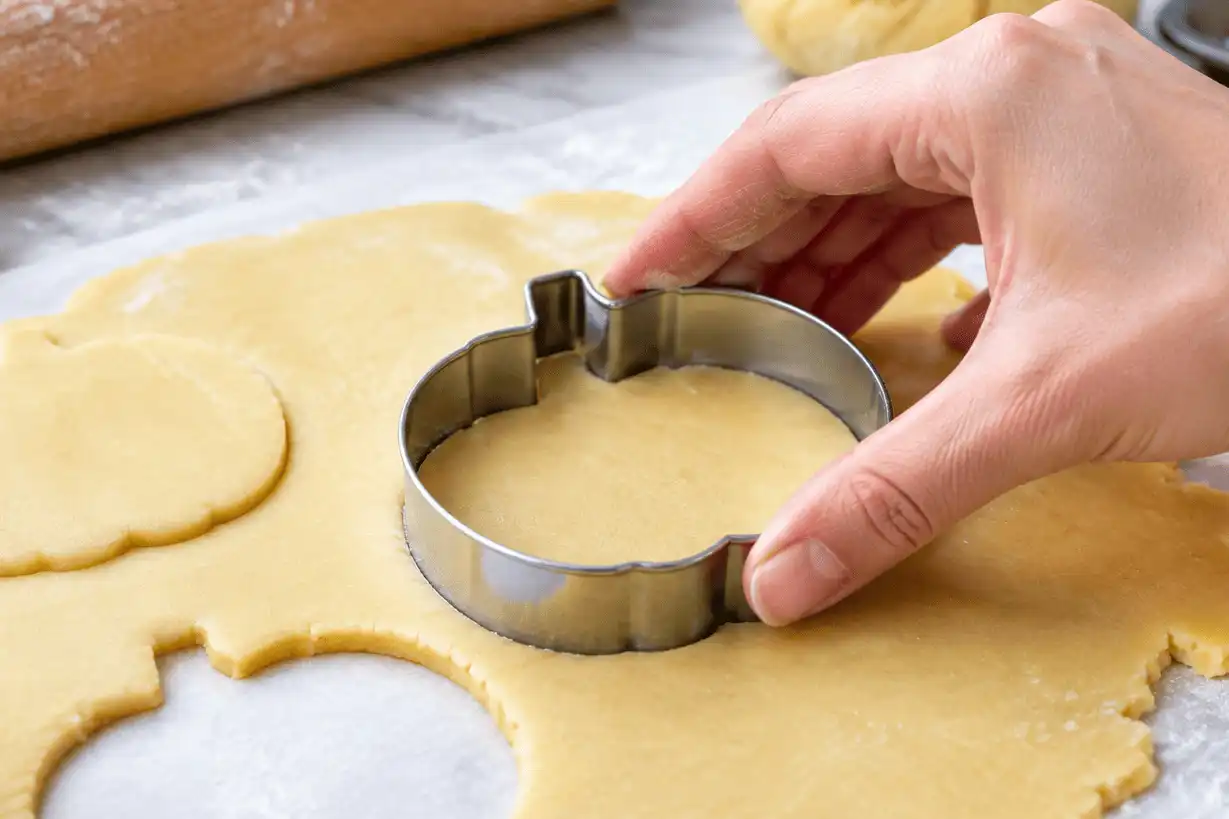
- Cut the pumpkin shapes. Press the pumpkin cookie cutter straight down into the dough. Lift it without twisting. Twisting can distort the pumpkin edges and stem.
- Transfer carefully. Use a thin spatula to move each cutout to the prepared baking sheet. Leave a little space between cookies. They should not spread much, but airflow helps them bake evenly.
- Chill again before baking. Place the cut cookies in the refrigerator for 10 to 15 minutes. This short second chill helps preserve the pumpkin outline.
- Bake until set. Bake at 350°F until the edges are just lightly golden and the centers look set. Small cookies bake faster than large ones, so check early.
- Cool completely. Let cookies rest on the baking sheet for a few minutes, then transfer them to a cooling rack. Decorate only when fully cool, or icing may melt and slide.
- Decorate and dry. Use piping bags for outlines and details. Let each icing layer set before adding the next color. This keeps jack-o’-lantern faces, vines, and stems sharp.
Classic decorating ideas with a fresh twist
Decorating is where a simple autumn cookie cutter becomes a full seasonal project. You can keep designs easy for kids or add detailed piping for a bakery-style finish. Start with one base color, then build texture with lines, dots, sanding sugar, or layered icing.
Cozy harvest pumpkins
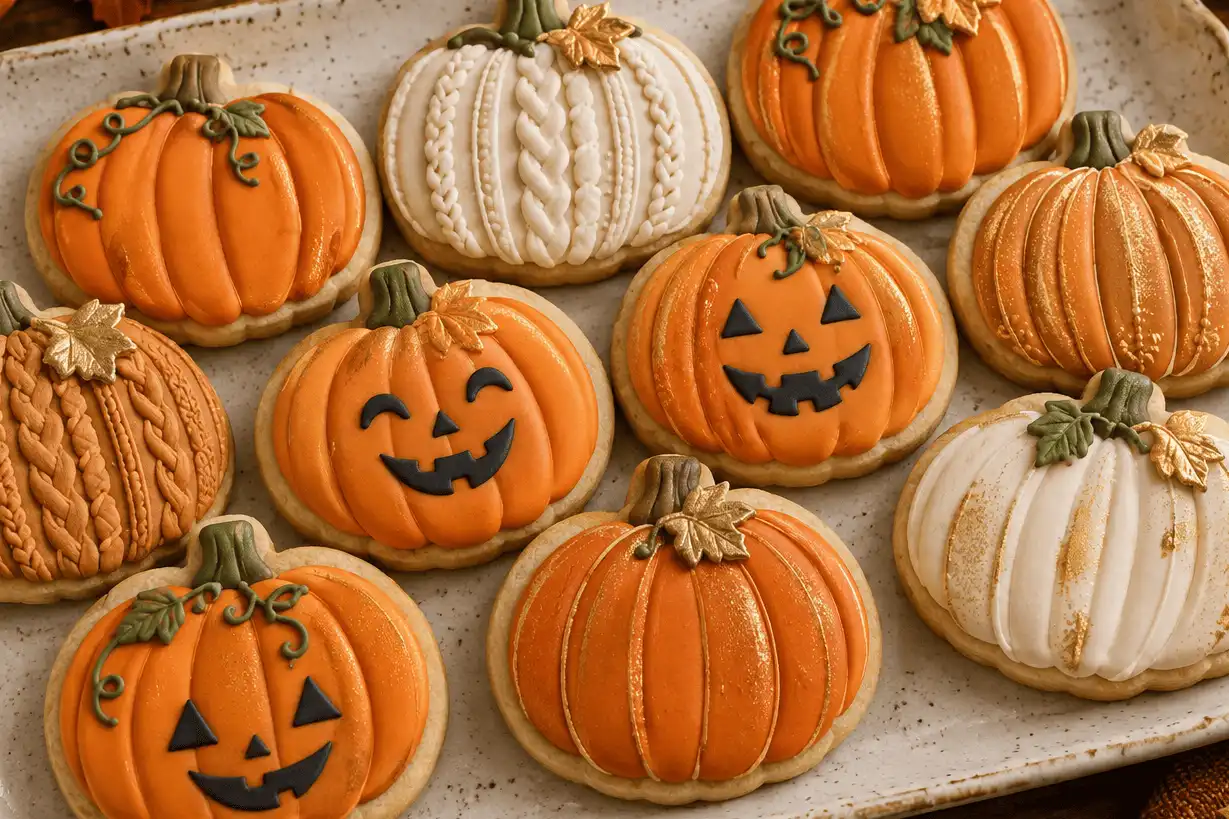
For a warm fall look, cover each cookie with orange icing and pipe curved darker-orange lines from top to bottom. Add a brown stem and a small green leaf. A sprinkle of cinnamon sugar along one edge gives the cookie a rustic, pie-like finish.
Try a muted palette if you want a softer dessert tray. Use burnt orange, cream, sage green, and cocoa brown instead of neon colors. These shades work beautifully for Thanksgiving gatherings, fall birthdays, and coffee bar treats.
Jack-o’-lantern cookies
A pumpkin cutter can instantly become a halloween cookie cutter with a few black icing details. Flood the cookie with orange icing first. Once dry, pipe triangle eyes, a nose, and a crooked grin.
For a cleaner result, outline the face first with a piping bag and small round tip. Fill in slowly. If decorating with children, use candy eyes, chocolate chips, or mini candies instead of detailed piping.
Painted watercolor pumpkins
Watercolor-style cookies look elegant but are surprisingly simple. Cover the cookies in white royal icing and let them dry fully. Then mix gel food coloring with a tiny amount of clear extract and lightly brush on orange, gold, or green tones.
Use a food-safe brush and keep the color light. The goal is soft variation, not full coverage. This technique is lovely for bridal showers, autumn weddings, or grown-up Halloween parties.
Textured sweater pumpkins
For a cozy design, use thick icing to pipe lines, dots, and cable-knit patterns. A small star tip or round tip works well. Keep the base color neutral, such as ivory or pale orange, so the texture stands out.
These cookies pair well with hot cider, chai, or coffee. They also look beautiful packaged in clear treat bags with twine.
Creative desserts beyond cookies
Once you have a pumpkin cookie cutter, you can use it across an entire dessert menu. The trick is to choose foods that are firm enough to cut cleanly but soft enough that the cutter can press through without cracking.
Pie crust decorations
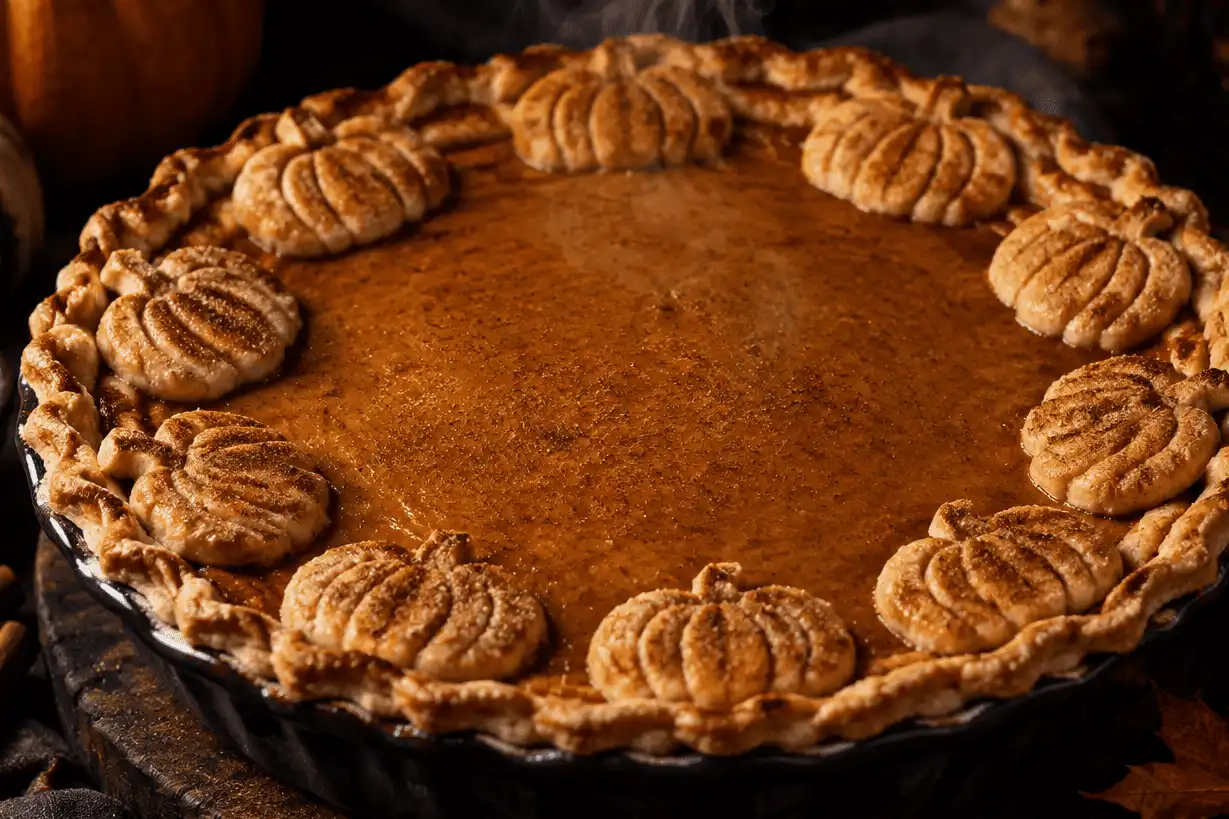
Roll out leftover pie dough and cut mini pumpkins to place on top of apple, pecan, or pumpkin pie. Brush the shapes with egg wash and sprinkle with cinnamon sugar before baking. This gives a simple pie a decorated finish without complicated lattice work.
Small cutters work best here. If the pumpkins are large, they may block steam from escaping. Leave a few gaps so the filling can bubble safely.
Fondant and cake toppers
Use decorative cookie molds or cutters to shape fondant pumpkins for cakes and cupcakes. Roll fondant thin, cut the shapes, then add ridges with a toothpick or the back of a small knife. Let the pieces firm up before placing them on buttercream.
A set of round cake pans can turn this into a full autumn layer cake. Frost the cake in cream cheese buttercream or vanilla buttercream, then add pumpkin toppers around the sides or across the top.
Brownies and blondies
Bake brownies in a standard pan, chill them until firm, and cut pumpkin shapes from the slab. This creates dense, fudgy treats with clean edges. Dust with powdered sugar or drizzle with orange candy melts.
Save the scraps for ice cream sundaes or trifle cups. Nothing has to go to waste.
Rice cereal treats
Press rice cereal treat mixture into a lined pan and let it set. Cut pumpkin shapes while the slab is firm but not rock hard. Dip the tops in orange candy coating and add pretzel pieces for stems.
This is one of the easiest party options because it does not require precise baking. It is also a good project for kids.
Savory and snack ideas for fall gatherings
Pumpkin cutters are useful outside the dessert tray, too. Use them for lunch boxes, party boards, brunch spreads, and appetizers. The shape adds charm without changing the recipe.
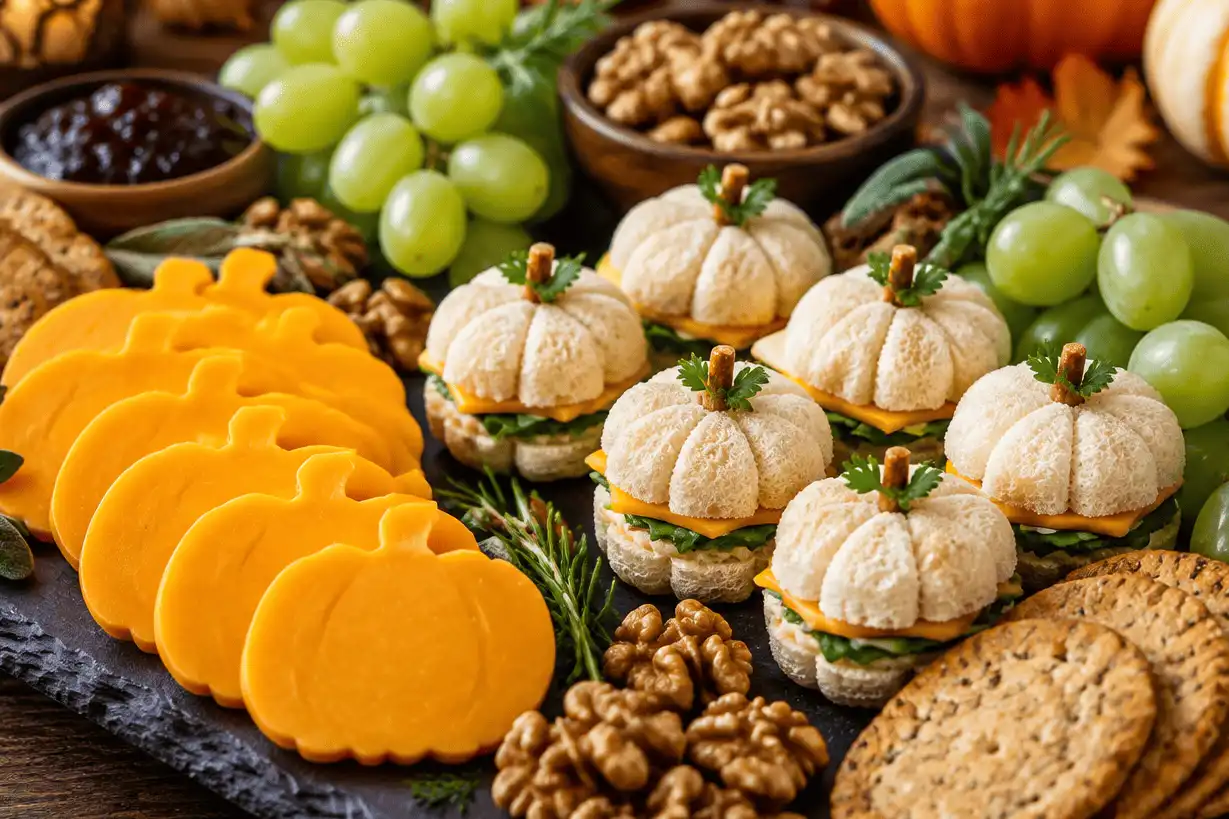
Try these simple ideas:
- Pumpkin sandwiches: Cut soft sandwich bread, cheese, and deli slices into matching shapes.
- Cheese board accents: Cut cheddar, Colby Jack, or firm mozzarella into pumpkins for a fall snack board.
- Tortilla chips: Cut flour tortillas, brush with oil, season lightly, and bake until crisp.
- Mini quesadillas: Cut tortillas first, add cheese, then warm until melted.
- Fruit shapes: Use the cutter on melon, pineapple, or thin apple slices.
- Pancakes: Cut cooled pancakes into pumpkins for a seasonal breakfast.
- Toast toppers: Cut pumpkin shapes from sliced cheese and melt them onto toast.
For savory use, choose a cutter with a simple outline. Detailed stems or thin curves can tear soft bread or cheese.
Craft and party uses that are not edible
If you have an extra cutter that is not used for food, it can become a crafting tool. Pumpkin shapes are easy to repeat, which helps party decorations look coordinated. Keep craft cutters separate from kitchen cutters and label them if needed.
Easy autumn crafts
Use a pumpkin cutter as a template for:
- Gift tags made from kraft paper
- Felt garlands
- Clay ornaments
- Napkin rings
- Place cards
- Window clings
- Painted canvas patterns
- Pumpkin-shaped soap embeds
For kids’ crafts, trace the cutter onto paper and let children decorate each pumpkin differently. Some can become jack-o’-lanterns. Others can be patterned with stripes, dots, leaves, or glitter.
Party styling ideas
A pumpkin cutter can help unify a party theme. Use the same shape for cookies, cheese slices, name tags, and favor labels. This creates a pulled-together look without buying many separate decorations.
You can also use the cutter to stencil powdered sugar onto cakes or cocoa onto whipped cream. Hold the cutter gently over the surface, dust inside the shape, then lift straight up.
How can you get clean edges and better results?
Clean edges come from cold dough, even rolling, and a cutter that is pressed straight down. If the dough sticks, dip the cutter lightly in flour and tap off the excess before each cut. If the shape stretches when you move it, the dough is too warm and should be chilled again.
Use this quick troubleshooting checklist:
- Cookies spread: Chill cut shapes before baking and check that the dough is not too soft.
- Edges look rough: Wipe the cutter between cuts and avoid dragging it through the dough.
- Stems break: Roll the dough slightly thicker or choose a cutter with a wider stem.
- Icing bleeds: Let the base layer dry before adding darker details.
- Colors look dull: Use gel coloring instead of liquid food coloring.
- Cookies bake unevenly: Roll dough to a consistent thickness and use light-colored baking sheets.
- Dough sticks to the counter: Roll between parchment sheets or dust lightly with flour.
A little patience makes a big difference. Chilling, cooling, and drying times may feel slow, but they help your finished cookies look neat and taste better.
Storage, gifting, and make-ahead tips
Pumpkin cutout cookies are easy to prepare in stages. You can mix the dough one day, cut and bake the next, then decorate after the cookies cool. This makes the project less rushed and more enjoyable.
Undecorated cookies can usually be stored in an airtight container at room temperature for a few days. Decorated cookies should be stacked only after the icing is completely dry. Place parchment between layers to protect the designs.
For gifting, package cookies in clear treat bags, bakery boxes, or small tins. Add a label with the flavor and date made. If you are giving a variety box, include different designs from the same autumn cookie cutter theme, such as classic pumpkins, jack-o’-lanterns, and white pumpkins.
Freezing is also useful. Freeze baked, undecorated cookies in a sealed container with parchment between layers. Thaw them fully before decorating so condensation does not affect the icing.
Building a seasonal baking collection
A pumpkin cutter is a great starting point, but it becomes even more useful when paired with other fall shapes. A cookie cutter set might include leaves, acorns, ghosts, bats, apples, turkeys, or basic circles. Together, they give you more design options for different occasions.
For example, pair pumpkin cookies with leaf cookies for a harvest dessert board. Add ghosts and bats for a Halloween platter. Use apples and pumpkins for a school event or fall bake sale.
Decorative cookie molds can add even more detail. Pressed lines, embossed patterns, and raised designs make plain dough look special before icing is added. They are helpful when you want pretty cookies but do not have time for detailed decorating.
Final ideas for using your cutter often
The best pumpkin cookie cutter is the one you reach for again and again. Use it in small ways throughout the season, not just for one big baking day. Cut pie dough scraps, shape sandwiches, decorate cakes, or make quick cheese board accents.
Keep the process simple when you need speed. Use refrigerated pie dough, prepared fondant, or a basic glaze. When you have more time, make the full cutout cookie recipe, pipe detailed designs, and create a complete autumn dessert spread.
With one pumpkin shape, a few dependable tools, and a little imagination, you can make fall treats that feel festive, personal, and fun. Whether you are baking for Halloween, Thanksgiving, a school party, or a cozy weekend at home, the humble pumpkin cutter can do much more than cut cookies.