
Quick Guide to Pillsbury Christmas Cookies
Pillsbury Christmas cookies offer a dependable shortcut to festive holiday desserts, ranging from pre-cut printed rounds to versatile refrigerated sugar cookie chubs. Achieving bakery-quality results requires proper temperature management, correct pan selection, and precise bake times.
Keep your cookie dough ice cold right up until the tray enters a fully preheated 350°F (177°C) oven. Line light-colored aluminum baking sheets with parchment paper, and remove the cookies the moment the edges set to a matte finish rather than waiting for dark browning.
- Optimal Temperature: 350°F (177°C) for standard ovens; 325°F (163°C) for dark nonstick pans.
- Chilling Secret: Freeze pre-cut shapes for 10 minutes on the pan before baking to stop design distortion.
- Texture Control: Pull cookies out at 10 to 12 minutes for a soft, chewy center.

The holiday baking season brings endless demands on your time, from shopping trips to school celebrations. Pillsbury Christmas cookies bridge the gap between homemade holiday spirit and the speed required by busy schedules.
This comprehensive manual covers everything you need to master refrigerated holiday dough. Whether you want crisp edges, detailed design retention on printed shapes, or elevated semi-homemade desserts for a cookie exchange, the techniques below deliver reliable results every time.
The Complete Pillsbury Holiday Dough Lineup
Pillsbury releases a distinct collection of seasonal refrigerated products each winter. Understanding the moisture content and structural behavior of each variety ensures you pick the right base for your intended recipe.
Pre-Cut Holiday Printed Shape Cookies
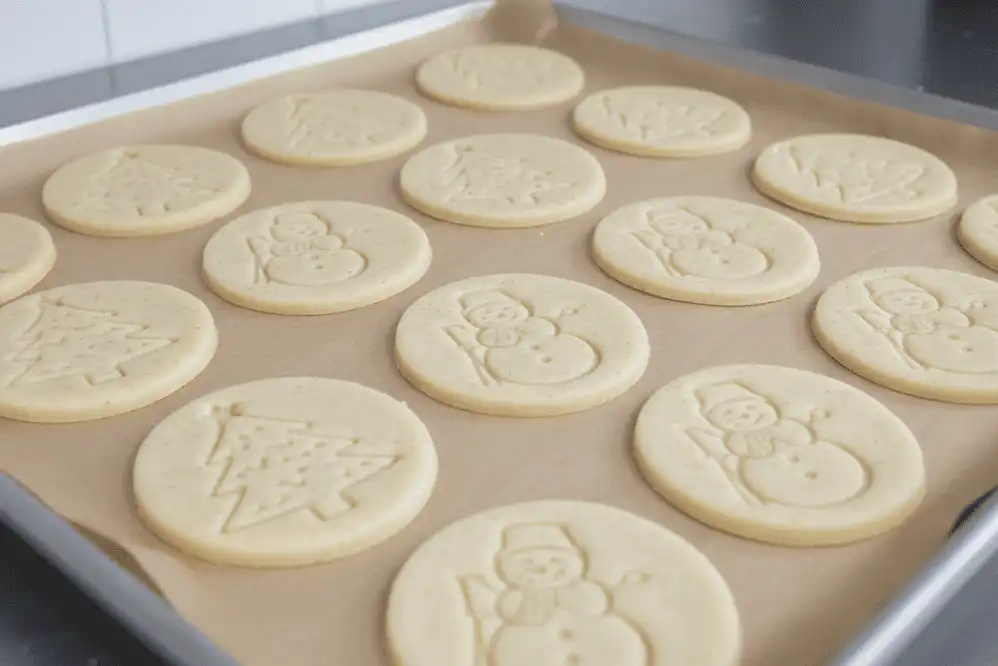
These round sugar cookies feature stamped seasonal emblems like Christmas trees, reindeer, snowmen, and licensed characters like Buddy the Elf or the Grinch. They are engineered to hold their printed food-grade coloring under high oven heat without bleeding.
Because they contain slightly higher vegetable fat ratios to support pre-cut sheet stability, they melt quickly when left at room temperature. Always handle them straight from the refrigerator to avoid flattening.
Refrigerated Sugar Cookie Chubs and Rolls
The classic 16.5-ounce and 30-ounce plastic-wrapped rolls provide a dense, pliable dough base. This format allows you to choose between slicing round coins or kneading and rolling the dough flat for cookie cutters.
The chub dough has a slightly lower moisture profile than the pre-cut shapes. That characteristic makes it the best candidate for add-ins like chopped nuts, chocolate chips, and crushed candy canes.
Seasonal Gingerbread and Chocolate Mint Rolls
Pillsbury frequently offers limited-edition rolls featuring warm spices such as ginger, cinnamon, and molasses, alongside chocolate mint varieties. These doughs bake with a deeper exterior crust than the vanilla sugar cookie line.
Their spice profiles work well as pie crusts, tartlet shells, and crunchy cookie bases for rich dessert bars.
The “Safe to Eat Raw” Seal Explained
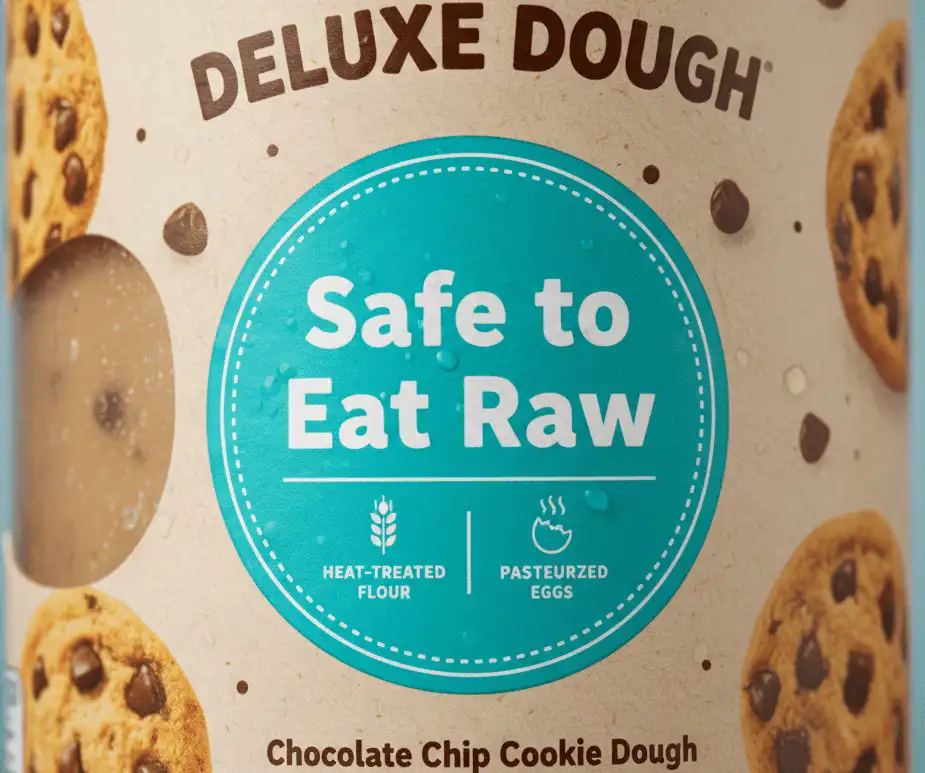
In recent years, General Mills redesigned the formulations of its refrigerated Pillsbury cookie doughs to carry a prominent “Safe to Eat Raw” seal. This update removes the traditional health risks associated with sampling unbaked batter straight from the package.
The safety change relies on two critical manufacturing steps. The wheat flour undergoes commercial heat treatment to destroy harmful bacteria like E. coli, while all egg ingredients are thoroughly pasteurized to eliminate Salmonella risk.
You can safely incorporate this raw dough into holiday ice cream churns, fold chunks into chilled holiday fudge, or serve it on a holiday dessert dip platter. Keep in mind that safe-to-eat dough still requires refrigeration below 40°F (4°C) to maintain texture and shelf life.
Prep Essentials: Pans, Heat, and Oven Calibration
Most baking issues with pre-made cookie dough stem from improper heat distribution rather than product flaws. Simple adjustments to your prep routine prevent scorched bottoms and greasy puddles.
Choosing the Right Baking Sheet
Heavy-gauge, light-colored aluminum half-sheet pans are the gold standard for refrigerated dough. Dark or nonstick cookie pans absorb radiant heat too quickly, causing cookie bottoms to burn before centers finish baking.
If you only own dark nonstick baking pans, drop your oven temperature by 25°F (15°C) and reduce the bake time by two minutes. Avoid insulated baking sheets, as they prevent the bottom crust from setting properly, leading to soggy cookies.
Parchment Paper vs. Silicone Mats
Unbleached parchment paper provides the ideal micro-texture for Pillsbury cookies. It absorbs trace surface oils and gives dough discs traction so they do not spread excessively across the pan.
Silicone baking mats create an ultra-slick barrier that promotes wider, thinner cookies. Never use nonstick aerosol cooking spray directly on the metal, as the oil pools around the base and fries the cookie perimeter.
Oven Thermometer Verification
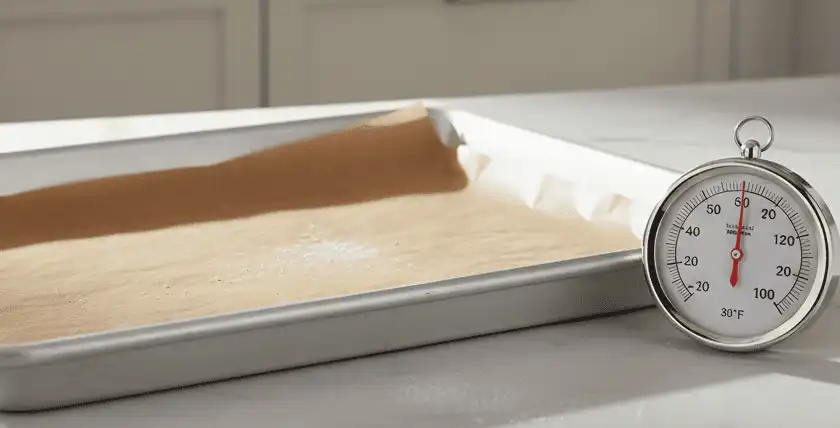
Home oven thermostats often swing 15°F to 35°F away from the displayed temperature. A hanging analog oven thermometer placed on your center rack ensures your baking chamber sits at an actual 350°F (177°C).
Always bake one cookie sheet at a time on the middle rack. Placing multiple trays on upper and lower racks traps heat pockets and yields uneven browning across your batch.
Step-by-Step Guide: Baking Flawless Shape Cookies
Printed holiday shape cookies are popular for seasonal parties, but home bakers often end up with blurry, distorted designs. Follow this systematic process to keep your trees, snowmen, and reindeer sharp and defined.
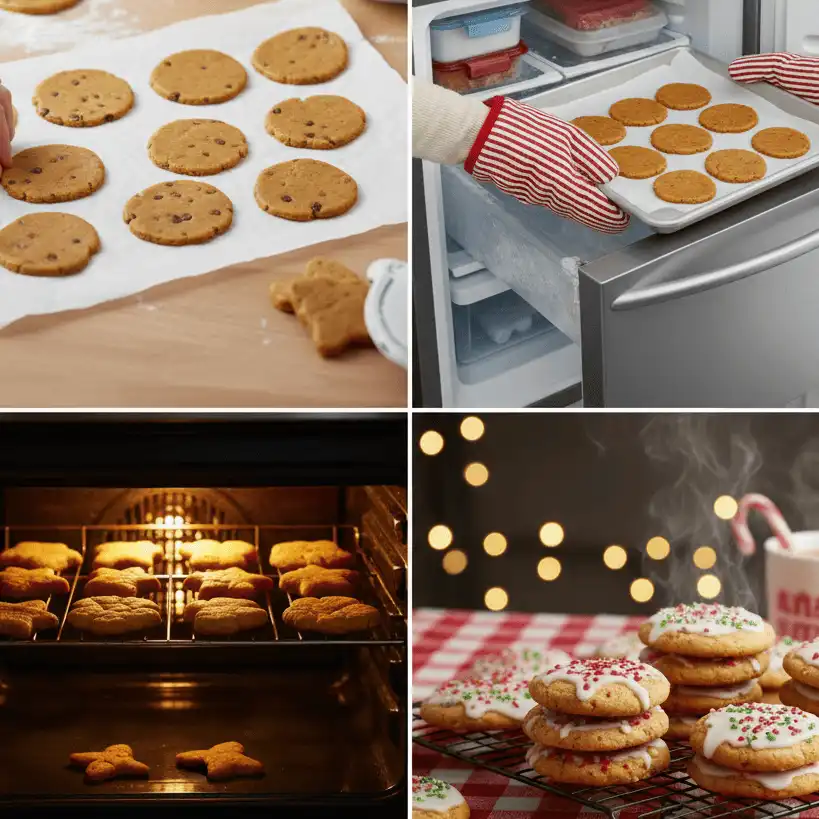
Chill the Baking Sheet: Place your empty, parchment-lined metal pan in the refrigerator for 10 minutes prior to loading. A cool pan prevents the butterfat in the dough from melting on contact.
Preheat Fully: Turn your oven to 350°F (177°C) and let it preheat for at least 15 minutes. Ensure the temperature stabilizes completely before sliding your cookies inside.
Space Evenly: Place the cold pre-cut discs at least 2 inches apart on the chilled sheet. Airflow between cookies allows moisture to vent quickly, helping the stamped image dry and set in place.
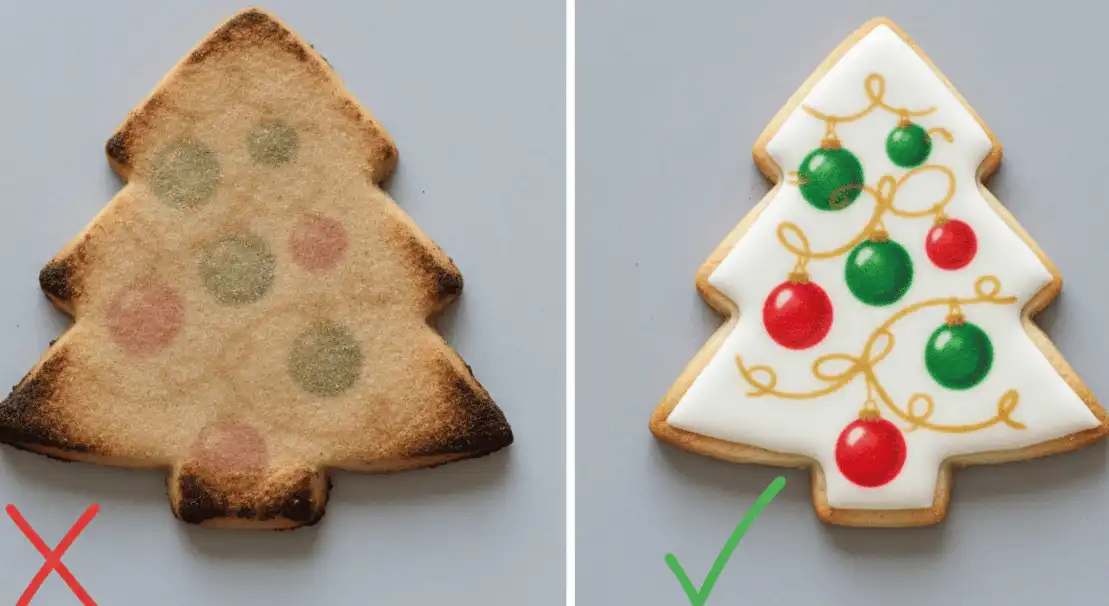
The Flash-Freeze Step: Slide the fully loaded cookie sheet into your freezer for 8 to 10 minutes just before baking. This hardens the fats, holding the graphic crisp during the initial heat blast.
Bake to a Matte Finish: Bake on the middle rack for 10 to 12 minutes. Check the cookies around minute 9; remove them as soon as the shiny, wet look leaves the top and the edges turn matte pale gold.
Countertop Carryover Cooling: Leave the cookies undisturbed on the hot baking sheet for 3 minutes after removing them from the oven. Transfer the parchment sheet directly onto a wire cooling rack to stop the cooking process.
Pro Tip: Never rely solely on color when baking printed shapes. If the edges show medium-brown color, the bottom is likely overdone and the printed design on top will appear cracked and dry.
Transforming the Classic Sugar Cookie Roll
The standard 16.5-ounce chub offers substantial culinary flexibility when treated as an ingredient base rather than a simple slice-and-bake log. A few basic adjustments allow you to stamp out bakery-style shapes with standard cutters.
Rolling and Cutting Like Scratch Dough
Refrigerated roll dough contains high moisture, making it sticky on warm surfaces. Dust your work area with a balanced blend of equal parts all-purpose flour and powdered sugar instead of plain flour.
Plain flour dries out the dough and leaves a bitter, chalky crust. Powdered sugar dissolves cleanly into the exterior while providing the friction needed to release metal or plastic cookie cutters cleanly.
Roll the dough between two sheets of wax paper to an even 1/4-inch thickness. Thinner cutouts will break when lifted, while thicker cuts spread out and lose edge definition in the oven.
Crystalline Edge Slices
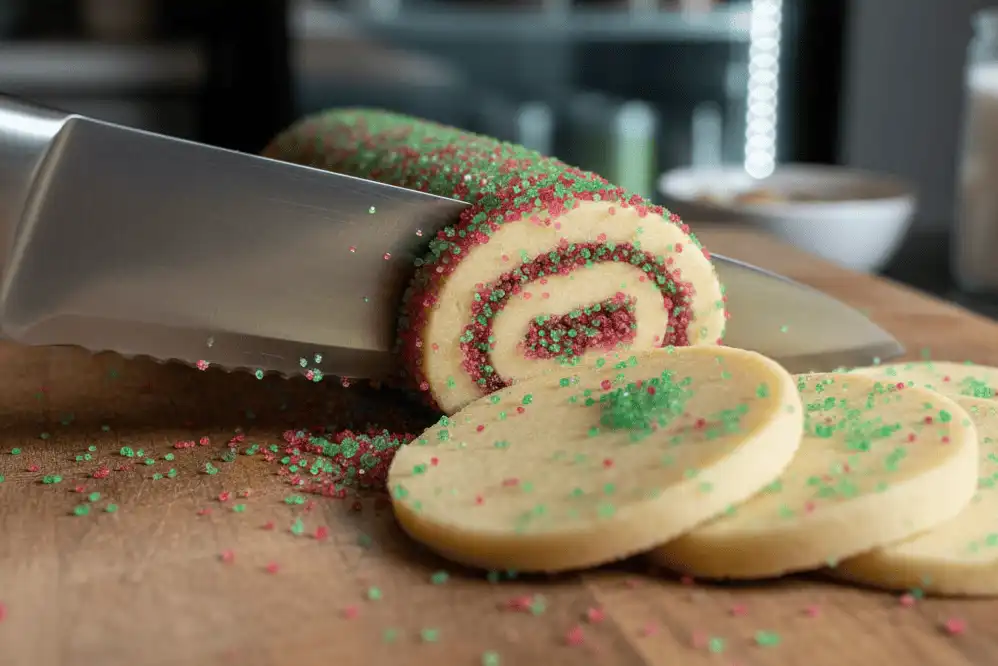
To produce upscale slice-and-bake cookies, unwrap the cold chub and brush the entire outer cylinder with a thin layer of egg wash or milk. Roll the wet cylinder through coarse sparkling sugar, red and green sanding sugars, or chopped toasted pecans.
Use an unflavored dental floss or a thin, razor-sharp chef’s knife to slice 1/3-inch coins. Pressing down with a dull blade squashes the round roll into an oblong oval; a quick slicing saw motion keeps the circle intact.
Five Creative Holiday Recipe Upgrades
Elevate your holiday dessert table with these five semi-homemade recipes that use Pillsbury dough as a convenient base.
1. Candy Cane Peppermint Patty Stuffed Cookies
Slice a sugar cookie chub into 24 thin rounds. Place a miniature chocolate peppermint patty between two dough slices and pinch the perimeter firmly to seal the edges completely.
Bake at 350°F (177°C) for 12 to 14 minutes until the outer crust is set. Top with crushed peppermint candies immediately after baking so they stick to the warm surface.
2. Spiced Eggnog Cookie Tarts
Press 1-inch balls of raw sugar cookie dough into the wells of an ungreased mini muffin tin. Press the centers down with a floured tart tamper or your thumb to form miniature cups.
Bake for 10 to 11 minutes until the edges are golden. Re-press the centers while warm, let cool, and fill each cup with prepared eggnog pastry cream and a grating of fresh nutmeg.
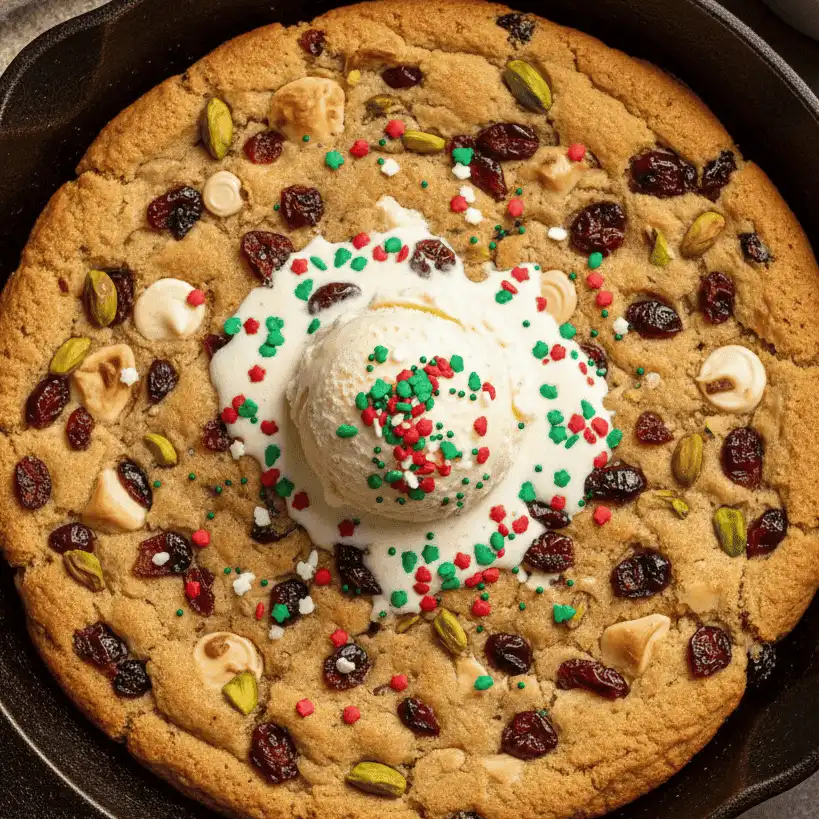
3. White Chocolate Cranberry Skillet Cookie
Press an entire chub of sugar cookie dough into a seasoned 10-inch cast iron skillet. Fold in 1/2 cup of dried tart cranberries, 1/2 cup of white chocolate chips, and 1/4 cup of chopped pistachios.
Bake at 325°F (163°C) for 24 to 28 minutes until the edges pull away slightly from the cast iron walls. Serve warm with vanilla bean ice cream for a family-style dessert.
4. Cinnamon Sugar Rugelach Twists
Roll out one package of Pillsbury refrigerated crescent dough sheet or sugar cookie dough into an even rectangle. Spread with 2 tablespoons of softened salted butter, 1/3 cup of packed dark brown sugar, and 1 tablespoon of ground cinnamon.
Fold the dough into thirds like a business letter, slice into 1/2-inch strips, and twist each strip three times. Bake at 350°F (177°C) for 11 minutes until golden and flaky.
5. Salted Caramel Pecan Thumbprints
Form sugar cookie dough into 1-inch round spheres and roll them in finely chopped raw pecans. Place them on a parchment-lined sheet and press a deep indentation in the center of each sphere with the back of a round teaspoon measure.
Bake for 10 to 12 minutes. Once pulled from the oven, fill each center cavity with a spoonful of warm jarred caramel and finish with a pinch of flaky Maldon sea salt.
Decorating Masterclass: Icings, Glazes, and Sprinkles
Pillsbury holiday cookies serve as an ideal surface for custom frostings and toppings. Choosing the right icing style depends on whether you plan to stack the cookies in gift tins or eat them immediately.
Quick Hardening Powdered Sugar Glaze
When you need to box or ship decorated cookies, royal icing or a setting glaze is required. Whisk together 2 cups of sifted confectioners’ sugar, 2 tablespoons of whole milk, and 1 tablespoon of light corn syrup.
The corn syrup gives the icing a high-gloss finish and prevents the sugar from cracking when dry. Tint with gel food coloring rather than water-based liquid drops, which can thin out the glaze and make it run off the cookie edges.
Fluffy Holiday American Buttercream
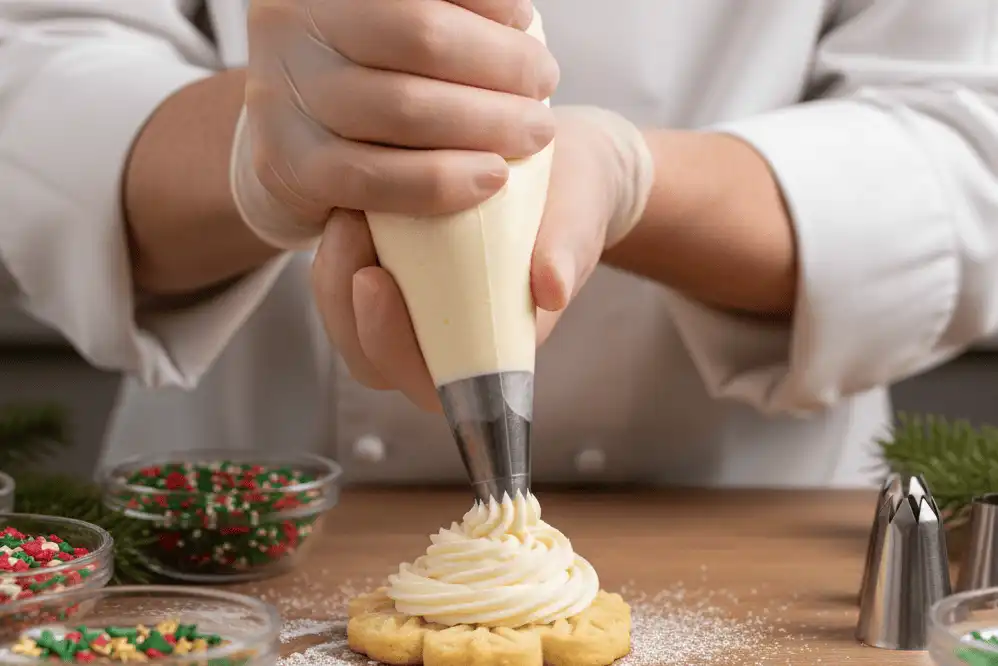
If you prefer rich, melt-in-your-mouth flavor over stackability, prepare a quick buttercream. Beat 1/2 cup of unsalted room-temperature butter with 2 cups of powdered sugar, 2 tablespoons of heavy cream, and 1/2 teaspoon of pure vanilla extract for 4 minutes until light and pale.
Pipe stars, borders, and tree branches using small star tips (such as a Wilton 1M or #21). Sprinkle edible toppings on immediately, as buttercream develops a firm outer skin within 15 minutes of piping.
Sprinkle Adhesion Techniques
Heavy holiday sprinkles and dragées will fall off baked cookies if applied late. For pre-cut printed shapes, press nonpareils or sanding sugars gently into the raw dough disc before freezing and baking.
If you want to apply sprinkles after baking without coating the cookie in heavy frosting, brush the cooled cookie with a light layer of warmed honey or simple syrup. The sticky glaze anchors the sprinkles without altering the cookie’s base flavor.
When your main oven is occupied by holiday roasts and side dishes, small counter appliances can easily handle small batches of cookies.
Alternative Baking: Air Fryer and Toaster Oven Rules
Air Fryer Method
Air fryers use concentrated convection heating, blowing hot air directly over the dough. This rapid airflow can dry out cookie edges quickly if the temperature is not lowered.
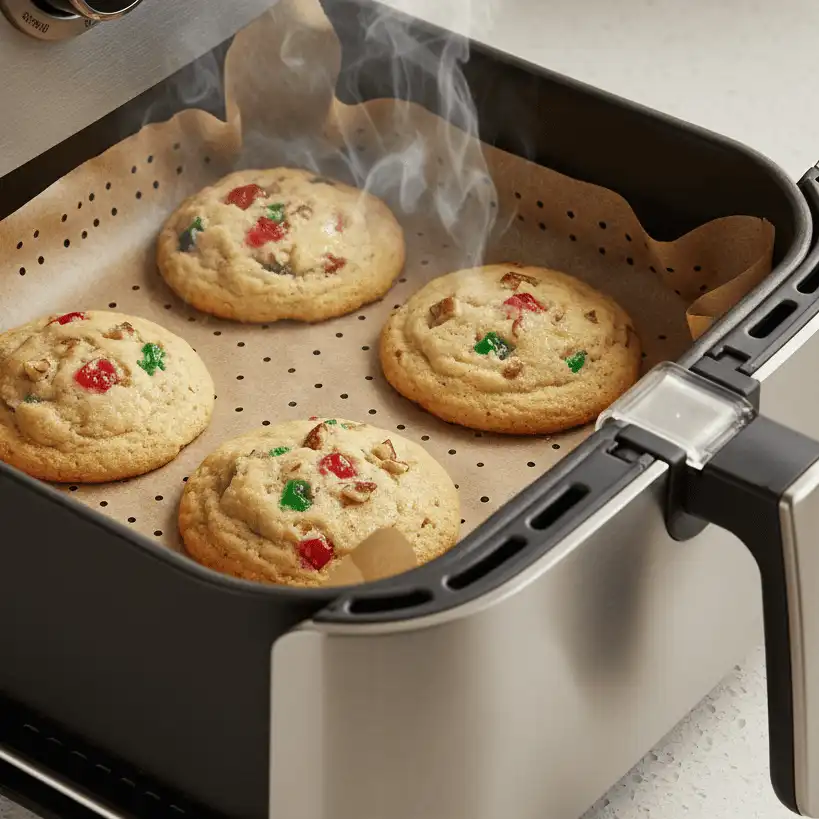
Set your air fryer to 300°F (150°C), which is 50°F lower than the standard oven recommendation. Line the perforated basket with a round piece of parchment paper designed with vent holes, or trim a sheet to fit flat inside the base.
Bake 4 to 5 cookies at a time for 6 to 8 minutes. Check them at the 5-minute mark; they finish rapidly once the fat liquefies.
Toaster Oven Method
Toaster oven heating elements sit much closer to the food than those in a full-sized range. This proximity can scorch the tops of your cookies before the center dough cooks through.
Drop the temperature to 325°F (163°C) and tent a small sheet of aluminum foil loosely over the tray for the first 6 minutes of baking. Remove the foil for the final 4 minutes to allow the top surface to dry to a clean matte finish.
Comparison Table: Pillsbury Holiday Dough Formats
Use this reference table to match the right Pillsbury product format to your schedule, skill level, and intended dessert presentation.
| Dough Format | Best Use Case | Active Prep Time | Texture Profile | Skill Level | Customization Potential |
|---|---|---|---|---|---|
| Printed Shapes | School events, quick platters, kids’ baking | 2 Minutes | Tender, soft center | Beginner | Low (Best baked as-is) |
| Sugar Cookie Chub | Custom cutouts, cookie cups, layered bars | 15 Minutes | Dense, chewy, sturdy | Intermediate | Very High (Rolls, folds, shapes) |
| Tub / Scoop Dough | High-volume drop cookies, casual trays | 5 Minutes | Crisp edge, chewy middle | Beginner | Moderate (Mix-ins, drop style) |
| Gingerbread Roll | Gingerbread men, spiced tart shells | 15 Minutes | Snap edge, soft center | Intermediate | High (Royal icing piping) |
| Crescent Sheet Hack | Rugelach, pinwheels, fruit danish bites | 10 Minutes | Flaky, buttery, layered | Intermediate | High (Sweet pastry applications) |
Pro Tips for Advanced Texture and Flavor
Store-bought dough provides reliable structure, but a few subtle culinary techniques can elevate its taste to rival homemade cookies.
The Flavor Spike Technique
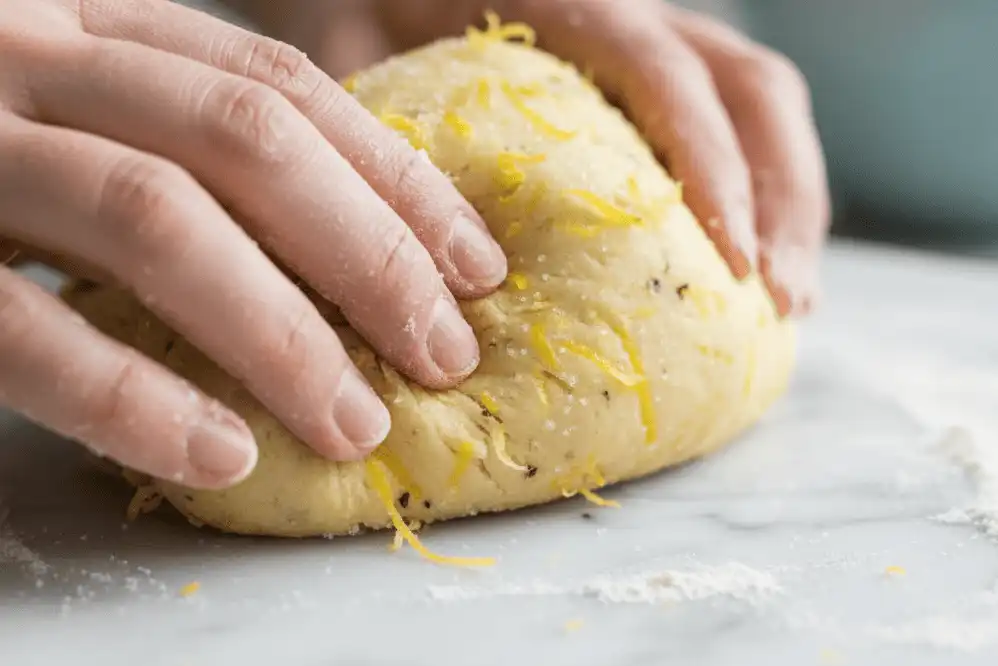
Refrigerated vanilla sugar dough relies primarily on artificial vanillin. You can give the flavor profile more depth by kneading simple aromatics into the chub before rolling.
Work 1/2 teaspoon of pure almond extract, 1 teaspoon of fresh lemon zest, or the scraped seeds of one vanilla bean pod into a 16.5-ounce roll. The added citrus oils or nut extracts cut through the sugar, producing a balanced, scratch-baked flavor profile.
Controlling Spread with Cornstarch
If you want your cutout sugar cookies to keep razor-sharp lines without spreading, knead 1 tablespoon of cornstarch into the room-temperature dough roll before rolling it out. Return the dough to the refrigerator for 20 minutes before cutting.
Cornstarch absorbs excess liquid and binds the fats during the initial baking phase. This prevents the edges from slumping in the oven without making the cookie dry or crumbly.
High-Altitude Baking Adjustments
If you are baking at 3,500 feet or higher, atmospheric pressure changes cause pre-packaged dough to rise too quickly and collapse outward into thin puddles. You can fix this by adding extra flour to build structure.
Knead 2 tablespoons of all-purpose flour into each 16.5-ounce roll of dough. Increase the baking temperature by 15°F to set the batter quickly, and check for doneness 2 minutes earlier than package directions suggest.
Common Mistakes and How to Avoid Them
Small missteps in handling store-bought dough can quickly compromise the appearance and texture of your finished cookies. Watch out for these six common pitfalls.
1. Baking on a Warm Cookie Sheet
Placing cold cookie dough onto a baking sheet that is still warm from a previous batch instantly liquefies the fats at the bottom of the dough. This causes the cookies to pool outward into thin, greasy disks before the oven heat can set their structure.
Always let your pans cool completely down to room temperature between batches. You can run the back of the metal pan under cool tap water and dry it thoroughly to speed up turnaround time.
2. Over-Greasing with Cooking Spray
Spraying nonstick cooking oil directly onto the baking pan creates a slick surface that forces dough to slide and spread unnaturally. The excess oil also burns against the metal, giving your cookies browned, greasy bottoms.
Skip cooking sprays entirely when working with pre-packaged dough. High-quality unbleached parchment paper or clean, ungreased light aluminum sheets deliver consistent bottom crusts every time.
3. Relying Solely on the Kitchen Timer
Package bake times are broad estimates based on testing in commercial convection setups. Kitchen variables like oven rack positioning, pan material, and home power fluctuations mean your cookies might finish several minutes earlier or later than listed.
Start checking your cookies visually 3 minutes before the minimum time printed on the box. Take them out as soon as the glossy sheen on the top center turns matte and dry.
4. Decorating Warm Cookies
Applying buttercream, glazes, or royal icing to warm cookies causes the fats and sugars in the frosting to melt. The icing will liquefy, slide off the surface, and soak into the crumb, leaving the cookies soggy.
Let cookies cool on the flat baking pan for 3 minutes, then move them to a wire rack to rest for at least 30 to 45 minutes before decorating. The underside should feel completely neutral to the touch before you begin piping.
5. Using Raw Flour Excessively During Roll-Out
Dusting your work surface with too much plain raw flour works extra starch into the prepared dough with every roll. This throws off the fat-to-flour ratio, yielding dry, tough cookies with a chalky finish.
Use a 50/50 blend of powdered sugar and all-purpose flour on your counter and rolling pin. Better yet, roll the cold dough directly between two sheets of parchment paper to skip added dry ingredients entirely.
6. Crowding the Baking Sheet
Placing too many cookies onto a single sheet pan traps the escaping moisture between the dough discs. Instead of baking with crisp edges, the cookies steam each other, resulting in pale, soft, misshapen treats.
Keep printed holiday shapes at least 2 inches apart, and give rolled drop cookies a full 2.5 inches of clearance. Stick to 12 cookies per standard half-sheet pan to ensure proper heat circulation.
Storage, Freezing, and Cookie Swap Packaging
Proper storage is essential to keep your holiday cookies fresh, whether you are filling gift tins or baking weeks ahead of the season.
Countertop Storage and the Bread Trick
Keep baked sugar cookies in a clean, airtight glass or BPA-free plastic container at room temperature. Layer the cookies between sheets of parchment paper or wax paper to protect piped frosting and delicate edges.
To keep cookies soft and chewy for up to a week, add half a slice of plain white sandwich bread to the container. The cookie starches draw moisture from the bread, keeping the cookies tender while the bread slowly dries out.
Freezing Dough vs. Baked Cookies
Both raw dough and baked cookies freeze exceptionally well, giving you useful options for holiday planning.
- Freezing Raw Cutouts: Place cut raw shapes on a parchment-lined sheet and freeze solid for 1 hour. Transfer the frozen pucks into a heavy-duty zip-top freezer bag for up to 3 months; bake straight from the freezer by adding 2 minutes to the bake time.
- Freezing Baked Cookies: Let decorated cookies dry completely for 12 hours until icing is firm. Pack them flat in airtight plastic storage bins lined with wax paper and freeze for up to 2 months; thaw on the kitchen counter at room temperature for 1 hour without opening the container lid to prevent condensation on the icing.
Packaging for Holiday Cookie Swaps
When packing cookies for holiday gifts or school swaps, choose rigid metal tins or firm cardboard bakery boxes over flexible cellophane bags. Soft bags let cookies knock together and break in transit.
Place heavier items, like stuffed cookies and bar squares, at the bottom of the tin. Place delicate printed shapes and iced sugar cookies on the top layer, separated by fluted paper cupcake liners or decorative tissue squares.

Recommended Kitchen Tools
Having the right tools on hand makes preparing pre-packaged holiday cookie dough straightforward and mess-free.
- Light-Colored Aluminum Half-Sheet Pans: Brands like Nordic Ware offer heavy-gauge natural metal that distributes heat evenly without burning cookie bases.
- Pre-Cut Unbleached Parchment Sheets: Sized specifically for half-sheet pans to keep dough flat without curling edges.
- Oven Thermometer: A simple stainless steel hanging dial that helps verify actual internal oven temps.
- Thin Metal Offset Spatula: Allows you to slide under warm, delicate cookies without bending or cracking the edges.
- Wire Cooling Racks: Raised grid racks that promote 360-degree airflow, stopping steam build-up under hot cookies.
- Tart Tamper or Cookie Scoop: Helpful for pressing dough into muffin cups or portioning uniform dough spheres.
Related Holiday Baking Guides
Expand your seasonal dessert menu with our step-by-step guides and recipe collections:
- Easy Christmas Cookie Recipes for Beginners – Simple scratch and semi-homemade ideas for holiday bakers.
- The Ultimate Royal Icing Recipe and Decorating Guide – Step-by-step piping, flooding, and detailing instructions.
- Crescent Roll Holiday Desserts – Quick sweet treats and party pastries using refrigerated dough sheets.
- Best Holiday Cookie Exchange Recipes – Sturdy, travel-friendly cookies designed for large seasonal swaps.
- Troubleshooting Guide: Why Did My Cookies Spread Flat? – A deep look at baking science, fats, and oven mechanics.
Trustworthy Baking References
For more details on commercial food safety and the science behind baking, consult these reliable resources:
- FDA Consumer Advisory: Handling Flour Safely – Federal food safety details on raw agricultural grains and heat treatment.
- General Mills Official Product Information – Manufacturer facts on ingredient pasteurization and safe-to-eat formulations.
- USDA Food Safety and Inspection Service – Best practices for holiday egg safety, safe storage temperatures, and shelf life guidelines.
Key Takeaways for Baking Pillsbury Christmas Cookies
- Keep Dough Cold: Chill pre-cut shapes in the freezer for 10 minutes on the pan before baking to keep the designs crisp.
- Choose Aluminum Pans: Use light-colored baking sheets lined with unbleached parchment paper to avoid scorched bottoms.
- Monitor Visual Cues: Take cookies out when the glossy wet surface turns matte, rather than waiting for brown edges.
- Safe to Eat Raw: Reformulated products feature pasteurized eggs and heat-treated flour for safe raw snacking.
- Elevate with Mix-Ins: Knead citrus zest, pure extracts, or chocolate into plain dough chubs to upgrade flavor quickly.
Baking holiday cookies should be an enjoyable seasonal tradition rather than a source of kitchen stress. By understanding how to handle, chill, and bake Pillsbury Christmas cookie dough, you can produce festive, bakery-worthy desserts in minutes.
Pick up a package of printed holiday shapes or a classic sugar cookie roll, preheat your oven, and try out these decorating hacks and creative recipes this winter season.
Frequently Asked Questions
Why do my Pillsbury Christmas cookies spread and lose their picture?
Pillsbury printed holiday shape cookies lose their stamped designs when the vegetable fats in the dough melt before the flour structure sets. This usually happens when dough sits at room temperature or is placed on a warm baking pan. To prevent this, freeze the shaped cookies on your parchment-lined pan for 10 minutes right before sliding them into a fully preheated oven.
Can you eat raw Pillsbury Christmas cookie dough?
Yes, you can safely eat raw Pillsbury Christmas cookie dough if the package displays the official “Safe to Eat Raw” seal. General Mills prepares these products using heat-treated flour to eliminate potential bacterial pathogens and pasteurized egg ingredients to prevent Salmonella risk. Always check the package label to ensure your specific batch features this designation before consuming it unbaked.
What temperature do you bake Pillsbury Christmas cookies at?
Pillsbury holiday sugar cookies bake best at 350°F (177°C) in a standard home oven using a light-colored aluminum baking sheet. If you are using a dark nonstick pan, drop the temperature to 325°F (163°C) to stop the bottoms from burning. Always preheat your oven for 15 minutes and confirm the temperature with a hanging oven thermometer for consistent results.
Can you use cookie cutters with a Pillsbury sugar cookie roll?
Yes, you can easily use holiday cookie cutters with a standard refrigerated Pillsbury sugar cookie chub. Dust your rolling pin and counter with equal parts all-purpose flour and powdered sugar to prevent sticking. Roll the chilled dough out to an even 1/4-inch thickness, cut your shapes, and chill the cutout pieces in the freezer for 10 minutes before baking.
How do you know when Pillsbury Christmas cookies are done baking?
Pillsbury holiday cookies are ready when the surface transitions from a shiny, wet look to a completely dry, matte appearance, typically around 10 to 12 minutes. The perimeter edges should look set and pale gold, not dark brown. For printed shape cookies, remove them immediately once the top appears dry to preserve the clarity of the design.
Can you bake Pillsbury Christmas cookies in an air fryer?
You can bake Pillsbury holiday cookies in an air fryer by lowering the temperature to 300°F (150°C). Place a piece of vented parchment paper in the basket, arrange 4 to 5 cookies with space between them, and bake for 6 to 8 minutes. Check them early at the 5-minute mark, as the high convection airflow cooks the dough quickly.
Can you freeze Pillsbury Christmas cookie dough?
You can freeze unopened rolls and pre-cut shapes of Pillsbury cookie dough for up to 3 months. Wrap the package in an extra layer of heavy-duty aluminum foil or slide it into a sealed freezer bag to prevent freezer burn. When ready to enjoy, bake pre-cut discs directly from frozen by adding 2 to 3 minutes to the normal bake time.
How do you keep baked Pillsbury cookies soft for days?
Store baked cookies in an airtight glass or plastic container at room temperature with half a slice of plain sandwich bread. The cookies will absorb moisture from the bread crumb, keeping them soft and fresh for up to 7 days. Make sure the cookies are completely cool before storing so trapped warmth does not turn the batch soggy.